
Lawn
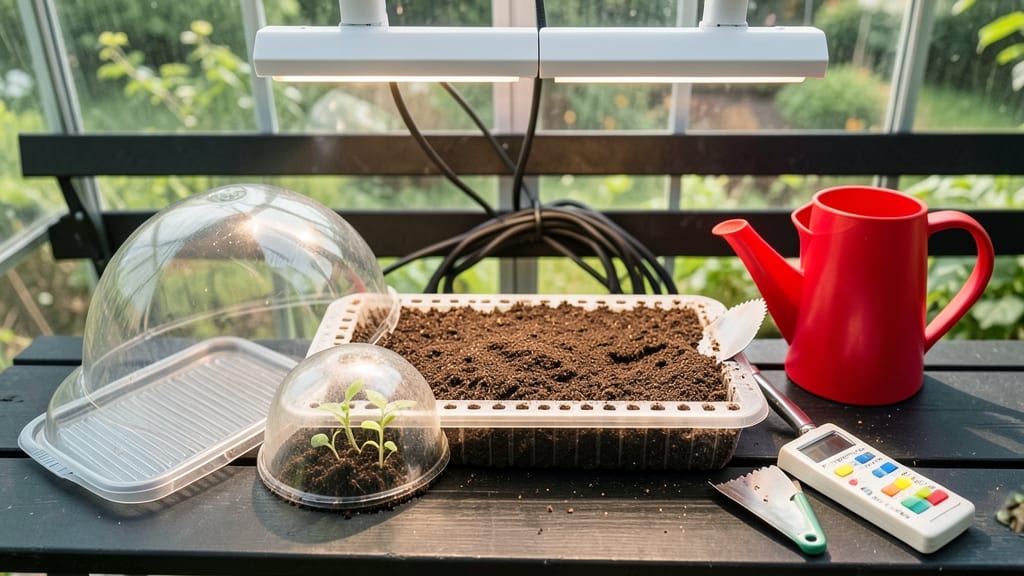
Your greenhouse seedlings will grow fast when you use moisture-retentive seed trays—no more leggy, weak starts. 🌱 I’ve tried every type, and these starter blocks keep roots happy while preventing the dreaded damping-off that wipes out batches overnight.
The secret lies in the right mix of drainage, airflow, and consistent moisture without soggy bottoms.
Start with 50-cell trays for tiny seeds like lettuce or 28-cell blocks for larger veggies like tomatoes. Fill them with a 50/50 mix of peat-based seed starter and perlite—this combo holds moisture while letting excess drain.
Label each tray by seed type (a dry-erase marker works best) to avoid mix-ups, because nothing’s worse than accidentally transplanting basil as tomatoes.
Keep temperatures steady at 70-75°F during the day and 60-65°F at night, with humidity hovering around 70% until germination. A simple plastic dome over the tray does the trick—just remove it once sprouts appear to prevent mold.
Within 7-14 days, you’ll see sturdy seedlings ready to graduate to bigger pots, and the transition to outdoor life becomes seamless.
For herbs like basil, space them 1 inch apart; for tomatoes, stretch them to 2 inches. Watch for yellowing leaves (overwatering) or stunted growth (underwatering)—adjust your spray bottle frequency until you find the sweet spot.
Once seedlings hit 2-3 true leaves, they’re ready to move into the greenhouse’s main growing area, where they’ll bulk up before their final outdoor home.
📚 In This Guide
- What you need
- Instructions
- Tips and common mistakes
- Wrapping up and next steps
What you need
- ● Seed trays: Choose moisture-retentive starter blocks (e.g., 72-cell or 200-cell trays) made from biodegradable or reusable materials like: Jiffy-7 peat pellets (200–500 pellets, depending on scale)
- ● Coco coir seed trays (10–20 trays, 72–200 cells each)
- ● Plastic trays with drainage (5–10 trays, 12x24" or 10x20")
- ● Growing medium: Seed-starting mix (1–5 bags, sterile and lightweight, e.g., Pro-Mix or Fox Farm Seedling Mix)
- ● Perlite or vermiculite (1–2 bags, for aeration)
- ● Seeds: High-quality, fresh seeds (check packet for days to germination)
- ● Watering tools: Spray bottle (for gentle misting)
- ● Watering can with fine rose (1–2, for even moisture)
- ● Greenhouse setup: Humidity dome or plastic wrap (to retain moisture)
- ● Grow lights or natural sunlight (12–16 hours/day for seedlings)
- ● Thermometer/hygrometer (to monitor 65–75°F temps and 40–60% humidity)
- ● Labeling tags or markers (to track seed varieties)
- ● Bottom trays or saucers (to catch excess water)
- ● Heating mat (for cold climates, 70–75°F soil temp)
- ● Fertilizer (balanced starter fertilizer, 5-10-5 or 3-4-6 ratio)
- ● Tray stand or rack (to elevate trays and improve airflow)
How to use moisture-retentive seed trays for fast greenhouse growth
Here's how I maximize germination speed and seedling vigor in greenhouse conditions.
🌱 Step 1: Prepare Trays with Moisture-Retentive Blocks
Start by filling your seed trays with moisture-retentive starter blocks designed specifically for greenhouse use. These blocks absorb and retain water while providing excellent aeration for delicate roots. I prefer the 72-cell blocks because they give each seedling enough room to develop without overcrowding—critical for fast growth.
Soak the blocks in lukewarm water for 10-15 minutes until they're fully saturated but not dripping. You'll know they're ready when they feel uniformly heavy and the surface stops bubbling. Drain excess water completely before placing them in the trays to prevent waterlogging, which can suffocate seeds before they even sprout.
💧 Step 2: Sow Seeds at Proper Depth and Spacing
Place 1-2 seeds per cell at a depth of ¼ inch—about the diameter of most small seeds. Deeper planting forces seedlings to struggle upward, slowing growth. For larger seeds like beans or peas, go ½ inch deep. I use a fine-tip pencil to make small indentations in each cell, which helps maintain consistent depth.
Cover seeds lightly with the same moisture-retentive material from the blocks, pressing down just enough to ensure good seed-to-soil contact. Avoid compacting the surface too firmly—you want it firm enough to hold seeds in place but loose enough for roots to penetrate easily. Label each tray with the seed variety and planting date to track germination progress.
☀️ Step 3: Maintain Optimal Moisture and Temperature
The key to fast greenhouse growth is keeping the blocks consistently moist but never soggy. Place the trays on a greenhouse propagation mat set to 75-85°F—this warmth accelerates germination by 30-50%. Check moisture daily by lifting a corner of the tray; if the surface feels dry to the touch, mist lightly with water at room temperature.
I avoid overhead watering in the greenhouse because it creates humidity spikes that promote fungal diseases. Instead, I use a fine-mist spray bottle to water from below, ensuring moisture reaches the roots without disturbing the seeds. Most seeds will germinate in 5-10 days under these conditions, with some fast growers like radishes appearing in just 3-4 days.
⏰ Step 4: Provide Controlled Light and Ventilation
Once seedlings emerge, move the trays to a bright, indirect light source in the greenhouse to prevent leggy growth. I use T5 fluorescent grow lights positioned 6 inches above the trays for the first week, then gradually increase the height to 12 inches as seedlings mature. Watch for thin, pale stems—this is your signal the light is insufficient.
Ventilation is just as critical as moisture in a greenhouse setting. Open vents for 10-15 minutes daily starting when seedlings have 2 true leaves to harden them off. This gradual exposure prevents shock while still maintaining the 70-75°F daytime temperature range that encourages robust growth. Avoid sudden temperature swings—seedlings can handle 10°F fluctuations but nothing more.
🌿 Step 5: Transplant When Seedlings Are Ready
Seedlings are ready for transplanting when they develop 3-4 true leaves and the first set of leaves turn deep green. At this stage, the roots will have filled the starter block, and you'll see them emerging from the bottom. I transplant on an overcast day or in the late afternoon to reduce stress from direct sunlight.
Gently squeeze the sides of the block to release the seedling intact—these blocks are designed to minimize root disturbance. Plant at the same depth they were growing in the tray, firming soil around the base to eliminate air pockets. Water deeply immediately after transplanting to help roots establish in their new location. Within 7-10 days, you'll see new growth signaling successful transition.
Tips & tricks for perfect greenhouse seedling growth
These simple adjustments will help you maximize germination speed and seedling strength in your greenhouse setup.
Soaking Technique: For Step 1, the 10-15 minute soak is crucial—don't rush it! If your blocks aren't fully saturated after 10 minutes, extend the soak by 5-minute increments until they feel uniformly heavy. Over-soaking beyond 20 minutes risks waterlogging, which can suffocate seeds before germination even begins. I test readiness by gently squeezing a block—it should hold its shape but feel noticeably heavier than when dry.
Seed Depth Precision: In Step 2, that ¼-inch depth matters more than you might think. For tiny seeds like lettuce or herbs, use a toothpick to create precise indentations—this prevents burying them too deep. Larger seeds like beans or peas can go ½ inch deep, but never exceed ½ inch or you'll delay emergence. I find marking my pencil at ¼ inch with a rubber band makes consistent planting effortless.
Temperature Consistency: Maintaining that 75-85°F range in Step 3 is where the magic happens. If your greenhouse runs cooler, consider adding a small space heater near the trays during germination. For warmer climates, position trays in partial shade to prevent overheating above 85°F. I've seen germination times cut by nearly half when temperatures stay consistently in this optimal range.
Light Transition Strategy: When moving seedlings to grow lights in Step 4, start with the 6-inch height for the first week—this prevents leggy growth while still providing enough light. Gradually increase to 12 inches only after you see sturdy stems developing. I watch for the first true leaves to darken slightly; that's your cue the light intensity is sufficient without being harsh.
Pro Tips for Seed Trays For Greenhouse
- These simple adjustments will help you maximize germination speed and seedling strength in your greenhouse setup.
- Soaking Technique: For Step 1, the 10-15 minute soak is crucial—don't rush it! If your blocks aren't fully saturated ...
- Seed Depth Precision: In Step 2, that ¼-inch depth matters more than you might think. For tiny seeds like lettuce or ...
Frequently asked questions
Got questions about using seed trays in your greenhouse? You’re not alone! Here are some of the most common queries—and straightforward answers—to help you get started with confidence.
What’s the best material for seed trays in a greenhouse?
Seed trays come in biodegradable peat or coconut coir (great for transplanting), plastic (durable and reusable), or recycled paper pulp (eco-friendly). Choose based on your needs: peat/coco coir for moisture retention, plastic for long-term use, or paper for sustainability.
How long should I keep seeds in trays before transplanting?
Most seedlings are ready in 4–8 weeks, depending on the plant. Check for 2–3 true leaves (not just cotyledons) and sturdy stems. Harden off seedlings by gradually exposing them to outdoor conditions for 5–7 days before moving them to the greenhouse or garden.
How do I prevent seed trays from drying out too quickly?
Keep trays in a shallow tray of water (bottom-watering) or use a humidity dome to retain moisture. Avoid overhead watering to prevent fungal issues. For extra insurance, mix peat moss or vermiculite into your soil for better water retention.
Can I reuse seed trays, and how do I clean them?
Yes! Rinse plastic trays with soapy water and disinfect with a 10% bleach solution (rinse well). For biodegradable trays, compost them after use. Sterilizing trays prevents mold and disease, ensuring healthy new seedlings.
What’s a good alternative if I don’t have seed trays?
No trays? Use eggshells, yogurt cups, or even toilet paper rolls lined with paper towels. Just ensure drainage holes are present. For larger setups, try straw bales or coconut husks as natural, moisture-retentive alternatives.
Wrapping up and next steps
Investing in moisture-retentive seed trays for your greenhouse is a game-changer for nurturing healthy, fast-growing seedlings. These starter blocks optimize water efficiency, reduce transplant shock, and give your plants the best possible start—saving you time and effort in the long run. 🌱
Ready to elevate your greenhouse game? Start small with a few trays and experiment with different seeds to see what thrives best in your setup. Before you know it, you’ll be harvesting vibrant, robust seedlings—all thanks to the perfect growing conditions you’ve created!