
Lawn
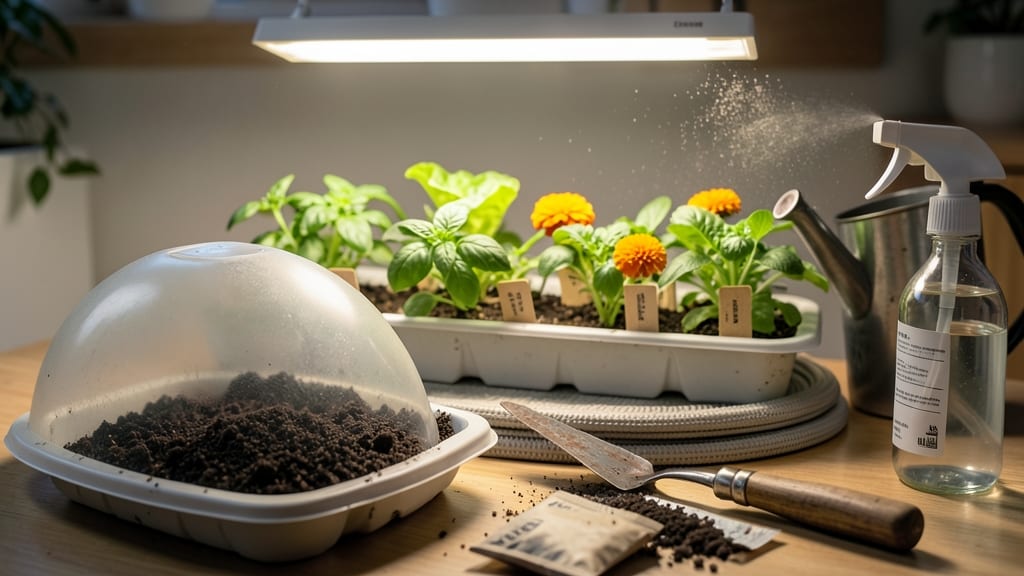
How to use a seed starter turns your kitchen counter into a nursery where tiny seeds become strong seedlings ready for the garden. 🌱 I’ve used this method for years—it’s how I get a head start on my tomatoes, peppers, and herbs, even when spring feels far away. The secret isn’t complicated: just the right setup, consistent care, and a little patience. By day 60, you’ll be transplanting seedlings that outperform anything from the garden center.
You’ll need a seed starter tray, some seed-starting mix, and a sunny spot (or grow lights). That’s it—no fancy equipment. The key is keeping the soil moist but not soggy, giving them enough light to stay sturdy, and avoiding overcrowding.
Most beginners mess up by watering too much or letting seedlings get leggy from weak light. I’ve been there, and I’ll show you how to skip those mistakes.
What you’ll end up with are compact, healthy seedlings that adjust to outdoor life with ease. No more wilting transplants or stunted growth—they’ll hit the garden bed ready to thrive. Plus, you’ll save money by growing your own instead of buying tiny, overpriced nursery starts.
This works for any garden, from a sunny windowsill to a greenhouse setup. Whether you’re growing flowers, veggies, or herbs, the same principles apply. Let’s get those seeds sprouting!
📚 In This Guide
- What you need
- Instructions
- Tips and common mistakes
- Wrapping up and next steps
What you need
- ● Seed starter trays or pots: 1-2 trays (biodegradable or plastic, 72-cell or 128-cell size for optimal spacing).
- ● Seed starting mix: 1 bag (sterile, well-draining potting mix—avoid garden soil!)
- ● Seeds: Your chosen variety (check seed packets for planting depth and spacing).
- ● Watering can or spray bottle: With a fine mist nozzle to avoid disturbing seeds.
- ● Clear plastic dome or plastic wrap: To create a mini greenhouse effect (if your trays don’t have lids).
- ○ Grow lights or sunny windowsill: A south-facing window or a 12-16 hour LED grow light (optional but helpful for weak sunlight).
- ● Heat mat: Keeps soil warm (70-75°F) for faster germination—great for slow starters like peppers or tomatoes.
- ● Plant labels: Wooden sticks or plant markers to track varieties (especially useful if growing multiple types).
- ● Fertilizer (low-dose): A balanced, water-soluble fertilizer (5-10-5 ratio) for seedlings after the first true leaves appear.
- ● Tweezers or small spoon: For delicate seed handling (e.g., tiny flower or herb seeds).
- ● Humidity dome or cloche: Extra protection for seeds in dry climates.
Step-by-step instructions for Using a seed starter
Here’s how to turn a simple seed starter into thriving seedlings—no guesswork, just reliable results.
🌱 Step 1: Prepare Your Seed Starter for Planting
Start by filling the seed starter tray with moistened seed-starting mix—never garden soil, as it compacts and blocks roots. I like to mix in a handful of perlite to improve drainage. Fill each cell to about ½ inch below the rim and press down lightly to remove air pockets. The mix should feel like a damp sponge, not dripping wet.
Tap the tray gently on the table to settle the soil evenly. This ensures seeds make good contact with the mix, which speeds up germination. If the tray has a dome or clear lid, place it aside for now—you’ll use it later, but not until after planting.
💧 Step 2: Plant Seeds at the Right Depth
Check the seed packet for depth recommendations, but a general rule is to plant seeds twice as deep as their diameter. For tiny seeds like lettuce, this might be just a sprinkle; for larger seeds like beans, aim for ½ inch deep. Use your finger to make a small hole, drop in 1-2 seeds per cell, and cover lightly with more mix.
Press the soil down just enough to secure the seeds—don’t pack it down. Water gently with a spray bottle until the surface looks evenly moist. Avoid soaking the tray, as this can wash seeds too deep or cause them to rot before germinating.
☀️ Step 3: Create Ideal Germination Conditions
Place the tray in a warm spot—70-75°F is perfect for most seeds. A seedling heat mat under the tray can help if your home runs cooler. Cover the tray with its dome or plastic wrap to trap humidity, but prop it up slightly so condensation doesn’t drown the seeds. Check daily for moisture—mist lightly if the soil feels dry to the touch.
Germination times vary, but you’ll usually see sprouts in 5-14 days. As soon as the first seedling appears, remove the dome immediately to prevent mold. This is the moment that matters: too much humidity now invites damping-off, a fungal disease that collapses seedlings overnight.
🌿 Step 4: Provide Light and Care for New Seedlings
Once seeds sprout, move the tray to a bright, indirect light source—a south-facing window works, but supplement with a grow light if natural light is weak. Keep the light 2-3 inches above the seedlings and raise it as they grow. Leggy, pale seedlings mean the light is too far away; strong, compact growth means you’re on track.
Water from the bottom by placing the tray in ½ inch of water for 10-15 minutes. This prevents soil from splashing onto delicate leaves, which can spread disease. Let the tray drain completely before returning it to its saucer. You’ll know moisture is right when the soil surface looks slightly damp but not soggy.
⏰ Step 5: Harden Off and Transplant Ready Seedlings
About 2 weeks before your last frost date, start hardening off seedlings by placing them outside in a sheltered spot for 1-2 hours the first day. Gradually increase outdoor time over 7-10 days, ending with a full day in the sun. This toughens stems and leaves so they survive transplant shock.
Transplant when seedlings have 3-4 true leaves and look sturdy. Gently squeeze the cell walls to loosen roots before placing them in the garden. Water deeply at the base to settle the soil and encourage root growth. With this method, you’ll have robust transplants ready to thrive in just 60 days.
Tips & tricks for perfect seed starter success
These little details make all the difference between wimpy sprouts and strong, healthy seedlings ready for your garden.
Soil Prep Secret: When filling your seed starter tray with that ½ inch below the rim of moistened seed-starting mix, press down just enough to remove air pockets—but don't compact it like garden soil. Think "damp sponge" consistency. I find adding a handful of perlite to the mix helps prevent that dreaded "soggy bottom" syndrome while still keeping roots happy.
Planting Depth Hack: The "twice as deep as their diameter" rule works wonders, but here's what nobody tells you—if you're planting tiny seeds like lettuce, don't even bother measuring. Just sprinkle them on top and press lightly. For larger seeds like beans, that ½ inch deep gives them perfect support without burying them too deeply. The key is gentle pressure—just enough to secure them without crushing.
Germination Temperature Tip: That 70-75°F range is your sweet spot, but don't stress if your home runs cooler. A seedling heat mat under the tray works miracles in chilly kitchens. Pro tip: Place the tray on top of your fridge during the day if you don't have a heat mat—the motor generates just enough warmth. Just don't let it get above 80°F, or you'll risk overheating your little sprouts.
Lighting Strategy: When your seedlings hit the 2-3 inches height mark, it's time to adjust that grow light. I like to keep it just above the tallest seedlings so they don't stretch toward it. Watch for those telltale signs: if they're leaning dramatically or turning pale yellow, they need more light. A simple rule—if you can see their shadows, they're getting enough light.
Pro Tips for Use Seed Starter
- These little details make all the difference between wimpy sprouts and strong, healthy seedlings ready for your garden.
- Soil Prep Secret: When filling your seed starter tray with that ½ inch below the rim of moistened seed-starting mix, ...
- Planting Depth Hack: The "twice as deep as their diameter" rule works wonders, but here's what nobody tells you—if yo...
Frequently asked questions
Got questions about seed starters? You’re not alone! Here are some of the most common concerns—and quick, practical answers to get you growing like a pro.
What’s the best time of year to start seeds indoors?
Timing depends on your climate and plant type. For most veggies (like tomatoes or peppers), start 6-8 weeks before the last frost in spring. Cool-season crops (e.g., lettuce, spinach) can go in 4-6 weeks before frost. Check your seed packet for specific guidance—it’s your roadmap to success!
How long does it take for seeds to sprout in a seed starter?
Sprouting time varies wildly! Fast growers (like radishes or basil) pop up in 3-7 days, while stubborn seeds (e.g., okra or some herbs) may take 2-4 weeks. Keep soil moist, warm (70–75°F), and patient—consistency beats speed. Pro tip: Label your starters so you don’t forget what’s lurking under the soil!
What if my seed starter mold grows instead of seedlings?
Mold is a seedling’s worst nightmare—but don’t panic! It thrives in wet, cool, or overcrowded conditions. Fix it by:
- Thinning seedlings
- Improving airflow (add a small fan)
- Reducing water (bottom-water only)
- Using a sterilized seed starter next time
Can I reuse seed starter trays, or do I need new ones every year?
Yes, you can reuse trays—but only if they’re clean and mold-free. Scrub with soapy water, rinse, and sanitize with a bleach solution (1 part bleach to 9 parts water). Avoid reusing soil; compost it instead. For extra hygiene, swap out trays every 2-3 years to prevent disease buildup.
What’s a good alternative to store-bought seed starters?
No seed starter? No problem! DIY options include:
- Egg cartons (for tiny seeds like lettuce)
- Toilet paper rolls (cut lengthwise, filled with soil)
- Yogurt cups or muffin tins (with drainage holes)
- Newspaper pots (eco-friendly and biodegradable)
Why are my seedlings leaning or stretching toward the light?
This is called etiolation, and it’s your seedlings’ way of crying for help! They’re reaching for light because they’re too far from a grow light or not getting enough sunlight. Move them 2-3 inches closer to your light source (but not touching!) and keep lights on 14-16 hours/day. Rotate trays daily for even growth.
Wrapping up and next steps
You’ve got everything you need to kickstart your gardening journey with confidence! 🌱 By following these steps—from choosing the right seed starter to nurturing your seedlings—you’re setting yourself up for a thriving lawn or garden in just 60 days.
Remember, every expert gardener started with their first sprout, so embrace the learning process and enjoy the rewards of your hard work.
Ready to take the next step? Plant your first seeds today and watch your green thumb grow! For even more tips, check out our guide on transplanting seedlings or explore our seasonal planting calendar to maximize your garden’s potential.