
Lawn
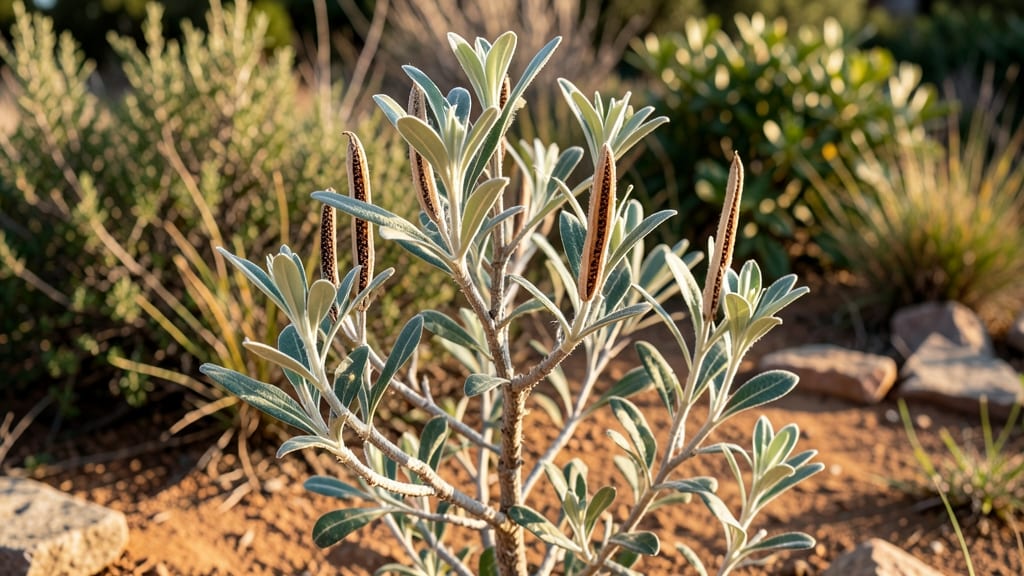
Texas mountain laurel seed pods hold the key to growing this iconic Texas native—without the frustrating twist-and-pull struggle most gardeners face. 🌿 The secret lies in a simple drying technique that makes seed extraction effortless, plus a few pro tips to break dormancy and ensure those hard-won seeds actually sprout.
Most people give up after wrestling with stubborn pods, but a 2-week drying period in a dry, shaded spot loosens the seeds naturally. Once you crack them open, you’ll find plump, viable seeds ready for planting—no brute force required.
The real magic happens when you mimic the plant’s natural conditions: well-draining soil, partial shade, and patience (these seeds take 30-60 days to germinate). What you end up with is a sturdy, drought-tolerant shrub that thrives in Texas heat and attracts pollinators all season.
The purple blooms arrive in spring, and the plant’s deep roots prevent erosion—making it a win for both gardens and landscapes. Here’s the twist-free method that actually works, plus how to troubleshoot common pitfalls like moldy pods or slow germination. Let’s get those seeds growing!
📚 In This Guide
- What you need
- Instructions
- Tips and common mistakes
- Wrapping up and next steps
What you need
- ● Mature Texas Mountain Laurel seed pods: Harvest 10–15 fully dried, brown pods (late summer/fall). Ensure they’re cracked open naturally—no green or unripe pods!
- ● Pruning shears or sharp scissors: 1 pair (sterilized with rubbing alcohol) to snip pods from branches.
- ● Heavy-duty gloves: 1 pair (nitrile or leather) to protect against thorns and sap.
- ● Large bowl or bucket: 1 (1–2 gallon capacity) for collecting pods and seeds.
- ● Colander or fine mesh strainer: 1 (with <0.25-inch holes) for rinsing seeds.
- ● Paper towels or newspaper: 2–3 sheets for drying seeds.
- ● Small paintbrush or soft toothbrush: 1 for gently dislodging seeds from pods.
- ● Air-tight container: 1 (small mason jar or resealable bag) for seed storage.
- ● Labeling tape & marker: 1 roll + 1 marker to tag your seeds with the harvest date.
- ● Seed germination kit: Includes a humidity dome or propagator tray for faster sprouting.
- ● Rubbing alcohol (70%+) & cotton swabs: For sterilizing tools between uses.
- ● Notebook & pen: To log seed viability, pod sources, or germination notes.
- ● Magnifying glass: For inspecting seeds for pests or damage.
- ● Compost bin: To recycle pod husks and stems after extraction.
Step-by-Step instructions for extracting Texas mountain laurel seeds
Here's how to open those stubborn pods without damaging the seeds inside.
🌱 Step 1: Harvest and Dry the Seed Pods
Collect pods when they turn from green to brown and begin splitting open naturally. I like to gather them in late summer or early fall when they're fully mature but haven't yet released seeds. Place pods in a single layer on a paper towel-lined tray in a dry, well-ventilated area with indirect sunlight.
Leave them to dry for 2-3 weeks until they feel light and papery when squeezed. You'll know they're ready when the outer shell cracks easily with gentle pressure—this means the seeds inside have fully matured. Avoid direct sunlight during drying, as it can overheat the pods and reduce seed viability.
✂️ Step 2: Gently Open the Pods Without Twisting
Lay a pod flat on a clean cutting board or table. Using a small, sharp knife or your fingernail, carefully slice along one seam where the pod naturally opens. Apply just enough pressure to split it open—don't force it. The goal is to expose the seeds inside without crushing them.
Here's the thing—Texas mountain laurel pods are tough, but they're also delicate when it comes to the seeds. If you twist or pry too hard, you'll end up with broken seed coats or damaged embryos. Instead, work slowly and let gravity help you by tipping the pod slightly as you cut.
🌿 Step 3: Extract and Clean the Seeds
Once the pod is open, you'll see several small, dark seeds nestled inside. Gently tap the pod to release the seeds onto a clean surface. Use a soft paintbrush or your finger to coax out any seeds stuck to the pod walls. I find a small bowl works best for collecting them—just tap the pod over it until everything falls free.
Remove any debris or empty seed coats by sifting the seeds through a fine-mesh strainer or by carefully picking them out with tweezers. You'll notice viable seeds are firm and dark, while non-viable ones may appear shriveled or lighter in color. Discard any seeds that look damaged or hollow.
💧 Step 4: Stratify Seeds for Better Germination
Place the cleaned seeds in a plastic bag with a damp paper towel or sphagnum moss. Seal the bag and store it in the refrigerator for 60-90 days. This cold stratification mimics winter conditions and breaks seed dormancy, which is crucial for Texas mountain laurel. Check the bag occasionally to ensure the paper towel stays moist but not soggy.
After stratification, plant the seeds in a well-draining potting mix. Keep the soil lightly moist and place the container in a warm, shaded area until germination occurs, which can take 3-6 months. Patience is key here—these seeds aren't in a hurry to sprout, but it's worth the wait for the stunning blooms that follow.
☀️ Step 5: Prepare for Outdoor Planting
Once seedlings emerge, wait until they develop 2-3 sets of true leaves before transplanting. Choose a location with full sun to partial shade and well-draining soil. Texas mountain laurel thrives in dry, rocky soil, so avoid heavy or waterlogged areas.
Dig a hole twice as wide as the root ball but only as deep as the container. Gently remove the seedling, loosen the roots if they're circling, and place it in the hole. Backfill with soil, water deeply, and add a 2-inch layer of mulch around the base to retain moisture and suppress weeds. Avoid overwatering—these plants are drought-tolerant once established.
Tips & tricks for perfect Texas mountain laurel seed extraction
Working with these delicate pods takes patience—but these little tricks will help you avoid common pitfalls and maximize your seed yield.
Timing Secret: When harvesting pods in Step 1, aim for late summer when they're brown but still slightly firm. Overripe pods (completely dry and cracked) release seeds naturally, while green pods won't yield viable seeds. I've found that pods gathered in late August give me the best balance—hard enough to protect seeds during drying, but soft enough to split cleanly later.
Tool Technique: For Step 2, I recommend using a small, sharp paring knife rather than your fingernail—it gives you more control without risking accidental damage. Hold the pod steady with one hand while making the cut, and work at a slight angle to follow the natural seam. The key is to make just one clean cut rather than multiple attempts, which can crush seeds when you finally get it open.
Seed Selection Tip: In Step 3, pay close attention to seed color and texture. Viable seeds should be dark brown and firm to the touch, while non-viable ones often appear lighter or have a chalky surface. I've learned to discard any seeds with visible cracks or hollow centers—they won't germinate. A magnifying glass helps identify these subtle differences, especially when working with large batches of pods.
Stratification Strategy: For Step 4, I like to use a clear plastic bag with a small zipper for stratification—it lets me check moisture levels without opening the bag completely. Place the bag on a shelf in your fridge where the temperature stays consistently between 35-40°F. The seeds need this cold period to break dormancy, and consistent temperature is more important than exact timing within the 60-90 day window.
Pro Tips for Texas Mountain Laurel Seed Pods
- Working with these delicate pods takes patience—but these little tricks will help you avoid common pitfalls and maxim...
- Timing Secret: When harvesting pods in Step 1, aim for late summer when they're brown but still slightly firm. Overri...
- Tool Technique: For Step 2, I recommend using a small, sharp paring knife rather than your fingernail—it gives you mo...
Frequently asked questions
Got questions about harvesting and working with Texas Mountain Laurel seed pods? You’re not alone!
Here are the most common queries—and their answers—to help you get the best results.
When is the best time to collect Texas Mountain Laurel seed pods?
The ideal time to harvest seed pods is in late summer to early fall (August–October), when they turn brown and begin splitting open naturally. Avoid collecting green pods—seeds inside won’t be mature or viable. Look for pods that are dry and papery to the touch!
Why do the seed pods twist so much when drying? Is this normal?
Yes, it’s completely normal! Texas Mountain Laurel pods twist as they dry due to uneven moisture loss in their fibrous structure. This twisting actually helps release seeds—but it can also make extraction tricky. Gently pry open pods with a knife or let them air-dry fully before handling to minimize resistance.
Can I plant Texas Mountain Laurel seeds directly from the pod, or do they need preparation?
Seeds do need preparation for successful germination. After extracting them, soak the seeds in warm water for 24–48 hours to soften the tough outer coating. Scarification (lightly nicking the seed coat with sandpaper) can also improve germination rates. Plant them in well-draining soil and keep moist until sprouts appear!
Are Texas Mountain Laurel seed pods toxic? Should I wear gloves?
Yes, the pods (and plant parts) contain cyanogenic glycosides, which can be toxic if ingested in large quantities. While handling them won’t harm you, wear gloves to avoid skin irritation or accidental ingestion. Always wash your hands thoroughly after working with pods or seeds.
What if my seed pods won’t open naturally? How can I encourage them?
If pods resist opening, try these tricks:
- Air-dry them fully in a warm, dry place for 1–2 weeks.
- Place pods in a paper bag and shake gently to simulate wind dispersal.
- Use a knife or pliers to carefully pry them open (avoid crushing seeds!).
Wrapping up and next steps
Extracting seeds from Texas Mountain Laurel seed pods is a rewarding way to propagate these stunning native plants—just remember, patience and care are key! With the right tools and techniques, you’ll unlock the potential for vibrant, drought-resistant additions to your landscape.
Now that you’re armed with the know-how, why not give it a try? Grab those pods, follow the steps, and watch your garden flourish with this hardy Texas beauty! 🌿✨
Next steps:
- Start with a few pods and practice your technique.
- Share your success (or tips!) with fellow gardening enthusiasts.
- Explore other native plants to diversify your garden’s resilience.