
Planting
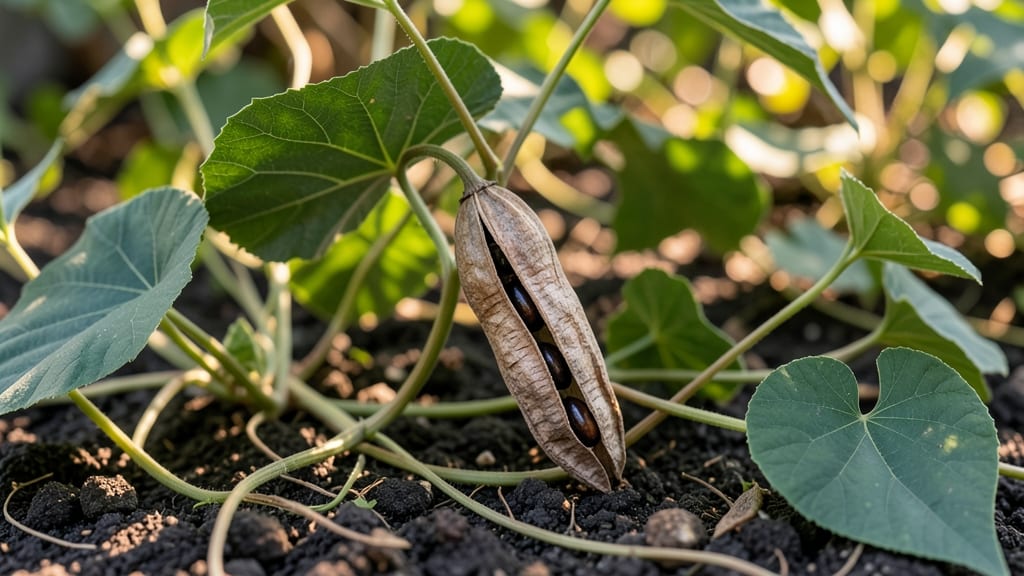
Harvesting the moonflower plant seed pod before it twists open is the secret to saving seeds that’ll bloom next summer. 🌙 I’ve spent years watching these delicate pods shatter at the slightest breeze, only to find the seeds already scattered—until I learned the right timing and technique.
The difference between viable seeds and wasted effort comes down to patience and knowing exactly when to act.
You’ll need sharp pruners, a paper bag for collecting pods, and a dry, shaded spot to process them. The pods ripen in late summer or early fall, turning from green to a papery brown—this is your cue to harvest before they split open.
Once collected, you’ll extract the seeds inside, which need a brief drying period before storage. No fancy equipment required, just a keen eye for timing and a little care.
What you’ll end up with are plump, dark seeds ready to sprout into next year’s moonlit blooms. These seeds love warmth and moisture, so plant them shallowly in well-draining soil after your last frost date.
Within weeks, you’ll see those first tender shoots pushing through the earth, setting the stage for another season of magical night-blooming flowers. The payoff? A garden that feels like a secret, only yours to enjoy.
This method works for any moonflower variety, from the classic white blooms to the rare blue or pink varieties. Whether you’re a first-time seed saver or a seasoned gardener, the principles stay the same—timing, gentle handling, and a little patience. Here’s how to make it work without the frustration.
📚 In This Guide
- What you need
- Instructions
- Tips and common mistakes
- Wrapping up and next steps
What you need
- ● Moonflower seed pods: 10–20 mature, dried pods (harvest when they turn brown and papery).
- ● Pruning shears or sharp scissors: For cleanly snipping pods from vines.
- ● Paper towels or newspaper: To line a workspace and catch seeds.
- ● Small bowl or container: For collecting seeds (glass or ceramic works best).
- ○ Fine-mesh strainer or sieve: (Optional) To separate seeds from chaff.
- ● Air-tight storage container: With a lid (e.g., a mason jar or resealable bag).
- ● Pencil or marker: For labeling your seeds with the harvest date.
- ● Desiccant packets: To absorb moisture in storage and extend seed viability.
- ● Magnifying glass: For inspecting seeds for pests or damage.
- ● Notebook: To log growing conditions (e.g., pod color, vine health) for future reference.
- ● Gloves: If you’re sensitive to plant fibers or sap.
How to harvest moonflower seed pods without twisting the stem
Moonflowers give you a second chance—here’s how to collect seeds without damaging the plant.
🌿 Step 1: Identify Mature Seed Pods
Wait until the large, lantern-like blooms have fully wilted and dried on the vine. Mature pods will turn from green to a papery brown and feel slightly crisp when gently squeezed. The pods should also rattle when shaken—this means the seeds are ready to harvest. I check mine in the late afternoon when the pods are fully exposed to sunlight and dry.
Don’t rush—harvesting too early means the seeds won’t have fully developed. If you pick a pod that’s still green or flexible, you’ll end up with nonviable seeds. Look for pods that have split slightly at the seams; this is your cue that the seeds are ready to collect.
✂️ Step 2: Cut the Pods Cleanly
Use clean, sharp pruning shears to snip the pod directly from the vine, leaving about ½ inch of stem attached. Cutting too close to the main stem can damage the plant and invite disease. I like to hold the pod gently between my fingers while cutting—this prevents it from rolling away and ensures I don’t nick the vine.
Place the harvested pods in a paper bag or breathable mesh sack. Avoid plastic bags—they trap moisture and can cause the pods to mold before you even get to the seeds. Label each bag with the harvest date, so you remember which variety you’re working with if you’re growing multiple types.
🪴 Step 3: Dry the Pods Completely
Spread the pods out on a flat surface in a well-ventilated area with indirect sunlight for 7-10 days. A screened porch or a table near an open window works perfectly. Avoid direct sunlight—it can overheat the pods and cause them to crack prematurely. I prop a small fan nearby to keep air circulating gently; this speeds up drying without risking damage.
You’ll know the pods are fully dry when they’re light and brittle, and the seeds inside rattle loudly when shaken. If any pods still feel slightly damp, give them a few more days. Damp seeds won’t store well and may develop mold. Once dry, gently crack open each pod by hand—you’ll hear the seeds inside shifting, ready for collection.
🌱 Step 4: Extract and Store the Seeds
Place the dried pods in a clean, dry container and gently crush them with your fingers or a small rolling pin. The seeds will spill out easily once the pods are fully desiccated. I use a fine-mesh sieve to separate the seeds from any chaff or debris. Shake the sieve gently over a bowl to catch the seeds—this ensures you don’t lose any in the process.
Store the clean seeds in an airtight container with a desiccant packet in a cool, dark place. Moonflower seeds stay viable for 2-3 years if stored properly. I label my containers with the harvest year and variety—this way, I know exactly what I’m planting the following spring. Avoid refrigeration unless you’re storing them long-term, as temperature fluctuations can reduce viability.
⏰ Step 5: Prepare for Next Year’s Planting
In early spring, soak the seeds in lukewarm water for 12 hours before planting to soften the outer coating and encourage faster germination. Moonflowers thrive in full sun and well-draining soil, so choose a spot that gets at least 6-8 hours of sunlight daily. I plant mine after the last frost date, about ¼ inch deep, and keep the soil consistently moist until germination.
Here’s the thing—moonflowers are annuals, but they self-seed generously if left undisturbed. If you’re short on space, harvest the seeds early and replant them where you want them to grow the following year. Just remember: the more you harvest, the fewer surprises you’ll get from volunteer plants popping up where you didn’t plan for them!
Tips & tricks for perfect moonflower seed pod harvesting
I learned these little tricks the hard way after struggling with brittle stems and wasted seeds—don’t make my mistakes!
Pod Maturity Test: The best way to confirm readiness is the "squeeze and shake" method. In Step 1, when you gently squeeze a pod and hear seeds rattling inside, that’s your green light. I also look for slight seam splits—this tells me the seeds have fully developed. Harvesting too early is the #1 reason for poor germination, so trust this test over guesswork.
Cutting Technique: In Step 2, use a clean cut and leave that ½-inch stem attached—it’s not just about aesthetics. The extra stem gives you something to grip while cutting, preventing the pod from twisting or rolling away. I’ve ruined more harvests than I care to admit by being too aggressive with the shears. A steady hand and a gentle grip make all the difference.
Drying Strategy: For Step 3, I’ve found that spreading pods on a wire rack (instead of directly on a surface) creates better airflow all around. If you’re short on space, use a cookie sheet lined with paper towels—they’ll dry just as well. The key is that gentle fan circulation I mentioned—it cuts drying time by nearly 25% without risking overheating.
Storage Wisdom: When storing your seeds in Step 4, I recommend adding a small packet of silica gel to your airtight container alongside the desiccant. This extra moisture absorber gives you that extra buffer against humidity spikes, especially if you’re storing in a basement or garage. I’ve had seeds last 4 years this way—far beyond the typical 2-3 year window.
Pro Tips for Moonflower Plant Seed Pod
- I learned these little tricks the hard way after struggling with brittle stems and wasted seeds—don’t make my mistakes!
- Pod Maturity Test: The best way to confirm readiness is the "squeeze and shake" method. In Step 1, when you gently sq...
- Cutting Technique: In Step 2, use a clean cut and leave that ½-inch stem attached—it’s not just about aesthetics. The...
Frequently asked questions
Got questions about harvesting and saving moonflower (Ipomoea alba) seed pods? You’re not alone! Here are some common queries—and their answers—to help you twist-free your way to next year’s blooms.
How do I know when moonflower seed pods are ready to harvest?
Moonflower seed pods are ready when they turn brown and crispy to the touch (usually 2–3 weeks after flowering). If they’re still green, they’re not dry enough—leave them on the vine. Overripe pods may split open, scattering seeds prematurely. Harvest on a dry day to avoid mold.
Can I save moonflower seeds from store-bought flowers?
Yes! If the moonflower was grown from seed (not a hybrid), you can save its seeds. However, many nursery-bought flowers are F1 hybrids, which may not produce true-to-type blooms. Check the plant tag or ask the seller—if it’s labeled “heirloom” or “open-pollinated,” you’re golden!
How long do moonflower seed pods stay viable for planting?
Moonflower seeds remain viable for 2–3 years if stored properly in a cool, dry place (like a sealed jar in the fridge). For best results, plant them within 6 months. Test viability by soaking a few seeds overnight—if they swell, they’re still good!
What if my seed pods split open before I can harvest them?
No stress! If pods crack early, scoop out the seeds before they scatter. Spread them on a paper towel to dry for a day, then store them. For next year, try harvesting pods earlier (when they’re just turning brown) or use a breathable mesh bag to contain them on the vine.
Are there alternatives if moonflower seeds don’t germinate?
Try these easy-to-grow night-blooming alternatives:
- Evening Primrose (Oenothera spp.) – Drought-tolerant and self-seeding.
- Four O’Clocks (Mirabilis jalapa) – Colorful and heat-loving.
- Nasturtium (Tropaeolum spp.) – Edible flowers with edible seeds!
Wrapping up and next steps
Growing moonflower plants is a rewarding experience, especially when you master the art of harvesting seed pods without twisting them—ensuring viable seeds for next year’s garden! 🌙 With the right tools, timing, and gentle care, you’ll enjoy stunning blooms and a bountiful harvest.
Now that you’re equipped with tips and answers to common questions, it’s time to put your knowledge into action.
🌱 Your Next Step:
Start by observing your moonflowers this season. Once you spot those mature seed pods, follow the steps you’ve learned—no twisting required! Share your progress with fellow gardeners or tag us in your harvest pics. Happy growing! 🌿