
Lawn
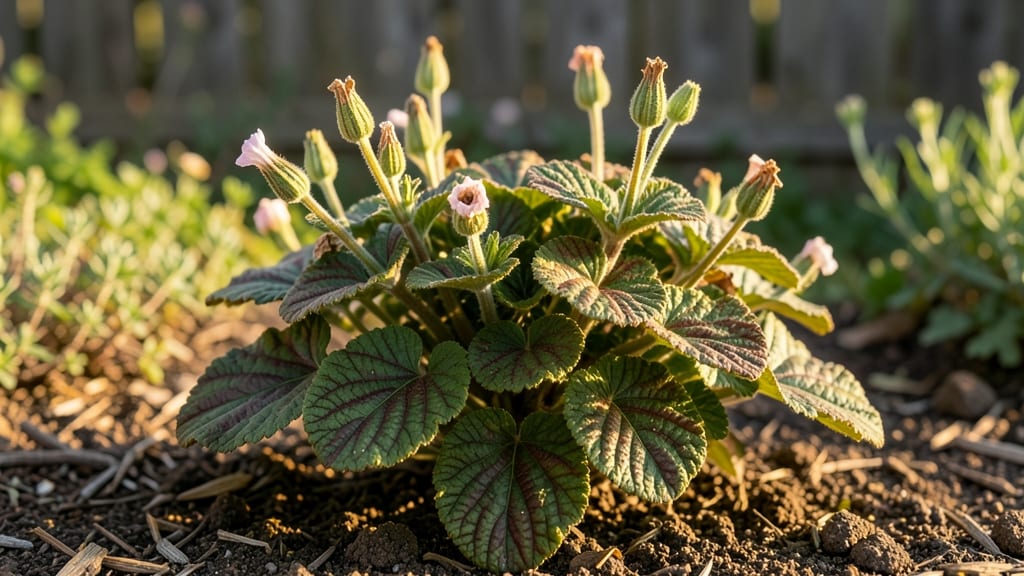
Cold-stratifying geranium seed pods unlocks a treasure trove of blooms you won’t find in stores. 🌱 Last spring, I harvested these papery pods from my hardy geraniums and turned them into plants that flowered by early June—two months ahead of nursery starts.
The secret lies in mimicking winter’s chilling effect, which breaks dormancy and jumpstarts growth.
First, identify mature pods—they’re dry, brown, and split open like tiny treasure chests. Harvest them in late summer or fall, then extract the tiny black seeds inside.
Store them in a sealed bag in the fridge for 4-6 weeks before sowing. This cold treatment mimics winter’s natural process, ensuring higher germination rates.
By early spring, you’ll see those first delicate sprouts pushing through the soil, ready to burst into color by summer. The plants grow hardy, drought-tolerant, and packed with the same vibrant blooms as their parent—plus, you’ll save money and avoid store-bought disappointments.
Works for both hardy and zonal geraniums, and the same method extends to other perennials like columbine or bleeding heart. No fancy equipment needed—just patience and a little fridge space. Let’s get those seeds growing!
📚 In This Guide
- What you need
- Instructions
- Tips and common mistakes
- Wrapping up and next steps
What you need
- ● Geranium seed pods: Fresh or dried pods from Pelargonium or Geranium varieties (e.g., zonal, ivy, or scented geraniums). Aim for 5–10 pods per batch.
- ● Paper towels or coffee filters: 2–3 sheets (for moisture retention during stratification).
- ● Plastic zip-top bags: 1–2 quart-sized bags (to create a humid, cold environment).
- ● Spray bottle: With water (for gentle misting).
- ● Small containers or seed trays: 4–6 inch pots or trays with drainage holes (for transplanting post-stratification).
- ● Potting mix: Seed-starting mix or a light, well-draining blend (avoid garden soil—it’s too dense!).
- ● Refrigerator: A standard fridge with a crispier drawer (ideal for cold stratification at 35–40°F).
- ● Grow lights or sunny windowsill: A south-facing window or LED grow lights (12–16 hours/day post-stratification).
- ● Humidity dome: To keep seedlings cozy after germination.
- ○ Heating mat: For faster germination once seeds sprout (optional but speeds up growth!).
- ● Label markers: To track varieties and planting dates.
- ● Fine-mesh screen: For covering trays to deter pests (like fungus gnats).
How to cold-stratify geranium seed pods for reliable germination
Cold stratification tricks geranium seeds into breaking dormancy naturally—here's how to do it right.
🌱 Step 1: Harvest and Prepare the Seed Pods
Collect fully mature geranium seed pods when they turn brown and begin splitting open. The pods should feel dry and papery to the touch. Place them in a paper bag and let them dry completely for 3-5 days in a dark, dry location—this prevents mold before stratification.
Once dry, gently crush the pods with your fingers to release the seeds. You'll see small, dark brown seeds inside. I like to spread them on a clean sheet of paper to remove any remaining chaff or debris. This ensures only pure seeds go into stratification, which prevents contamination later.
💧 Step 2: Moisten and Chill for Stratification
Mix the seeds with an equal amount of moistened perlite or coarse sand in a sealed plastic bag. The moisture level should feel like a damp sponge—not dripping, but damp enough that the seeds stay hydrated. Squeeze the bag gently to check; water should bead up slightly on the surface.
Place the sealed bag in a refrigerator set to 35-40°F for 6-8 weeksg. This cold period mimics winter conditions and signals the seeds to break dormancy. Check the bag weekly—if it feels dry, mist the contents lightly and reseal. Condensation inside the bag is normal, but mold or foul odors mean it's too wet.
☀️ Step 3: Plant Stratified Seeds in Warmth
After stratification, fill small seed trays or pots with well-draining seed-starting mix. Press the soil down lightly to remove air pockets, then make shallow furrows about ¼ inch deep using a pencil or stick. Space the seeds ½ inch apart—they germinate quickly and need room to grow.
Cover the seeds lightly with soil and mist the surface until evenly moist. Place the trays in a warm, bright location with temperatures between 65-75°F. A seedling heat mat helps speed germination if your home runs cooler. You should see sprouts in 10-21 days, though some varieties may take longer.
🌿 Step 4: Transplant and Care for Young Seedlings
Once seedlings develop 2-3 sets of true leaves (the second set appears after the initial cotyledons), it's time to transplant. Harden them off by placing the trays outside in a shaded spot for 1-2 hours daily over 5-7 days. This gradual adjustment prevents shock when they go into the garden.
Transplant outdoors after the last frost when soil temperatures reach 55°F. Space geraniums 12-18 inches apart in full sun. Keep the soil consistently moist but not soggy—geraniums hate wet feet. Watch for leggy growth; if stems stretch too tall, move the plants to a sunnier spot immediately.
Tips & tricks for perfect geranium seed germination
Cold-stratifying geranium seeds isn't just about patience—it's about getting the details right. Here's what I've learned to make this process foolproof.
Pod Selection Matters: The key to success starts in Step 1 with your seed pods. Look for pods that are fully brown and beginning to split open—these are the ones that contain mature seeds ready for germination. I've found that pods still green inside often yield lower germination rates. If you're unsure, split one open to check the seed color; they should be dark brown, not green or white. This careful selection saves you from wasted effort later.
Moisture Balance is Critical: In Step 2, getting the moisture right is everything. The mixture should feel like a damp sponge—not soaking wet, but definitely not dry. I test this by squeezing the bag gently; if water beads up slightly on the surface when you release, you've got it right. Too much moisture leads to mold, while too little means the seeds won't break dormancy. This is why I check weekly during the 6-8 week stratification period—just a light misting keeps everything perfect.
Temperature Consistency Wins: Maintaining that 35-40°F range in your refrigerator is crucial for breaking dormancy. Some fridges have temperature fluctuations, so I place my bag on the middle shelf where temps are most stable. If your fridge runs hotter, try the crisper drawer. The goal is to mimic natural winter conditions that trigger germination. I've seen seeds fail to sprout when kept in warmer fridge areas—don't make that mistake!
Planting Depth Visual: For Step 3, think of those ¼-inch deep furrows as just barely covering the seeds. I use a pencil to make the lines—it's the perfect depth gauge. Planting too deep can prevent seedlings from breaking through the soil, while planting too shallow might leave them exposed to drying out. The ½-inch spacing gives each seedling room to grow without competing immediately, which makes for stronger plants later.
Pro Tips for Geranium Seed Pods
- Cold-stratifying geranium seeds isn't just about patience—it's about getting the details right. Here's what I've lear...
- Pod Selection Matters: The key to success starts in Step 1 with your seed pods. Look for pods that are fully brown an...
- Moisture Balance is Critical: In Step 2, getting the moisture right is everything. The mixture should feel like a dam...
Frequently asked questions
Got questions about geranium seed pods and cold stratification?
You’re not alone! Here are answers to the most common queries—from timing to troubleshooting—to help you grow vibrant blooms year-round.
When should I start cold-stratifying geranium seed pods?
Start cold-stratifying geranium seeds 8–12 weeks before your last frost date (typically late winter). This mimics natural winter conditions, breaking seed dormancy for spring planting. For year-round blooms, stagger batches every 4–6 weeks to ensure continuous germination.
How long does cold stratification take for geranium seeds?
Most geranium seeds need 4–8 weeks in the fridge (34–40°F) to soften their hard outer shell. Check weekly—if seeds sprout, remove them immediately. Over-stratifying can lead to mold or rot, so patience (and a little monitoring) is key!
Can I skip cold stratification and plant geranium seeds directly?
While possible, cold stratification dramatically improves germination rates (from ~20% to 80%+). If you’re in a hurry, try soaking seeds in warm water for 24 hours first, but expect slower, less reliable results. For best blooms, embrace the chill!
My geranium seed pods aren’t opening—what’s wrong?
Seed pods may refuse to open due to immature seeds, dry conditions, or lack of sunlight. Try these fixes:
- Harvest pods when they’re light brown and papery (not green).
- Place pods in a paper bag for 1–2 weeks to encourage natural drying.
- Move the plant to a sunny windowsill or grow light.
Are geranium seed pods safe for pets or kids?
Yes! Mature geranium seed pods are non-toxic to pets and humans, but avoid ingesting large quantities—they’re not edible. Always supervise kids when handling seeds or plants. Plus, they’re a fun, safe way to teach little gardeners about plant cycles!
Wrapping up and next steps
Mastering the art of cold-stratifying geranium seed pods unlocks a world of vibrant, year-round blooms—without breaking the bank! 🌱 Whether you’re a seasoned gardener or just starting, this method proves that patience and a little science can yield stunning results.
Now that you’ve got the know-how, why not try it with a few seed pods this fall? Grab your supplies, follow the steps, and watch your garden transform into a burst of color. Happy planting! 🌸
- Next step: Start small—experiment with one variety first to refine your technique.
- Pro tip: Share your progress (or blooms!) with fellow gardeners for extra motivation.