
Lawn
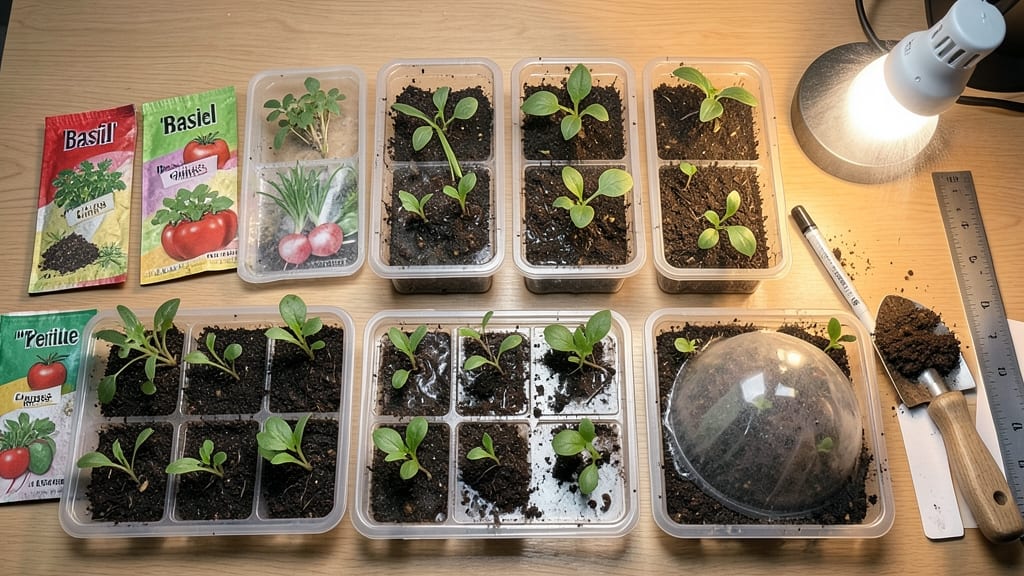
Your indoor seed planting chart isn't just a schedule—it's the roadmap to a kitchen windowsill bursting with fresh herbs, crisp microgreens, and baby vegetables year-round. 🌱 I've used this exact timing system to grow basil that tastes better than store-bought, peppers that ripen indoors, and greens that keep producing through winter.
The secret lies in matching each seed's natural rhythm with your indoor conditions.
Start with the right seeds—herbs like basil and parsley germinate in just 5-7 days under bright light, while tomatoes and peppers need 7-14 days and warmer temperatures. My chart breaks it down month-by-month, showing exactly when to plant for continuous harvests without overcrowding your space.
You'll see which varieties thrive in small pots and which need deeper containers to avoid root-bound stress.
By following this timing, you'll avoid the most common mistakes: planting too early when light is still weak, or too late when seedlings outgrow their containers. The result?
A steady supply of homegrown goodness that saves money and tastes like summer, even in January. Plus, you'll learn which plants play well together in shared containers.
Whether you're working with a sunny south-facing window or supplemental grow lights, this system adapts to your setup. The key is consistency—watering when the top inch feels dry and rotating trays for even light exposure. Let's get those seeds started on the right path!
📚 In This Guide
- What you need
- Instructions
- Tips and common mistakes
- Wrapping up and next steps
What you need
- ● Seeds: Choose fast-growing, cold-hardy varieties like microgreens, herbs (basil, parsley), lettuce, or radishes. Start with 50–100 seeds per tray (adjust based on seed size).
- ● Growing Trays or Containers: Seedling trays with cell inserts (2–4" deep) (e.g., 10x20 cell trays).
- ● Alternative: Small pots (3–4" diameter) or repurposed containers (yogurt cups, egg cartons) with drainage holes.
- ● Growing Medium: Seed starter mix (lightweight, sterile, and well-draining). Avoid garden soil—it’s too dense! (~5–10 lbs per batch).
- ○ Optional boost: Add perlite or vermiculite (20% mix) for aeration.
- ● Drainage Layer: Pebbles, hydroponic clay balls, or coarse sand (¼" layer at the bottom of trays).
- ● Watering Can or Spray Bottle: A fine-mist spray bottle (for gentle hydration) or a small watering can with a rose attachment.
- ● Grow Lights: LED grow lights (full-spectrum, 12–16" above seedlings). 12–16 hours/day (use a timer!).
- ● Alternative: A sunny windowsill (south-facing, if possible).
- ● Humidity Dome or Plastic Wrap: Keeps moisture in during germination (cover trays until seeds sprout).
- ● Thermometer/Hygrometer: Monitor temperature (65–75°F) and humidity (40–60%) for optimal growth.
- ● Heating Mat: Speeds up germination for slow starters (70–75°F).
- ● Fertilizer: Balanced liquid fertilizer (5-5-5 or 10-10-10) diluted to ½ strength after sprouts emerge.
- ● Labels & Markers: Track seed types and planting dates (use toothpicks + masking tape for DIY labels).
- ● Pruning Shears: For trimming leggy seedlings or harvesting microgreens.
- ● Notebook or App: Log germination times, light exposure, and watering schedules (e.g., Gardenate or Seed to Supper).
How to plan your indoor seed planting schedule by month
Here's the month-by-month system I rely on to keep my indoor seedlings thriving year-round.
📅 Step 1: Determine Your Last Frost Date and Planting Windows
Start by finding your average last frost date—this is your anchor point for all timing decisions. For most northern climates, this falls between April 15 and May 15, while southern regions may see frost as late as March 1. Count backward from this date to establish your indoor seed starting window.
Most vegetables need 6-8 weeks of indoor growth before transplanting, while herbs and flowers often require 4-6 weeks. I mark these windows on my calendar with colored tabs—red for long-season crops like tomatoes and peppers, and green for fast growers such as lettuce and radishes. This visual system prevents me from crowding my seedling schedule.
⏰ Step 2: Create Your Month-by-Month Planting Timeline
January-February: Begin with cool-season crops like spinach, kale, and broccoli that tolerate lower indoor temperatures (60-65°F). These can handle shorter daylight hours and will be ready to transplant by early spring. I use a grow light on a timer for 12 hours daily to supplement natural light during these darker months.
March-April: Shift to warm-season crops like tomatoes, peppers, and eggplants that need 75-85°F soil temperatures for germination. This is also when I start my herbs and flowers, which have more flexible timing. I keep a separate heat mat for these warmer seeds to ensure proper germination rates.
May-June: Focus on fast-maturing crops like lettuce, radishes, and bush beans that can be directly sown outdoors or transplanted quickly. This prevents overcrowding on my seedling trays and gives me space to experiment with new varieties.
☀️ Step 3: Adjust Light and Temperature by Season
Winter months require supplemental grow lights since natural daylight drops below 10 hours daily. I position my lights 2-3 inches above seedlings and run them for 14-16 hours to prevent leggy growth. In summer, I move seedlings to a shaded windowsill or under 50% shade cloth to prevent overheating.
Temperature adjustments are equally critical. During winter, I keep my seedling area at 65-70°F with a small space heater, while summer months see me moving seedlings to cooler basements or garages where temperatures stay below 75°F. I've learned the hard way that heat stress during germination can reduce yields by up to 40%.
🌱 Step 4: Monitor Germination Rates by Month
Cool-season seeds typically germinate in 7-14 days, while warm-season varieties can take 10-21 days depending on soil temperature. I maintain a simple chart tracking each variety's germination progress, noting when 50% of seeds have sprouted—this is my signal to remove humidity domes and adjust watering.
Here's the thing—I've found that February-sown tomatoes often germinate 3-5 days slower than those started in April due to cooler indoor temperatures. This is why I always start a few extra seeds in early months to account for potential delays. Watch for first true leaves (not the initial seed leaves) to appear before transplanting.
✂️ Step 5: Plan Your Transplanting and Succession Planting
Create a transplanting schedule that accounts for both your outdoor space and indoor seedling capacity. I typically transplant cool-season crops first in early spring, followed by warm-season varieties 2-3 weeks later. This staggered approach ensures I'm not overwhelmed with seedlings all at once.
For succession planting, I mark every 2-3 weeks on my calendar for quick growers like lettuce and radishes. This method gives me a continuous harvest rather than one large transplant event. I've also found that herbs like basil and cilantro can be sown every 4-6 weeks throughout the growing season for a steady supply.
Tips & tricks for perfect indoor seed planting schedules
These practical insights will help you optimize your indoor seed starting for maximum success—no matter the season.
Lighting Strategy: Position your grow lights 2-3 inches above seedlings during winter months, but raise them to 4-6 inches as seedlings mature to prevent burning. I use a simple ruler to mark the ideal height on my light fixture—this ensures consistent distance as plants grow. Adjust the 14-16 hour daily light cycle by setting a timer; even 15 minutes less can cause leggy growth in cool-season crops like kale.
Temperature Zones: Create microclimates in your growing space by using separate trays for cool-season (60-65°F) and warm-season (75-85°F) seeds. I keep a small heat mat under warm-season varieties like tomatoes and peppers, while cool-season crops like spinach thrive on a regular seedling tray. The 65-70°F range is ideal for most seedlings—any hotter and you risk heat stress that stunts germination by up to 40%.
Germination Tracking: When monitoring germination rates, mark your calendar with the 50% sprouting point for each seed batch. This is your cue to remove humidity domes and increase airflow. For warm-season seeds that take 10-21 days to germinate, I add a second marker at 21 days—if no sprouts appear by then, I consider the seeds non-viable and start fresh. This prevents overcrowding on my trays with failed batches.
Succession Planning: For continuous harvests, stagger your 2-3 week succession plantings by sowing every 10-14 days rather than every 21 days. This creates overlapping maturity windows for quick growers like lettuce and radishes. I use colored sticky notes (red for first planting, orange for second) on my calendar to visualize the progression—this visual system prevents me from accidentally planting too many at once.
Pro Tips for Indoor Seed Planting Chart
- These practical insights will help you optimize your indoor seed starting for maximum success—no matter the season.
- Lighting Strategy: Position your grow lights 2-3 inches above seedlings during winter months, but raise them to 4-6 i...
- Temperature Zones: Create microclimates in your growing space by using separate trays for cool-season (60-65°F) and w...
Frequently asked questions
Got questions about indoor seed planting? You’re not alone! Here are some of the most common concerns—and straightforward answers—to help you grow with confidence.
Can I use regular store-bought seeds for indoor planting?
Yes! Most vegetable, herb, and flower seeds work indoors, but opt for fast-maturing varieties (marked "early harvest" or "bush type") to avoid leggy plants. Check the seed packet for "indoor start" recommendations—some, like tomatoes or peppers, thrive with early sowing, while others (like lettuce) prefer direct sowing.
How long does it take for seeds to germinate indoors?
Germination times vary by plant: fast growers (e.g., radishes, arugula) sprout in 3–7 days, while slowpokes (e.g., parsley, basil) may take 10–21 days. Keep soil consistently moist (not soggy) and warm (70–85°F) to speed things up. A heat mat helps for stubborn seeds!
What’s the best light source for indoor seedlings?
A grow light (LED or fluorescent) is ideal—place it 2–4 inches above seedlings for 12–16 hours daily. No light? South-facing windows work temporarily, but seedlings may stretch (a sign of etiolation). Rotate trays daily for even growth.
My seeds aren’t sprouting—what’s wrong?
Check these fixes:
- Moisture: Soil should feel like a damp sponge. Overwatering can suffocate seeds!
- Temperature: Most seeds need warmth (use a seedling heat mat if your home is chilly).
- Depth: Plant too deep? Tiny seeds (like lettuce) need light to germinate—press them lightly into soil.
- Age: Old seeds (2+ years) may fail. Test viability by soaking in water—sinkers are good!
Can I reuse containers or soil from last year?
Containers? Yes! Clean with soapy water and disinfect with a 10% bleach solution (rinse well). Soil? No. Old soil harbors pests/diseases. Use fresh, sterile seed-starting mix (lightweight and sterile) to avoid damping-off fungus.
Wrapping up and next steps
Growing your own herbs, veggies, or flowers indoors is a rewarding journey—one that starts with the right timing! 🌱 Whether you’re a seasoned gardener or just beginning, this indoor seed planting chart gives you a clear roadmap to year-round success.
By following the month-by-month guide, you’ll enjoy fresh harvests, vibrant greenery, and the joy of nurturing life indoors.
Ready to take the next step? Start by picking 1-2 easy seeds (like basil or microgreens) and test your setup. Soon, you’ll be expanding your indoor garden with confidence—and maybe even sharing your green thumb with friends! Happy planting! 🌿