
Lawn
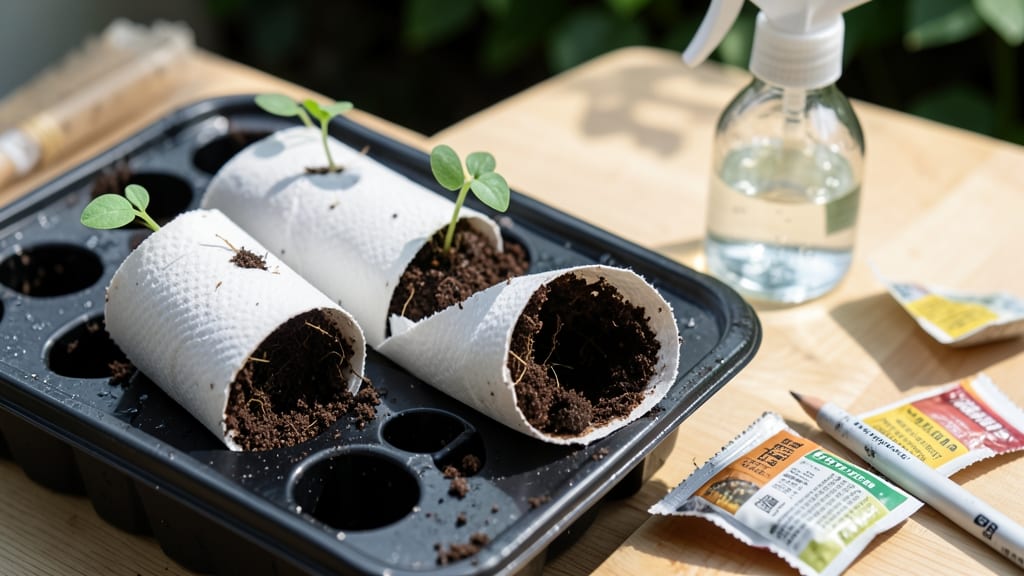
My toilet paper rolls became the secret weapon that turned my black thumb into a green thumb. 🌱 These humble tubes transform into perfect seed starters that save money, reduce waste, and give seedlings a head start—no fancy equipment required.
All you need is empty toilet paper rolls, potting soil, seeds, and a little patience. Cut the rolls into 2-inch sections, fill them with moist soil, and tuck in your seeds. The rolls provide just the right structure for roots to grow while keeping moisture locked in.
My first batch of petunias sprouted in just 5 days, beating the store-bought seedlings I'd tried before.
You'll end up with sturdy seedlings ready to transplant without that dreaded shock. The rolls break down in soil, so there's no mess, and you can even plant them directly into the ground with the tube still attached.
Plus, it's a great project to involve kids—they love watching tiny seeds turn into plants in their very own recycled starters.
Works for almost any small seed, from flowers to herbs, and adapts to containers or in-ground planting. Here's how to make it work for your garden this season!
📚 In This Guide
- What you need
- Instructions
- Tips and common mistakes
- Wrapping up and next steps
What you need
- ● Empty toilet paper rolls – 1-2 per seedling (clean, dry, and free of labels).
- ● Seeds – Choose fast-growing varieties like marigolds, basil, or lettuce (check seed packet for planting depth).
- ● Potting soil – 1-2 cups of lightweight, seed-starting mix (sterilized to prevent mold).
- ○ Scissors or knife – For cutting rolls (optional: decorate with paint or markers for fun!).
- ● Spray bottle – To mist seeds gently (avoid oversaturating!).
- ○ Plastic wrap or dome lid – Creates a mini greenhouse (optional but helpful for humidity).
- ● Compost or worm castings – Boosts soil nutrients (mix 1 tbsp per cup of soil).
- ● Plant markers – Label rolls with seed types (toothpicks + tape work great!).
- ● Grow light or sunny windowsill – 6+ hours of light daily (south-facing is ideal).
- ● Fertilizer (diluted) – Fish emulsion or seaweed extract (use after sprouts emerge).
Step-by-Step instructions for toilet paper seed starters
Here’s how to turn empty rolls into a seed-starting system that’s both eco-friendly and foolproof.
🌱 Step 1: Cut and Prep the Toilet Paper Rolls
Unroll each toilet paper roll and cut it lengthwise into four equal strips—each strip should be about 1 inch wide. This creates four individual seed-starting tubes per roll. I like to leave the cardboard intact for structure, but you can remove it if you prefer a cleaner look.
Lay the strips flat and fold them in half lengthwise, creating a pocket. This pocket will hold your seeds and soil. The folds keep everything contained while allowing roots to grow downward naturally. If you’re working with multiple rolls, stack them neatly to save space.
💧 Step 2: Fill and Moisten the Strips
Fill each folded strip with seed-starting mix until it’s about ¾ full. Press the soil gently but firmly—just enough to hold its shape when you stand the strip upright. Overpacking will suffocate roots, so keep it loose. I use a small spoon or my fingers to distribute the mix evenly.
Once filled, give the strips a light misting with water until the soil looks damp but not soggy. You want moisture to penetrate without pooling at the bottom. If the soil feels dry after a few minutes, add a little more water. The goal is to create a cozy, hydrated environment for your seeds to germinate.
☀️ Step 3: Plant Seeds and Provide Warmth
Plant one seed per strip, placing it about ¼ inch deep in the soil. Follow the depth guidelines on your seed packet—some seeds need less, others more. Gently press the soil around the seed to secure it. If you’re planting multiple types of seeds, label each strip with the variety and date to avoid confusion later.
Place the strips in a clear plastic bag or under a humidity dome to trap warmth and moisture. Keep them in a warm spot, like on top of the fridge or near a sunny window. Most seeds germinate best at 70-75°F, so avoid cold drafts. You should see sprouts in 5-10 days, depending on the plant type.
🌿 Step 4: Transplant into Soil or Pots
Once your seedlings have 2-3 true leaves (the first set of leaves after the initial sprouts), they’re ready to move. Carefully slide the toilet paper strip out of its pocket and place it directly into the soil or a small pot. The paper will break down naturally, so no need to remove it.
Water gently around the base of the seedling to settle the soil and encourage root growth. If transplanting into a larger pot, make sure the pot has drainage holes to prevent waterlogging. I like to bury the strip about ½ inch deep in the soil to stabilize the seedling and protect it from wind.
⏰ Step 5: Monitor and Maintain Growth
Keep the soil evenly moist but not waterlogged—you’ll know it’s right when the top inch feels dry to the touch. Avoid overwatering, as this can lead to damping-off, a fungal disease that kills seedlings. If you notice yellowing leaves or wilting, reduce watering slightly and ensure good airflow.
Place your seedlings in bright, indirect light at first, then gradually introduce them to direct sunlight over a week or two. This helps them toughen up for outdoor conditions. Once hardened off, you can transplant them into your garden or larger containers. The toilet paper will decompose completely, leaving no trace behind.
Tips & tricks for perfect toilet paper seed starters
Real talk: These little rolls can transform your gardening game with zero fuss. Here's what nobody tells you about making them work like a charm.
Cutting Consistency: Use a sharp pair of scissors or a craft knife to cut those toilet paper strips—dull blades will crush the fibers and make them less sturdy. Aim for 1-inch-wide strips (as instructed), but don't stress if they're slightly uneven. The key is keeping the folds neat so they hold soil properly. I like to test-fit each strip by standing it upright before filling—if it collapses, adjust the fold.
Soil Packing Secret: When filling your strips with seed-starting mix in Step 2, press just enough to hold the shape but leave room for roots to spread. I've learned this the hard way—overpacking creates air pockets that suffocate seedlings. Tap the strip gently on the counter to settle the soil, then give it one final press with your thumb. The goal is firm enough to stand upright but still light enough for water to penetrate.
Germination Warmth: That 70-75°F temperature range in Step 3 is non-negotiable for most seeds. I place my seed starters on top of my fridge (which runs warm) or use a seedling heat mat for faster germination. Pro tip: If your kitchen stays cool, try placing them near a sunny window with a clear plastic bag to trap warmth. You'll notice sprouts appear in just 5-10 days when conditions are ideal.
Transplanting Hack: When moving seedlings to soil in Step 4, bury the toilet paper strip about ½ inch deep—this gives your seedlings stability while the roots establish. I like to make a small trench first, then slide the strip in gently. The paper will decompose completely, so no need to remove it. This method works especially well for delicate seedlings that might otherwise topple over.
Pro Tips for Toilet Paper Seed Starters
- Real talk: These little rolls can transform your gardening game with zero fuss. Here's what nobody tells you about ma...
- Cutting Consistency: Use a sharp pair of scissors or a craft knife to cut those toilet paper strips—dull blades will ...
- Soil Packing Secret: When filling your strips with seed-starting mix in Step 2, press just enough to hold the shape b...
Frequently asked questions
Got questions about turning toilet paper rolls into seed starters? You’re not alone! Here are answers to the most common queries to help you grow like a pro—without the waste.
Can I use any toilet paper roll for seed starters?
Most standard toilet paper rolls work, but avoid thick or wax-coated rolls (like some luxury brands). Plain, unbleached rolls break down easily and won’t block drainage. If yours feels flimsy, double-layer it for extra support!
How long does it take for seeds to sprout in toilet paper rolls?
Sprouting time varies by plant, but most seeds (like herbs or flowers) appear in 7–14 days. Keep rolls moist and warm—a sunny windowsill or grow light speeds things up. If nothing sprouts after 3 weeks, check seed viability or adjust moisture levels.
What’s the best way to transplant seedlings from rolls?
Gently tear the roll away from the roots (don’t pull!) once seedlings have 2–3 true leaves. Plant the whole roll 1–2 inches deep in soil—it’ll decompose naturally. Water lightly to help roots adjust. Pro tip: Soak rolls in water for 10 minutes before planting to reduce transplant shock!
Can I reuse toilet paper rolls for multiple planting seasons?
Not directly, but you can sterilize rolls for reuse! Boil empty rolls for 10 minutes to kill bacteria, then dry completely. Use them for seedling markers, compost bins, or craft projects—just avoid planting food crops in reused rolls without sterilizing.
Why are my seedlings wilting or moldy in the rolls?
Wilting usually means overwatering or poor drainage. Let rolls dry slightly between waterings, and poke a few holes in the bottom if drainage is slow. Mold? Your rolls may be too damp—reduce moisture and improve airflow by propping them open with a toothpick. Pro tip: Use a spray bottle for gentle hydration!
What seeds work best for toilet paper roll starters?
Fast-growing, small seeds thrive best! Try herbs (basil, parsley), flowers (marigolds, sunflowers), or veggies (radishes, lettuce). Avoid large seeds (like beans or squash)—they need more space. Herbs and leafy greens are the easiest wins for beginners!
Wrapping up and next steps
Transforming old toilet paper rolls into thriving seed starters isn’t just eco-friendly—it’s a simple, rewarding way to kickstart your gardening journey! With minimal supplies and a little creativity, you’ve got a cost-effective, sustainable solution that reduces waste while nurturing new life.
Whether you’re a seasoned green thumb or a curious beginner, these starters make gardening accessible and fun.
Ready to grow your green dreams? Grab those empty rolls, pick your favorite seeds, and let your garden flourish—one recycled roll at a time! 🌱✨