
Lawn
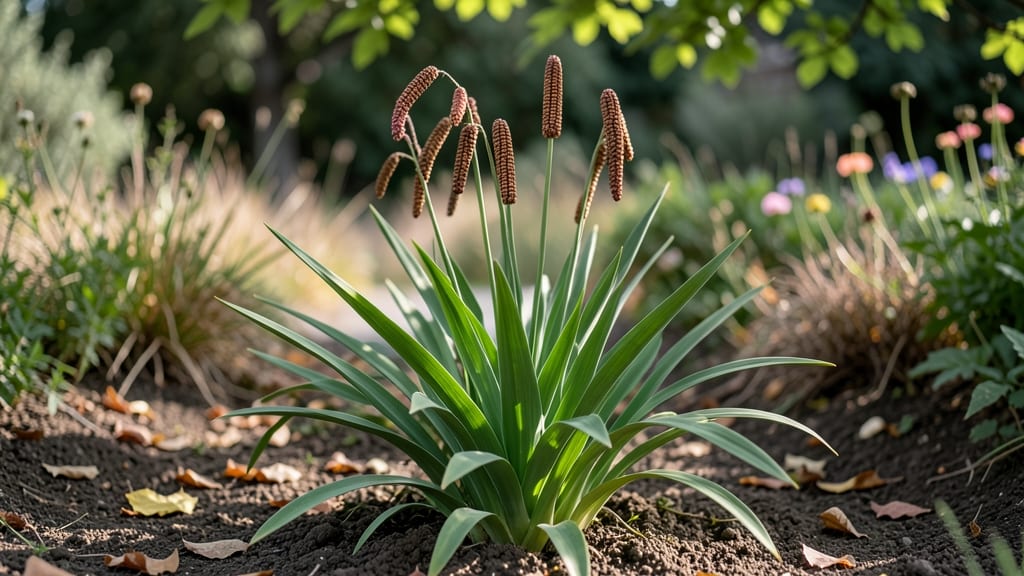
Crocosmia seed pods reveal a surprising secret: viable seeds hide inside their twisty shells, waiting for patient gardeners like you. 🌱 I've spent years watching these dramatic, firework-like blooms fade into strange, twisted pods—only to discover the potential for propagation hidden within.
The twist isn't the challenge; it's the careful extraction that makes all the difference.
Most gardeners propagate crocosmia through corm division, but seed saving offers a rare experiment. The pods develop in late summer, turning from green to papery brown—signaling maturity. Inside, you'll find flat, dark seeds that need proper drying before storage.
This method isn't foolproof (success rates hover around 20-30%), but the thrill of growing something from seed makes it worth trying.
What you'll get is a handful of tiny seeds that could grow into your own unique crocosmia plants. The germination process is slow—expect sprouts in 4-6 weeks with consistent moisture and warmth.
Even if not all seeds sprout, the process teaches you more about this fascinating plant than any corm division ever could.
Works best in zones 5-9 where crocosmia thrives, but the seed-saving technique adapts to any climate. Here's how to handle those twisty pods without losing your seeds—and maybe discover a new favorite variety in your garden.
📚 In This Guide
- What you need
- Instructions
- Tips and common mistakes
- Wrapping up and next steps
What you need
- ● Mature crocosmia seed pods: Harvest when fully dry and brown (typically late summer/fall). Aim for at least 10-15 healthy pods for a decent seed yield.
- ● Sharp pruning shears or scissors: Bypass-style (clean cuts, no crushing) for stems up to ½-inch thick. 1 pair is sufficient.
- ● Paper bags or breathable mesh bags: Brown kraft paper (1 per 5 pods) or seed-saving mesh bags (reusable) to store pods while drying.
- ● Labeling tags & permanent marker: Note the variety/cultivar and harvest date. 5-10 tags for organization.
- ● Drying tray or screen: A wire cooling rack or flat wooden tray (12"x18" minimum) to lay pods out for airflow.
- ○ Small funnel (optional but helpful): For transferring seeds into storage containers without spills. 1-2 inch diameter works best.
- ● Desiccant packets: Place 1-2 silica gel packs in storage containers to prevent moisture buildup.
- ● Fine mesh sieve: ¼-inch mesh to sift out debris from opened pods (if not using mesh bags).
- ● Glass jars with airtight lids: Pint-sized mason jars for long-term seed storage (label tightly!).
- ● Magnifying glass: Helps spot tiny seeds or check for viability in older pods.
- ● Spray bottle with water: Lightly mist pods if they’re too dry before opening (avoid soaking!).
How to extract crocosmia seeds without damaging the pods
Here's my foolproof method for harvesting seeds from crocosmia pods—no twisting required.
🌱 Step 1: Identify and Harvest Mature Seed Pods
Wait until the seed pods turn a deep brown color and begin to dry out completely—this usually happens in late summer to early fall. The pods will feel papery and crisp to the touch. Use clean, sharp scissors to snip the stems about 1 inch below the base of each pod. Avoid pulling or twisting, as this can damage the delicate structures inside.
Place the harvested pods in a well-ventilated area, like a mesh bag or paper envelope, to dry further for 3-5 days. This extra drying step prevents moisture from causing mold during storage. I like to lay them out on a screen or mesh tray to allow air circulation on all sides.
💧 Step 2: Gently Open the Pods for Seed Extraction
Once the pods are completely dry, hold one firmly with your fingers and tap it gently against a hard surface—like a wooden cutting board—until it splits open naturally. You'll hear a soft pop as the pod releases its seeds. Never cut into the pod with a knife, as this can damage the seeds inside.
Empty the seeds into a small bowl or envelope. You'll see tiny, dark brown seeds surrounded by fine, papery chaff. Use a soft paintbrush to separate the seeds from the chaff, working gently to avoid crushing them. This step is crucial—crocosmia seeds are fragile and can lose viability if mishandled.
☀️ Step 3: Store Seeds in a Cool, Dry Environment
Transfer the cleaned seeds into a small paper envelope or breathable fabric pouch. Label it with the date and variety (if applicable) using a fine-tip marker. Store the envelope in a cool, dry place, like a seed drawer or airtight container with silica gel packets to absorb excess moisture.
Crocosmia seeds can remain viable for 1-2 years if stored properly, but I recommend planting them as soon as possible for the best germination rates. Check the envelope periodically for signs of mold or dampness—if you notice any, transfer the seeds to a new, dry container immediately.
⏰ Step 4: Prepare Seeds for Spring Planting
In early spring, soak the seeds in lukewarm water for 12-24 hours to soften the outer coating and encourage faster germination. This step mimics natural rainfall and helps break dormancy. After soaking, plant the seeds ¼ inch deep in a well-draining seed-starting mix, keeping the soil lightly moist but never soggy.
Place the pots in a warm, bright location with indirect light until germination occurs—typically within 2-4 weeks. Once the seedlings develop their first true leaves, gradually introduce them to more sunlight. Avoid transplanting until the seedlings are at least 3 inches tall and have developed a sturdy root system.
Tips & tricks for perfect crocosmia seed extraction
These simple yet game-changing techniques ensure you preserve every viable seed without the frustration of damaged pods.
Pod Selection: Look for pods that have turned completely brown and feel crisp to the touch—this is your cue they're ready. I've found that pods harvested in late summer yield the highest viability. If you're unsure, split one open to check for dark brown seeds; if they're still green, wait a few more days. This step is critical because premature harvesting leads to underdeveloped seeds.
Drying Strategy: The 3-5 day drying period in Step 1 is non-negotiable for mold prevention. I've learned this the hard way—after storing damp pods, I lost an entire batch to mold within weeks. Use a mesh bag or screen tray to maximize airflow; this prevents moisture buildup while keeping the pods stable. If your climate is humid, extend drying to 5-7 days to be safe.
Seed Separation: That soft paintbrush isn't just for show—it's your secret weapon against crushed seeds. Work slowly and methodically, lifting chaff away rather than brushing seeds toward the edge. I've seen gardeners accidentally sweep seeds right off the table during this step. For stubborn chaff, try using a fine-mesh sieve to catch any seeds that might fall through while you work.
Storage Wisdom: While crocosmia seeds can last 1-2 years, I've found their germination rates drop significantly after the first year. For best results, plant them within 6 months of harvest. If you must store longer, place a small packet of silica gel in the container to absorb any lingering moisture—this keeps seeds crisp and viable. Label your containers with both the date and variety if you're saving multiple types.
Pro Tips for Crocosmia Seed Pods
- These simple yet game-changing techniques ensure you preserve every viable seed without the frustration of damaged pods.
- Pod Selection: Look for pods that have turned completely brown and feel crisp to the touch—this is your cue they're r...
- Drying Strategy: The 3-5 day drying period in Step 1 is non-negotiable for mold prevention. I've learned this the har...
Frequently asked questions
Got questions about saving crocosmia seed pods? You’re not alone! Here are some of the most common queries—plus straightforward answers to keep your gardening game strong.
When is the best time to harvest crocosmia seed pods?
Harvest seed pods when they’re fully dried but before they split open—usually late summer to early fall (August–September). Look for pods that turn brown and papery; if they crack, the seeds may have already scattered. Pro tip: Collect them on a dry, sunny day to avoid moisture issues.
Can I save seeds from store-bought crocosmia plants?
Yes, but with a caveat! Store-bought plants may be hybrids or sterile cultivars, meaning their seeds might not grow true to the parent. For reliable results, save seeds from open-pollinated varieties or plants grown from your own garden. If you’re unsure, ask your nursery for heirloom or seed-fertile types.
Why won’t my crocosmia seed pods open naturally?
Seed pods might stay closed if they’re too moist or immature. Try these fixes:
- Place pods in a paper bag with a few holes for airflow.
- Let them dry indoors for 1–2 weeks in a warm, dry spot.
- Gently squeeze the pod—if seeds rattle inside, they’re ready!
How do I store crocosmia seeds long-term?
Store seeds in a cool, dry place (like a sealed envelope or airtight container) at 35–40°F for up to 2 years. Add a desiccant packet to prevent mold. Label with the harvest date—fresh seeds (less than 6 months old) germinate best with stratification (4–6 weeks in the fridge).
What’s the easiest way to germinate crocosmia seeds?
Start with stratification for best results:
- Mix seeds with moist potting soil in a container.
- Refrigerate for 4–6 weeks (simulates winter).
- Plant outdoors in spring after the last frost.
Bonus Tip:
If you’re short on time, plant pods directly in the garden in fall—they’ll self-sow! Just monitor for volunteers (unplanned seedlings) in spring.
Wrapping up and next steps
Crocosmia seed pods offer a simple yet rewarding way to preserve your garden’s beauty year-round—no twists or complications needed! 🌱 By mastering the twist-free extraction method, you’ll unlock a low-effort, high-reward strategy for saving seeds efficiently.
Ready to try? Gather your supplies, follow the steps, and watch your garden thrive with fresh blooms next season.
Now that you’re equipped with the know-how, take the next step: experiment with different crocosmia varieties or share your newfound skills with fellow gardeners. Happy saving—and may your garden always bloom bright! 🌸