
Propagation
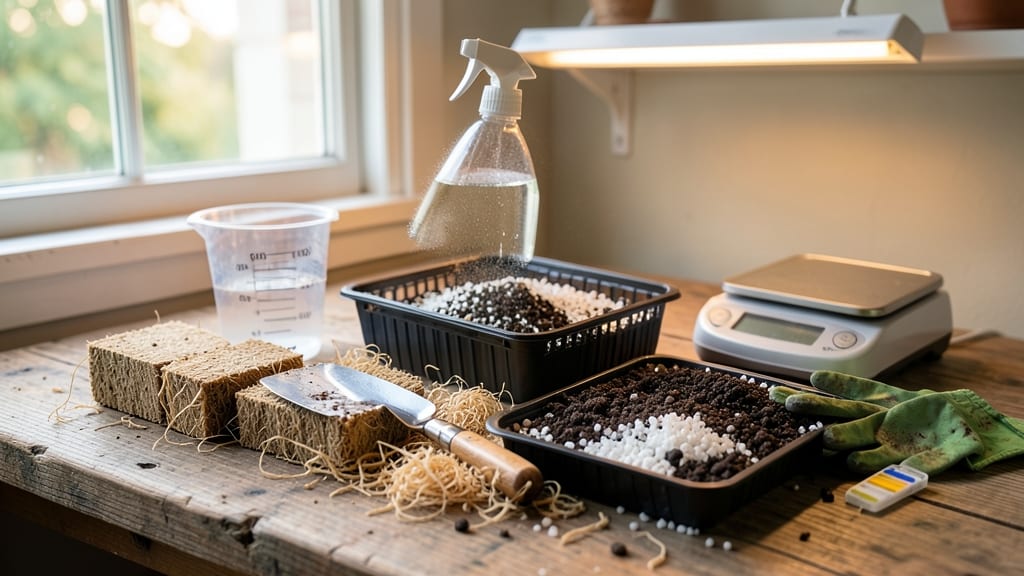
A DIY seed starting mix with coco coir is the game-changer I wish I’d known years ago—it cuts damping-off by half while giving seedlings the perfect head start. 🌱 The secret lies in coco coir’s airy texture and water-retention balance, but mixing it right makes all the difference.
My first batch was too dense; now I nail it every time with just four ingredients and 10 minutes of work. This mix works for everything from finicky lettuce to stubborn tomatoes, and it’s cheaper than store-bought blends.
You’ll need coco coir (the base), perlite (for drainage), worm castings (for nutrients), and a pinch of mycorrhizal fungi—all available at garden centers or online. The ratio is simple: 3 parts coco coir to 1 part perlite, with amendments mixed in lightly to avoid overwhelming tender roots.
What you’ll end up with is a light, crumbly medium that holds moisture without staying soggy. Seedlings grow strong and straight, with fewer leggy stretchers reaching for light. The best part?
This mix stays fresh for months if stored properly, so you won’t waste money on single-use trays or soil blocks. Here’s where most people mess up: over-moistening or skipping sterilization.
I’ll show you exactly how to fluff it right, pasteurize it safely, and keep moisture consistent—so your seedlings thrive from day one. Ready to try it?
📚 In This Guide
- What you need
- Instructions
- Tips and common mistakes
- Wrapping up and next steps
What you need
- ● Coco coir (bricks or blocks): 1–2 bricks (about 1–2 cubic feet total, depending on your seedling tray size). Pro tip: Look for 100% coco coir (no peat or additives) for the best results!
- ● Perlite or vermiculite: 1 part (by volume) to coco coir. Why? These add aeration and moisture retention—critical for tiny roots!
- ● Worm castings or compost: 10–20% of the total mix (about ½–1 cup per 2 cubic feet). Boosts nutrients without compacting the mix.
- ○ Lime (optional but helpful): ½ teaspoon per cubic foot of mix. Balances pH (coco coir is naturally acidic).
- ● Water: Enough to hydrate the mix thoroughly (like a damp sponge).
- ● Large bucket or wheelbarrow (for mixing).
- ● Garden trowel or small shovel (for blending).
- ● Spray bottle (for misting coco coir before mixing).
- ● Seedling trays or pots (with drainage holes!).
- ● Plastic wrap or humidity dome (to retain moisture while seeds germinate).
- ○ pH test kit (optional but handy)—aim for 5.8–6.2 for most seedlings.
How to make a lightweight, sterile seed starting mix using coco coir
This fluffy, moisture-retentive mix gives seedlings the perfect head start—sterile, airy, and free from garden soil pathogens.
🪴 Step 1: Measure and Combine Base Materials
Start by mixing 2 parts coco coir with 1 part perlite in a large clean container. The coco coir should be expanded and fluffy—if it's compressed, soak it in warm water for 15-20 minutes until it triples in volume. Drain excess water completely before mixing.
Use your hands to gently fold the perlite into the coco coir. The perlite adds 10-20% air pockets, preventing compaction and encouraging root growth. Avoid over-mixing—just distribute the perlite evenly. For 4 seed trays, you’ll need about 4 quarts of coco coir and 2 quarts of perlite.
💧 Step 2: Add Moisture and Conditioners
Sprinkle ½ cup of worm castings and ½ cup of compost into the mix. These provide gentle, slow-release nutrients without overwhelming tender seedlings. Stir lightly to distribute them—you want an even distribution, not clumps.
Gradually add warm water while mixing until the blend reaches a squeeze-and-hold consistency. It should clump slightly in your hand but not drip. If it feels too dry, add water 1 tablespoon at a time. Overwatering now will create a soggy mess that suffocates roots later.
☀️ Step 3: Sterilize and Test the Mix
Microwave the mix in 1-minute bursts until it reaches 160°F (test with a food thermometer). This kills fungi and bacteria without cooking the organic matter. Let it cool completely before handling—hot mix can damage seedlings later.
Fill a seed tray with the mix and press down lightly. It should hold its shape when gently squeezed but still feel light and airy. If it feels dense, add 1-2 tablespoons of perlite per quart to improve drainage. This is your quality check—seedlings need both moisture retention and airflow.
🌱 Step 4: Use Immediately or Store Properly
Sow seeds right away for best results. If storing, keep the mix in a sealed container for up to 2 weeks in a cool, dry place. Before use, fluff the mix gently with your hands to restore air pockets. Never reuse mix from failed seedlings—pathogens linger even after drying.
For extra insurance, sprinkle a thin layer of horticultural sand on top before sowing. This prevents crusting when watering and gives seedlings a clean surface to push through. Your mix is now ready to transform tiny seeds into strong, disease-resistant starts.
Tips & tricks for perfect DIY seed starting mix
Here's what nobody tells you about making this mix right the first time—trust me, these details make all the difference.
Coco Coir Prep: If your coco coir arrives compressed, the 15-20 minute soaking time is non-negotiable. I learned this the hard way after trying to use it straight from the bag—it won't expand properly and creates a dense, waterlogged mess. Use warm water (not boiling) to speed up hydration without cooking the fibers. Once expanded, drain it thoroughly in a colander for 5 minutes to remove excess moisture before mixing.
Perlite Distribution: When folding perlite into the coco coir, aim for even distribution but don't overdo it. Think of it like making a cake batter—just until combined. Too much perlite (over 20%) can make the mix too dry, while too little defeats the purpose of preventing compaction. For 4 seed trays, I find 2 quarts of perlite creates perfect air pockets without making the mix feel gritty.
Sterilization Safety: That 160°F target in the microwave is critical—any lower and you risk leaving pathogens alive, but any higher and you'll cook the organic matter. Use a food thermometer to check temperature between 1-minute bursts. If your microwave heats unevenly, stir the mix between bursts to ensure even heating. The mix should smell fresh and earthy, not burnt or chemical-like after sterilization.
Storage Wisdom: The 2-week storage limit is firm, but you can extend it to 3 weeks if you add a pinch of cinnamon (¼ teaspoon per quart) as a natural preservative. Store in a sealed container with a silica gel packet to absorb any excess moisture. Before using stored mix, let it sit at room temperature for 30 minutes to equalize temperature—cold mix can shock seedlings when planted.
Pro Tips for Diy Seed Starting Mix With Coco Coir
- Here's what nobody tells you about making this mix right the first time—trust me, these details make all the difference.
- Coco Coir Prep: If your coco coir arrives compressed, the 15-20 minute soaking time is non-negotiable. I learned this...
- Perlite Distribution: When folding perlite into the coco coir, aim for even distribution but don't overdo it. Think o...
Frequently asked questions
Got questions about crafting your own seed-starting mix with coco coir?
You’re not alone! Here are answers to the most common queries to help you grow confidently.
Why should I use coco coir instead of peat moss?
Coco coir is a sustainable, renewable alternative to peat moss. It retains moisture better, resists compaction, and won’t shrink as it dries. Plus, it’s eco-friendly—peat moss harvesting harms delicate ecosystems. Win-win for your seedlings and the planet!
How long does a DIY coco coir seed-starting mix last?
When stored in a cool, dry place, your mix stays fresh for 6–12 months. Once moistened, use it within 2–4 weeks to prevent mold or bacterial growth. For longer shelf life, add a pinch of perlite or vermiculite to improve aeration.
Can I reuse old seed-starting mix?
No—never reuse spent mix. It harbors fungi, bacteria, and pests that can kill new seedlings. Compost it instead! For a budget-friendly hack, blend 50% fresh coco coir with 50% used mix only if you’ve sterilized it (bake at 200°F for 30+ minutes).
What if my mix smells bad or molds?
Bad smells or mold mean excess moisture or poor drainage. Fix it by:
- Fluffing the mix to improve airflow.
- Adding perlite or sand (10–20%) to boost drainage.
- Discarding and remaking if mold persists.
Are there alternatives if I can’t find coco coir?
Yes! Try these DIY seed-starting mix swaps:
Base
Additives
Coconut fiber (cheaper than coir)
Vermiculite + worm castings
Compost
Perlite + sand (pasteurize first!)
Sphagnum peat moss
Vermiculite + lime (for acidity balance)
Just ensure your mix is light, sterile, and well-draining!
Wrapping up and next steps
Creating your own DIY seed starting mix with coco coir is a game-changer for gardeners—it’s cost-effective, sterile, and packed with the perfect fluffy texture to give your seedlings the best start! 🌱 With just a few simple ingredients, you’ve got a nutrient-rich foundation that promotes strong root growth and healthy sprouts.
Now that you’re equipped with the know-how, it’s time to roll up your sleeves and watch your green thumb shine.
Ready to take the next step? Try starting a batch of your favorite seeds today—whether it’s tomatoes, herbs, or flowers—and share your success with fellow plant lovers. Happy growing! 🌿