
Lawn
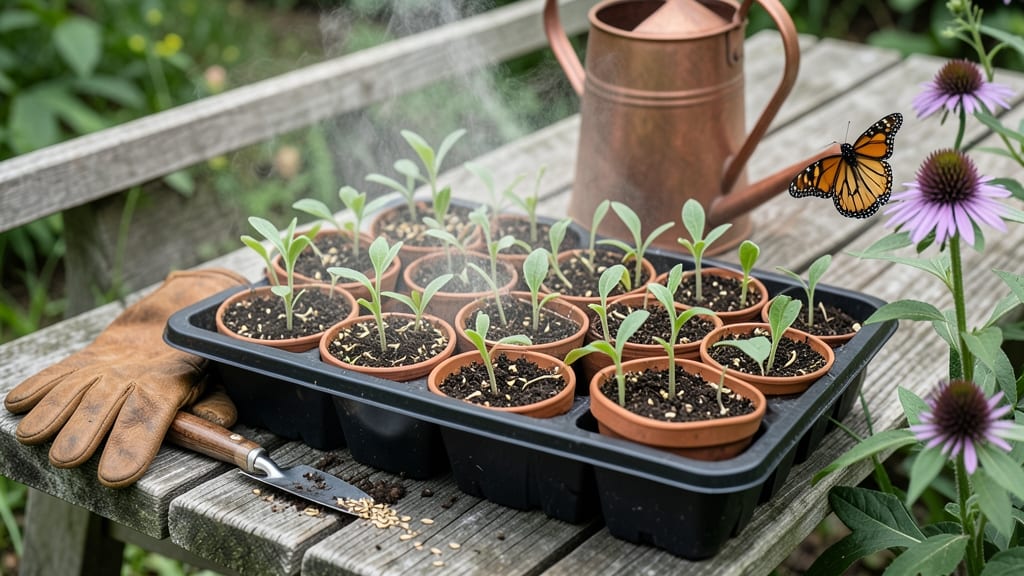
The right monarch seed mix transforms your yard into a butterfly magnet. 🌸 I planted mine last spring, and within weeks, the garden became a fluttering haven—orange wings everywhere. This isn’t just about pretty flowers; it’s a lifeline for monarchs facing habitat loss.
You’ll need full sun, well-draining soil, and patience—milkweed (the host plant) takes time to establish, but it’s worth it. Pair it with nectar-rich blooms like coneflowers or asters for a year-round buffet. The key is diversity: different plants bloom at different times, ensuring food when monarchs need it most.
By summer’s end, you’ll see caterpillars munching milkweed leaves and adults sipping nectar. The garden hums with life, and you’ll feel like part of the solution. Even small spaces work—containers or window boxes can host these pollinators too.
Start small if you’re new, but think big: every seed planted helps. The payoff isn’t just beauty—it’s knowing you’re supporting one of nature’s most iconic species. Ready to get started?
📚 In This Guide
- What you need
- Instructions
- Tips and common mistakes
- Wrapping up and next steps
What you need
- ● Monarch seed mix: 1–2 lbs (purchase a pre-mixed blend or combine native milkweed seeds + nectar plants like Asclepias, Liatris, and Echinacea).
- ● High-quality potting soil: 2–3 cubic feet (sterile, well-draining mix—avoid garden soil with pests!).
- ● Seed-starting trays or pots: 50+ cells or 4-inch pots (biodegradable options work great!).
- ● Grow lights or sunny windowsill: 6–8 hours of light daily (or a greenhouse for optimal growth).
- ● Watering can or spray bottle: Gentle misting keeps seeds moist without drowning them.
- ● Plant labels: 50+ (mark varieties and planting dates—trust us, it’s a lifesaver!).
- ○ Seedling heat mat (optional): Speeds up germination for slower-growing milkweed seeds.
- ● Fertilizer (balanced 10-10-10 or organic compost tea): Lightly mix into soil before planting.
- ● Transplanting tweezers: Gently handles delicate seedlings when moving to outdoor beds.
- ● Mulch (straw or shredded leaves): Retains moisture and suppresses weeds post-planting.
- ● Pollinator-friendly companion plants: Marigolds, coneflowers, or bee balm to boost biodiversity.
Step-by-Step instructions for planting a monarch-friendly seed mix
Here’s how to turn your garden into a monarch magnet—season after season.
🌱 Step 1: Choose the Right Location for Year-Round Blooms
Monarchs need nectar sources from early spring through fall, so pick a spot that gets 6+ hours of sun daily. I always check for at least 4 hours of direct sunlight in the morning—this gives plants the energy they need to bloom consistently. Avoid low-lying areas where frost lingers, as monarchs won’t find food there in spring.
Test your spot by observing it for a week. If the ground stays damp for more than a few hours after rain, amend the soil with 2-3 inches of compost to improve drainage. Monarchs avoid soggy soil—it stresses their host plants and deters them from laying eggs. A slight slope or raised bed helps prevent waterlogging while keeping the area accessible for maintenance.
🌿 Step 2: Prepare the Soil for Pollinator Success
Loosen the top 6-8 inches of soil with a garden fork or tiller to break up compaction. Monarchs thrive when roots can spread freely, so avoid heavy clay or rock-hard ground. Work in 2-3 cups of organic matter per square foot—I like to mix in composted leaves or well-aged manure for slow-release nutrients.
Spread a 1-inch layer of mulch (like straw or shredded bark) after planting to retain moisture and regulate soil temperature. This keeps roots cool in summer and prevents freezing in winter, which is critical for perennials that rebloom year after year. Avoid fresh wood chips—they can tie up nitrogen as they decompose, starving your plants.
💧 Step 3: Plant the Seed Mix at the Right Depth and Spacing
Scatter seeds evenly, following the packet’s spacing guidelines—usually 12-18 inches apart for perennials and 6-12 inches for annuals. Press them lightly into the soil (about ¼ inch deep), as monarch host plants like milkweed need good soil contact to germinate reliably. Cover with a thin layer of soil or mulch to protect seeds from drying out.
Water gently but thoroughly after planting to settle the soil around seeds. Use a fine spray nozzle to avoid displacing them—monarch seeds are tiny, and even a light rain can wash them away. Keep the soil consistently moist (not soggy) until seedlings reach 2-3 inches tall. This encourages strong root development before the first true leaves appear.
☀️ Step 4: Maintain Blooms for Continuous Monarch Visits
Water newly planted seeds every 2-3 days until they establish roots, then taper to 1 inch of water per week once mature. Monarchs are drawn to gardens where flowers bloom nonstop, so deadhead spent blooms regularly—snip off faded flowers just above the next set of leaves to encourage reblooming. This keeps nectar sources available from spring through fall.
Fertilize lightly in early spring with a balanced organic fertilizer (10-10-10) to support vigorous growth, but avoid heavy feeding after midsummer. Too much nitrogen produces leafy growth at the expense of flowers, which is exactly what monarchs need. A handful of compost worked into the soil each spring keeps nutrients steady without overfeeding.
✂️ Step 5: Protect and Preserve for Generations of Monarchs
Leave seed pods on milkweed plants in late summer and fall—they provide food for migrating monarchs and ensure next year’s crop. Cut back dead foliage in late winter (after the first hard frost) to make room for new growth, but leave some stems standing for overwintering caterpillars. Monarchs rely on these plants for survival, so every stem counts.
Monitor for pests like aphids or spider mites, which can stress plants and reduce blooms. A strong spray of water usually removes aphids, while neem oil (applied in early morning) controls mites without harming monarchs. Healthy plants attract more monarchs, creating a feedback loop of pollinator activity that benefits your entire garden.
Tips & tricks for planting a monarch-friendly garden
Creating a thriving monarch habitat takes a little strategy—here's how to maximize your success from the start.
Sunlight Strategy: The 4 hours of morning sun mentioned in Step 1 is non-negotiable for monarchs, but here's the thing: east-facing garden beds get the most consistent morning light. If your space only gets afternoon sun, consider adding a few shade-tolerant nectar plants like Joe Pye weed to supplement. Morning sun also helps prevent fungal issues by drying dew quickly, which is especially important in humid climates.
Soil Prep Pro Tip: When loosening that 6-8 inches of soil in Step 2, don't just scratch the surface—aim to break up compaction all the way down. I use a broadfork to avoid disturbing the soil structure too much. For heavy clay soils, mix in 1 part sand to 3 parts compost to improve drainage without overwhelming the plants. This creates the perfect loose, crumbly texture that monarch roots love.
Watering Wisdom: That 2-3 days of watering until roots establish might feel like a lot, but here's what I've learned: use a rain gauge or tuna can to measure your watering. Fill it with water—when the soil feels like that can when you squeeze it, you're at the perfect moisture level. Overwatering is just as bad as underwatering for these delicate seedlings. For containers, I always use saucers to catch excess water and prevent root rot.
Seasonal Maintenance: The instructions mention leaving seed pods, but here's the secret: mark those plants with small flags or paint dots on stakes so you remember which ones to leave. In fall, I collect some seed pods to store in paper bags for next year's planting. This gives you a head start and ensures you always have the right varieties for your climate. Plus, it's a great activity to do with kids!
Pro Tips for Monarch Seed Mix
- Creating a thriving monarch habitat takes a little strategy—here's how to maximize your success from the start.
- Sunlight Strategy: The 4 hours of morning sun mentioned in Step 1 is non-negotiable for monarchs, but here's the thin...
- Soil Prep Pro Tip: When loosening that 6-8 inches of soil in Step 2, don't just scratch the surface—aim to break up c...
Frequently asked questions
Got questions about monarch seed mixes? You’re not alone!
Here are answers to the most common queries to help you grow a pollinator paradise with confidence.
When is the best time to plant monarch seed mix?
For spring planting, sow seeds after the last frost when soil is at least 60°F (15°C). Fall planting (6–8 weeks before first frost) is ideal—cooler temps improve germination. Avoid planting in extreme heat or drought. Pro tip: A light mulch (like straw) retains moisture and protects tender seedlings.
How long does it take for monarch seed mix to bloom?
Most varieties bloom in 60–90 days from planting, but some perennials (like milkweed) may take 2–3 years to reach full maturity. Annuals (e.g., cosmos, zinnias) deliver fast color, while perennials offer season-after-season rewards. Patience pays off!
Will monarch seed mix attract other pollinators besides monarchs?
Monarch seed mixes include bee-friendly flowers (e.g., coneflowers, black-eyed Susans) and butterfly magnets (like butterfly weed). You’ll likely see honeybees, hummingbirds, and beneficial wasps too. Diversity = more pollinator parties!
How often should I water monarch seed mix after planting?
Keep soil consistently moist (not soggy) for the first 2–3 weeks—water lightly daily if rain is scarce. Once seedlings sprout, water deeply 2–3 times per week (early morning is best). Drip irrigation or soaker hoses prevent fungal issues. Let thirsty roots do the work!
What if my monarch seed mix doesn’t germinate?
Try these fixes:
- Check seed viability: Test a few seeds in damp paper towels—if none sprout in 7–10 days, they may be old.
- Scarify seeds: Lightly nick hard-coated seeds (like milkweed) with sandpaper to help water penetrate.
- Adjust conditions: Some seeds need cold stratification (refrigerate moist seeds for 4–6 weeks before planting).
- Try a fresh batch: Store-bought mixes often include annuals that germinate faster.
Wrapping up and next steps
Transforming your lawn into a monarch magnet with a simple seed mix is one of the most rewarding ways to support pollinators—and it’s easier than you think! 🌸 Whether you’re a seasoned gardener or just starting, every seed planted today helps create a brighter, buzzing ecosystem tomorrow. Ready to take action? Grab your gloves, pick your favorite mix, and start sowing—your local monarchs (and future generations) will thank you!
Next step: Visit your local nursery or order online to get your monarch seed mix today. Then, mark your calendar for spring or fall planting—your garden’s pollinator party is just around the corner! 🌱