
Lawn
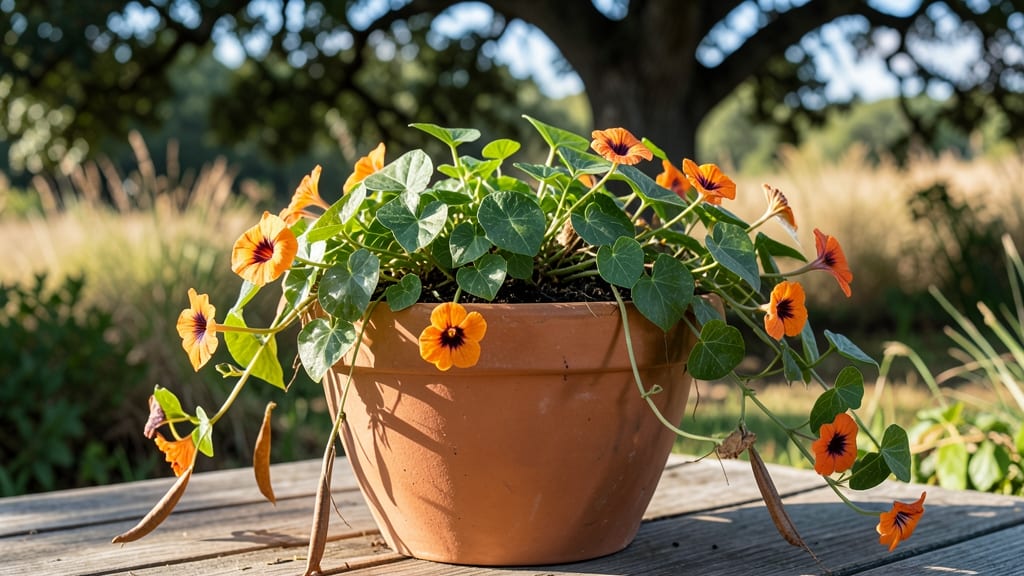
Black-eyed Susan vine seed pods hold the secret to next year's garden. 🌱 The moment those papery pods turn brown and begin popping open, you've got a 30-day window to collect them before the seeds scatter or lose viability.
I've learned the hard way—waiting too long means watching your hard-earned seeds vanish into the wind.
Gathering them is simple: just twist the pods gently from the vine and place them in a breathable container. The real magic happens during the drying process, where proper airflow prevents mold while preserving that all-important germination power.
Most gardeners skip this step, but it's what separates a handful of seeds from a thriving new vine.
Once dried, you'll have seeds that sprout with 80-90% success when planted in warm soil. The key is patience—these vines grow fast, but they need consistent moisture and full sun to reach their full, dramatic potential.
I've watched mine climb 10 feet in a single season, transforming bare walls into lush green curtains.
For those in cooler climates, store the dried pods in a cool, dark place until spring. The seeds keep well for up to two years, though fresh seeds always perform best.
This method works whether you're growing in containers or letting the vine sprawl across a trellis—just be ready for the show it'll put on next summer.
📚 In This Guide
- What you need
- Instructions
- Tips and common mistakes
- Wrapping up and next steps
What you need
- ● Fresh black-eyed Susan vine seed pods – Harvest them when they’re fully mature but before they split open (aim for golden-brown color and slightly papery texture). Collect at least 10–20 pods for a good stash.
- ● Brown paper bags (2–3) – Use unbleached, kraft-style bags (no plastic!) to allow airflow. Size: ~12" x 15" (large enough to hold pods in a single layer).
- ● Twine or rubber bands – To securely tie the bag openings shut.
- ○ Drying rack or mesh screen – Optional but helpful for pods that need extra airflow (e.g., a window screen or cooking rack placed over a tray).
- ● Small envelopes or airtight containers – For long-term storage (e.g., pill boxes or glass jars with silica gel).
- ● Labeling supplies – Masking tape + marker (to note the harvest date and variety).
- ● Dry, well-ventilated space – Choose a spot with 60–70°F (15–21°C) and low humidity (e.g., a garage, shed, or pantry). Avoid direct sunlight or damp areas.
- ● Time – Allow 2–4 weeks for pods to dry completely (patience is key!).
- ● Dehumidifier – If your climate is humid, place one near your drying area to speed up the process.
- ● Fan on low – Gently circulate air around the pods (but avoid blowing directly on them).
- ● Seed viability test kit – For advanced gardeners who want to verify germination rates after drying.
- ● Desiccant packets – Add to storage containers to absorb moisture over time.
How to dry black-eyed Susan vine seed pods for maximum germination
This simple drying method keeps seeds viable for years—no fancy equipment needed.
🌿 Step 1: Harvest Pods at Peak Maturity
Pick seed pods when they turn light tan and begin cracking open naturally. If you harvest too early, seeds won't be fully developed; too late, and they'll spill out. I like to collect pods on a dry, sunny morning when dew has evaporated—this prevents mold from starting during drying.
Gently twist pods from the vine and place them in a paper bag (plastic traps moisture). Leave a few pods on the vine as a reference—if they're still green, wait another week. The goal is to capture seeds at their most dormant yet viable state.
⏰ Step 2: Air-Dry Pods for 2-3 Weeks
Spread pods in a single layer on a mesh screen or paper towel in a warm, dry, shaded spot (65-75°F). Avoid direct sunlight—it can overheat pods and reduce germination. I use a covered porch or basement shelf where airflow circulates but dust stays out.
Check pods weekly. They're ready when they rattle when shaken (seeds inside are loose) and the outer shell turns brown and papery. If moisture remains, extend drying time—moldy pods mean lost seeds. This step is critical: proper drying preserves germination for up to 5 years.
🪴 Step 3: Extract and Store Seeds Properly
Once pods are completely dry, crush them between your fingers over a white paper plate—this makes seeds easy to spot against the light background. Discard any seeds with holes or discoloration. A good batch yields 40-60 seeds per pod, though yield varies by plant health.
Store seeds in an airtight container with a silica gel packet (absorbs excess moisture). Label with the date—seeds retain 90% viability for 3 years if stored this way. Keep containers in a cool, dark place (like a pantry) to prevent premature sprouting.
💧 Step 4: Test Germination Before Planting
Before sowing, test a few seeds by placing them between damp paper towels in a sealed plastic bag. Keep them in warmth (70-75°F) and check daily. Germination should occur in 7-14 days—if seeds sprout, the rest are ready for planting. If none sprout after 2 weeks, the batch may be old or improperly dried.
This test saves time and frustration. I always plant 2-3 seeds per cell in my seed trays—even with high viability, not all seeds germinate. Use a sterile seed-starting mix and keep it moist (not soggy) until sprouts appear.
Tips & tricks for perfect black-eyed Susan vine seed pod preservation
Here's what I've learned from years of drying these seeds—simple tricks that make all the difference.
Harvest Timing is Everything: The light tan color is your cue, but don't wait until pods are fully open. I've found that harvesting when they're just starting to crack gives me the best balance of seed development and pod integrity. If you miss this window, seeds may spill out before you can collect them.
Drying Environment Matters: While the instructions mention 65-75°F, I've noticed that humidity plays a bigger role than temperature alone. If your space feels damp, add a small fan nearby to improve airflow—this helps prevent mold even if temps are perfect. A dehumidifier can work wonders if you're in a naturally humid climate.
Storage Hack for Long-Term Viability: Beyond the silica gel packet, I add a tiny packet of rice to my seed containers. The rice naturally absorbs any lingering moisture over time, giving you that extra year of viability beyond the 3-year mark. Just make sure to use uncooked, dry rice—cooked rice can introduce unwanted bacteria.
Germination Test Shortcut: Instead of waiting the full 14 days for your germination test, check after 7 days. If you see any sprouts by then, the rest of your batch is likely good to go. If nothing happens by day 7, extend to 14 days—but if you still get no sprouts, it's time to try a new batch.
Pro Tips for Black Eyed Susan Vine Seed Pods
- Here's what I've learned from years of drying these seeds—simple tricks that make all the difference.
- Harvest Timing is Everything: The light tan color is your cue, but don't wait until pods are fully open. I've found t...
- Drying Environment Matters: While the instructions mention 65-75°F, I've noticed that humidity plays a bigger role th...
Frequently asked questions
Got questions about harvesting and preserving Black Eyed Susan vine seed pods? You’re not alone! Here are some of the most common queries—plus practical answers to keep your seeds viable and ready for planting.
When is the best time to harvest Black Eyed Susan vine seed pods?
The ideal time is when the pods turn brown and papery but before they split open. This usually happens in late fall or early winter, depending on your climate. Harvesting too early means seeds aren’t mature; waiting too long risks losing them to wildlife or wind.
How long do dried Black Eyed Susan vine seed pods stay viable?
When stored properly in a cool, dry place (like a sealed container with silica gel), these seeds can stay viable for 1–2 years. For best results, label pods with the harvest date and test germination annually by planting a few seeds.
Can I use seed pods from last year’s vine? Will they still grow?
Yes! If stored correctly, last year’s pods can still yield healthy plants. However, germination rates may drop after 1–2 years. To boost success, soak pods in warm water for 24 hours before planting, mimicking natural spring rains.
What if my seed pods mold or develop black spots?
Mold or dark spots signal excess moisture or poor airflow during drying. To salvage seeds, spread pods on a clean, dry towel in a sunny spot for 2–3 days, then transfer to a breathable paper bag. Discard any pods with fuzzy mold to prevent spoilage.
Are there alternatives if my Black Eyed Susan vine doesn’t produce seed pods?
If your vine skips flowering or pod formation, try these fixes:
- Pollination boost: Gently shake the vine during peak bloom (late summer) to encourage cross-pollination.
- Sunlight check: Ensure it gets 6+ hours of sun daily—partial shade can reduce flowering.
- Fertilizer tweak: Use a low-nitrogen, high-phosphorus fertilizer (like 5-10-10) to promote blooms over foliage.
Wrapping up and next steps
Mastering the art of drying Black Eyed Susan vine seed pods ensures you’ll have vibrant blooms year after year! With the right tools and patience, you can preserve those precious seeds for future gardening adventures.
Whether you’re a seasoned gardener or just starting out, this simple process opens the door to endless possibilities—think lush vines, cheerful flowers, and a garden that thrives with minimal effort.
Now that you’re equipped with the know-how, grab those pods and get drying! 🌱 Once your seeds are ready, why not share your success with fellow plant lovers? Tag us in your garden updates or experiment with new planting spots—your green thumb is about to shine even brighter!