
Lawn
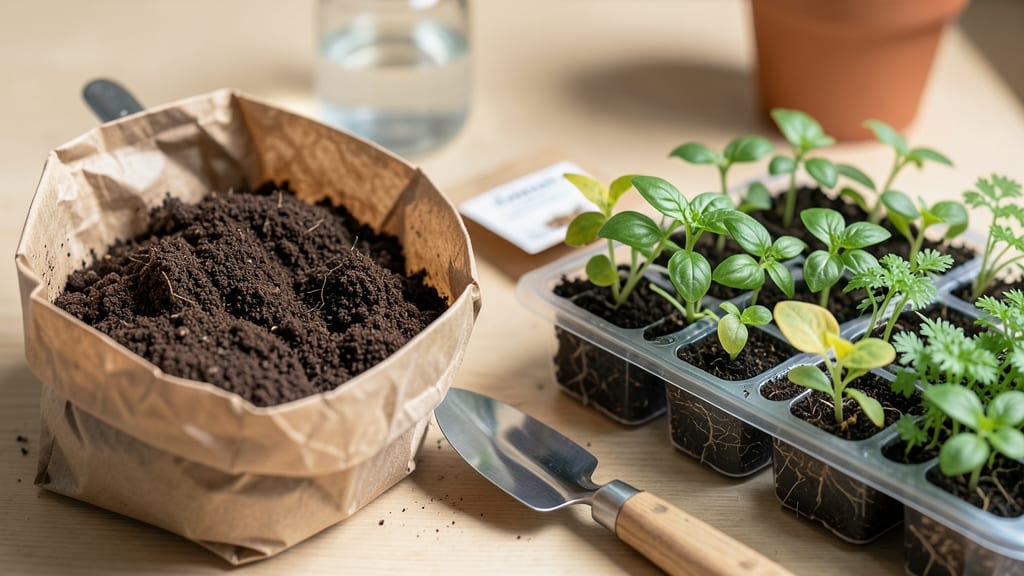
The right seed starter potting soil makes the difference between seedlings that pop up in days and ones that sulk in the tray for weeks. 🌱 I’ve tested everything from cheap peat mixes to premium organic blends, and the best ones share three key traits: they’re lightweight, moisture-retentive, and sterile—no compacted dirt or mystery nutrients that confuse tiny roots.
Most gardeners grab whatever’s on sale, but that’s a gamble. Peat-based mixes dry out fast unless you baby them, while coco coir holds moisture too long and risks rot.
I’ve settled on a 50-50 blend of coco coir and perlite for my trays—it stays fluffy, drains just enough, and gives those first roots room to stretch without fighting for air. Sterilization is non-negotiable too; even a hint of old soil pathogens can derail your whole batch.
What you’ll end up with are stocky, dark-green seedlings that outpace their neighbors by a week. They transplant smoother because the roots aren’t tangled in dense soil, and you’ll avoid the dreaded “leggy” look from overwatering or poor light.
The payoff? Stronger plants that hit the garden ready to grow, not struggle to catch up.
This works for veggies, flowers, and herbs alike—just adjust the moisture based on what you’re growing. Start with a sterile base, keep it damp (not soggy), and you’ll be snipping those first true leaves in no time. No more guessing games; just fast, reliable germination every time.
📚 In This Guide
- What you need
- Instructions
- Tips and common mistakes
- Wrapping up and next steps
What you need
- ● Base Soil: 40% peat moss or coco coir (for moisture retention and aeration)
- ● 30% perlite or vermiculite (to improve drainage and lighten the mix)
- ● Nutrients: 20% compost or worm castings (for organic nutrients)
- ○ 10% sand (coarse horticultural sand, optional but helpful for drainage)
- ● Tools: Large mixing container (bucket or wheelbarrow)
- ● Garden trowel or shovel
- ● Measuring cups or scale (for precision)
- ● Gloves (to keep hands clean!)
- ● Slow-release fertilizer (e.g., 5-10-5 or organic options like fish emulsion)
- ● Mycorrhizal fungi (boosts root development)
- ● Biochar (improves water retention and microbial activity)
- ● Seed starter pellets (pre-mixed convenience for beginners)
How to mix the perfect seed starter potting soil
Fast germination starts with the right soil mix—here’s how I blend lightweight loam for roots that pop through in days.
🌱 Step 1: Gather Your Base Materials
Start with 50% peat moss or coconut coir—this gives your mix that airy texture seeds need to breathe. I measure it out in a wheelbarrow or large bin so I can see the proportions clearly. Next, add 25% perlite or vermiculite for drainage; these little white granules keep roots from sitting in soggy soil.
Don’t skip the 25% compost or worm castings—this is where the magic happens. The compost feeds hungry seedlings right from the start, while worm castings add gentle nutrients without burning tender roots. I always sift the compost first to remove any big chunks that could smother seeds.
💧 Step 2: Mix Until Uniform and Fluffy
Use your hands or a garden fork to combine everything until it looks like light, crumbly cake batter. You want big air pockets—poke the mix with your finger and it should feel like a sponge, not packed dirt. If it’s too dense, add a little more perlite.
Here’s the thing—this mix should barely hold its shape when squeezed. If it clumps tightly, you’ve got too much peat or not enough perlite. I test mine by filling a small container, pressing down lightly, then lifting it. If it collapses, it’s ready. If it stays in a hard block, mix in more perlite until it’s just right.
☀️ Step 3: Moisten Just Enough to Wake Up Seeds
Now for the tricky part—water. Fill a spray bottle with lukewarm water (cold water shocks seeds) and mist the mix until it’s damp but not dripping. You want it to feel like a wrung-out sponge: squeeze a handful and a few drops should come out, but it shouldn’t be wet enough to leave puddles.
I like to let the mix sit for 10 minutes after watering so the moisture distributes evenly. Then I give it one final gentle stir. Overwatering now will drown your seeds before they even sprout, so resist the urge to soak it. The goal is to give seeds a drink, not a bath.
✂️ Step 4: Test and Adjust for Germination Speed
Fill a seed tray with your mix and press it down lightly—just enough to remove air gaps but not compact it. Drop a few seeds on top and cover them to the depth recommended on the packet (usually twice the seed’s width). If your mix is perfect, those seeds will push through in 3-7 days.
If germination takes longer than a week, your mix might be too dense. Add a little more perlite and remix. If seeds rot before sprouting, you’ve overwatered—next time, use less water and let the mix dry out slightly between waterings. This is where the fast results happen, so don’t rush it.
Tips & tricks for perfect seed starter potting soil
Here's what nobody tells you about making this mix work like a dream—your seeds will thank you.
Ingredient Intel: For even faster germination, swap out half the peat moss for coconut coir—it holds moisture better while still staying light. I've found that adding 1 tablespoon of lime per gallon of mix (optional) helps balance acidity, especially if your compost is heavy. The key is keeping that 50-25-25 ratio—too much compost makes it gummy, too little and your seedlings starve.
Mixing Technique: When testing your mix in Step 2, try this trick: Fill a small plastic cup halfway, press down gently, then lift. If it holds its shape but crumbles easily when poked, you've nailed it. If it stays in a solid block, you need more perlite. I like to mix everything in a clean wheelbarrow first, then transfer to trays—it's easier to see the texture when it's spread out.
Watering Wisdom: That 10-minute wait after watering in Step 3 is crucial—it lets moisture distribute evenly without creating soggy pockets. I use a spray bottle with a fine mist setting to avoid clumping. Pro tip: If your mix feels too dry after the 10 minutes, add just a teaspoon of water at a time until it reaches that wrung-out sponge consistency. Overwatering here is the #1 reason seeds fail to sprout.
Germination Speed Hack: To test your mix's readiness in Step 4, plant a few fast-sprouting seeds like radishes or lettuce first. If they emerge in 3-4 days, your mix is perfect. If they take longer than a week, remix with an extra 5% perlite. I've found that covering seed trays with clear plastic wrap creates a mini greenhouse effect—just remove it once sprouts appear to prevent mold.
Pro Tips for Seed Starter Potting Soil
- Here's what nobody tells you about making this mix work like a dream—your seeds will thank you.
- Ingredient Intel: For even faster germination, swap out half the peat moss for coconut coir—it holds moisture better ...
- Mixing Technique: When testing your mix in Step 2, try this trick: Fill a small plastic cup halfway, press down gentl...
Frequently asked questions
Got questions about seed starter potting soil?
You’re not alone! Here are some of the most common queries—and straightforward answers—to help you grow confidently.
What’s the difference between seed starter soil and regular potting soil?
Seed starter soil is lighter and more sterile than regular potting mix, designed to promote fast germination and delicate root growth. It has finer particles, better water retention, and fewer nutrients (since seedlings don’t need heavy feeding yet). Think of it as a cozy blanket for tiny sprouts!
How long can I store unused seed starter potting soil?
Unopened bags last 1–2 years in a cool, dry place (like a garage or basement). Once opened, use it within 3–6 months for best results. If it dries out or develops mold, toss it—fresh soil ensures healthier starts. Pro tip: Store it in an airtight container to extend shelf life!
Can I reuse seed starter soil for multiple planting seasons?
Reusing soil isn’t recommended because it can harbor disease, pests, or depleted nutrients. However, if you sterilize it (bake at 200°F for 30+ minutes or freeze for 3 days), you can repurpose it once. For best results, buy fresh each season—your seedlings will thank you!
Why does my seed starter soil sometimes dry out too fast?
Fast-drying soil usually means it’s too coarse or lacks organic matter. Mix in perlite or coconut coir (10–20%) to improve moisture retention, or water gently from the bottom (using a tray) to avoid disturbing seeds. Pro tip: Cover trays with plastic wrap to lock in humidity—just remove it once sprouts emerge!
What’s a budget-friendly alternative to seed starter potting soil?
DIY blends work great! Mix 50% peat moss or coco coir, 30% perlite/vermiculite, and 20% compost (or worm castings). Avoid garden soil—it’s too dense and may contain weeds/seeds. For a zero-cost option, shred newspaper (unglazed) and compost it with yard waste for a lightweight base.
Wrapping up and next steps
Choosing the right seed starter potting soil is your first step toward a thriving garden—lightweight loam packed with nutrients ensures fast germination and strong root growth. 🌱 Whether you're a beginner or a seasoned gardener, the key is balance: airy enough for roots to breathe but moist enough to support early development.
Now that you’re armed with the knowledge, it’s time to get your hands dirty!
Your next step? Grab your soil mix, fill those seed trays, and watch your tiny seeds transform into lush seedlings. Happy planting! 🌿