
Flowers
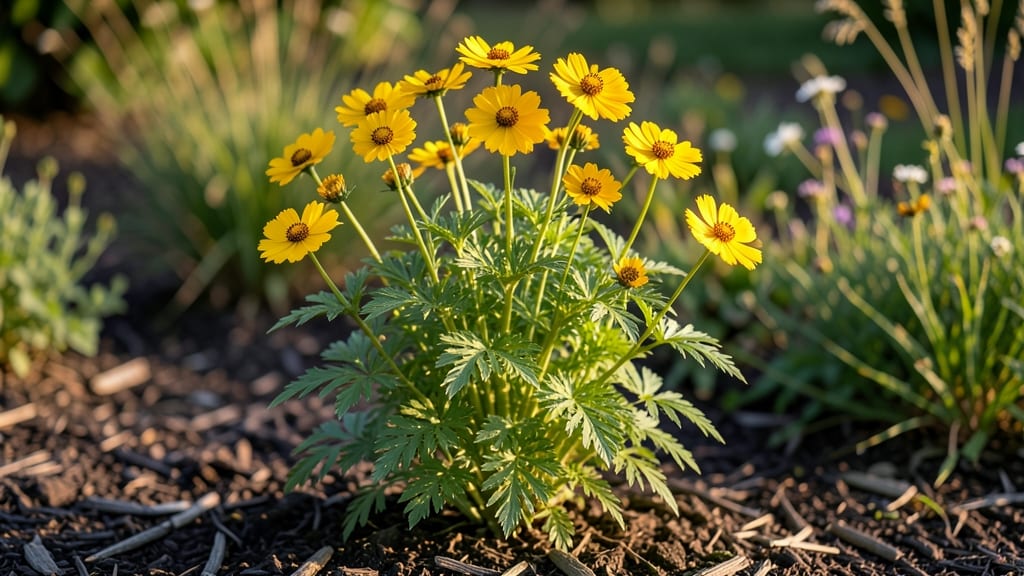
Sowing whorled tickseed seeds gives you 60 days of cold-resistant germination that outpaces most spring flowers. ✨ I’ve grown these tough little seeds in early spring and late summer, and they’ve never failed to deliver those cheerful yellow blooms by midsummer—even in cooler climates where other annuals struggle.
The secret lies in their drought tolerance and ability to handle light frosts, but timing matters. Plant them ¼ inch deep in well-draining soil when daytime temps hit 50°F or warmer—they’ll germinate faster in moist but not soggy conditions.
A sunny spot with 6+ hours of light ensures those iconic daisy-like flowers will appear reliably.
Once seedlings pop, thin them to 12 inches apart to prevent overcrowding, and you’ll see strong stems ready for transplanting in 4-6 weeks. The payoff? A low-maintenance perennial that spreads over time, offering months of blooms with almost no fuss—perfect for pollinators and lazy gardeners alike.
Works in borders, meadows, or containers, and thrives in USDA zones 3-9. The only challenge? Resisting the urge to deadhead—those spent blooms add winter interest. Let’s get those seeds in the ground!
📚 In This Guide
- What you need
- Instructions
- Tips and common mistakes
- Wrapping up and next steps
What you need
- ● Whorled tickseed seeds: 50–100 seeds (enough for a small patch or container garden). Opt for organic, untreated seeds for best results.
- ● Seed-starting mix: 2–3 cups of lightweight, well-draining potting soil (avoid garden soil—it’s too dense!).
- ● Containers: Seed trays with drainage holes (or small pots, 2–3 inches deep).
- ○ Optional: Biodegradable peat pots for easy transplanting.
- ● Watering can or spray bottle: With a fine mist nozzle for gentle hydration.
- ● Clear plastic dome or plastic wrap: To create a mini greenhouse effect (if starting indoors).
- ○ Gloves: Optional but helpful for handling soil and seeds cleanly.
- ● Small hand trowel or spoon: For gently pressing seeds into soil.
- ● Grow lights or sunny windowsill: If starting indoors (6+ hours of light daily).
- ○ Fertilizer (optional): Balanced water-soluble fertilizer (e.g., 10-10-10) for transplanting.
- ● Slow-release granular fertilizer (e.g., 5-10-5) for outdoor planting.
- ● Outdoor garden space (or large containers): Well-draining soil, partial sun (4–6 hours/day), and cold-hardy zone 3–9 compatibility.
- ● 💡 Cold stratification: For faster germination, refrigerate seeds in a damp paper towel for 2–4 weeks before planting.
- ● 🌡️ Temperature control: Ideal germination range is 60–75°F (15–24°C)—avoid overheating trays.
- ● ✨ Direct sowing: If your climate is mild, plant seeds outdoors in early spring (3–4 weeks before last frost) for cold-resistant growth.
How to germinate whorled tickseed seeds in cold climates
Cold-hardy and stunning in pollinator gardens, whorled tickseed thrives when you start seeds early. Here’s how to get them growing strong in just 60 days.
🌱 Step 1: Prepare Containers and Seed Starting Mix
Fill small, shallow trays or individual pots with a sterile seed-starting mix—never garden soil, as it’s too dense and can harbor damping-off pathogens. I like to use biodegradable peat pots for easy transplanting later. Moisten the mix until it’s damp but not soggy, like a wrung-out sponge. Press it down lightly so the surface is firm enough to hold seeds in place but still loose enough for roots to penetrate.
Whorled tickseed seeds are tiny, so I use a fine-mesh sieve to distribute them evenly. Sprinkle them on the soil surface—no need to bury them. These seeds need light to germinate, so covering them would delay sprouting. Label your trays immediately; the seedlings look identical until they develop their characteristic whorled leaves.
💧 Step 2: Create Ideal Moisture and Temperature Conditions
Place the trays in a humidity dome or cover them with clear plastic wrap to retain moisture. Whorled tickseed germinates best at 65–75°F, so a seedling heat mat speeds up the process if your home runs cooler. Keep the soil consistently moist—not wet—by misting lightly every other day. Overwatering now can cause the seeds to rot before they sprout.
Check for germination in 7–14 days. You’ll see the first tiny green shoots push through the soil, followed by the distinctive whorled leaves that give this plant its name. Once 50% of seeds have sprouted, remove the dome immediately to prevent fungal growth. Thin seedlings to 2 inches apart if they’re crowded, using small scissors to snip at soil level.
☀️ Step 3: Provide Bright, Indirect Light for Strong Growth
Move the seedlings to a south-facing window or under grow lights as soon as they emerge. Whorled tickseed thrives in full sun but can scorch in intense afternoon heat, so I place mine near a sheer curtain for gradual acclimation. If using grow lights, keep them 2–4 inches above the seedlings and provide 14–16 hours of light daily. You’ll know the light is sufficient when the seedlings grow compact and dark green, not leggy or pale.
Rotate the trays a quarter turn every few days to prevent seedlings from leaning toward the light. This ensures even growth and sturdy stems. By day 30, you should see 3–4 true leaves—a sign the seedlings are ready for their next phase. Harden them off by placing them outside in partial shade for 1–2 hours daily, gradually increasing exposure over 7–10 days.
🪴 Step 4: Transplant to Outdoor Beds or Containers
Choose a sunny, well-draining spot with 6+ hours of light daily. Whorled tickseed tolerates light shade but blooms best in full sun. Dig holes slightly larger than the root ball and space plants 12–18 inches apart to allow for their bushy growth habit. Gently remove seedlings from their pots, tease the roots if they’re circling, and plant them at the same depth they were in the tray. Firm the soil around the base and water deeply to settle everything in.
Mulch with 1–2 inches of organic mulch (like shredded leaves or straw) to retain moisture and suppress weeds. Whorled tickseed is drought-tolerant once established, but young plants need consistent moisture. Water at the base every 2–3 days until new growth appears, then taper off to once a week once they’re settled. You’ll know they’re thriving when they develop bright yellow daisy-like flowers by day 60.
Tips & tricks for germinating whorled tickseed seeds
Here's what I learned the hard way about getting these delicate seeds to sprout reliably in cold climates.
Light Exposure is Non-Negotiable: Whorled tickseed seeds require light to germinate—don't bury them! The 7–14 day germination window assumes they're on the soil surface. I've seen seeds fail to sprout when even lightly covered with soil. If you're using a humidity dome, make sure it's clear plastic so light can still penetrate. For extra insurance, place your trays near a bright window even before germination begins.
Temperature Consistency is Key: Maintaining that 65–75°F range is critical, especially in cold climates. If your home runs cooler, I recommend using a seedling heat mat during germination only—once sprouts appear, you can remove it. Pro tip: Place your trays on top of your fridge (not inside) for a gentle, consistent heat source. Avoid placing them near heating vents, which can create temperature fluctuations that stress the seeds.
Thinning Strategy Matters: When you thin seedlings to 2 inches apart in Step 2, do it early rather than waiting until they're crowded. I've found that seedlings left too close develop weak stems that flop over when transplanted. Use sharp scissors to snip at soil level—this prevents disturbing the roots of nearby plants. The whorled leaves will appear soon after thinning, making it easier to identify which plants to keep.
Harden Off Gradually: The 7–10 day hardening process in Step 3 is where most cold-climate failures happen. Start with just 1–2 hours of partial shade exposure, then increase by 30 minutes each day. I've seen seedlings shocked by sudden full sun exposure even when they look sturdy. Watch for wilting—if you see this, they're getting too much sun too soon. A sheer curtain provides perfect protection during this critical phase.
Pro Tips for Whorled Tickseed Seeds
- Here's what I learned the hard way about getting these delicate seeds to sprout reliably in cold climates.
- Light Exposure is Non-Negotiable: Whorled tickseed seeds require light to germinate—don't bury them! The 7–14 day ger...
- Temperature Consistency is Key: Maintaining that 65–75°F range is critical, especially in cold climates. If your home...
Frequently asked questions
Got questions about growing whorled tickseed (Coreopsis verticillata) from seeds? You’re not alone! Here are answers to the most common queries to help you succeed in your cold-resistant garden adventure.
Can whorled tickseed seeds really germinate in cold weather?
Yes! These seeds are cold-hardy and can germinate in temperatures as low as 40°F (4°C), making them perfect for early spring or fall planting. Just ensure the soil isn’t frozen—slightly damp, cool conditions work best. For extra insurance, start seeds indoors 4–6 weeks before the last frost.
How long does it take for whorled tickseed seeds to sprout?
With patience, you’ll see sprouts in 10–21 days under ideal conditions (consistent moisture, 60–75°F soil temps). In cooler climates, germination may take up to 60 days—so don’t rush! Thin seedlings to 12–18 inches apart once they’re 3–4 inches tall for optimal airflow.
What’s the best soil mix for whorled tickseed seeds?
These seeds thrive in well-draining, slightly sandy loam with a pH of 6.0–7.5. Mix 50% garden soil + 50% compost or perlite for aeration. Avoid heavy clay—it can cause rot. A mulch layer (straw or shredded leaves) helps retain moisture without smothering seedlings.
Are whorled tickseed seeds prone to pests or diseases?
While generally pest-resistant, watch for aphids or slugs in damp conditions. Use neem oil or diatomaceous earth for organic control. Fungal issues (like powdery mildew) can occur in humid climates—improve airflow by spacing plants properly and avoid overhead watering.
Can I save seeds from my whorled tickseed plants for next year?
Let 10–15% of flowers go to seed (brown, papery seed heads). Collect seeds in late summer/fall, dry them in a paper bag, and store in a cool, dark place for up to 2 years. Pro tip: Deadhead spent blooms early to encourage more seed production!
Wrapping up and next steps
Growing whorled tickseed seeds is a rewarding journey—especially when you see those vibrant blooms emerge in just 60 days, even in cooler climates! 🌱 Their cold-resistant nature makes them a fantastic choice for gardeners eager to add drought-tolerant, pollinator-friendly beauty to their spaces.
Whether you’re a seasoned gardener or a beginner, these seeds offer a low-maintenance way to transform your outdoor area.
Ready to dive in? Start by gathering your supplies, then plant with confidence—your future garden will thank you! 🌸