
Lawn
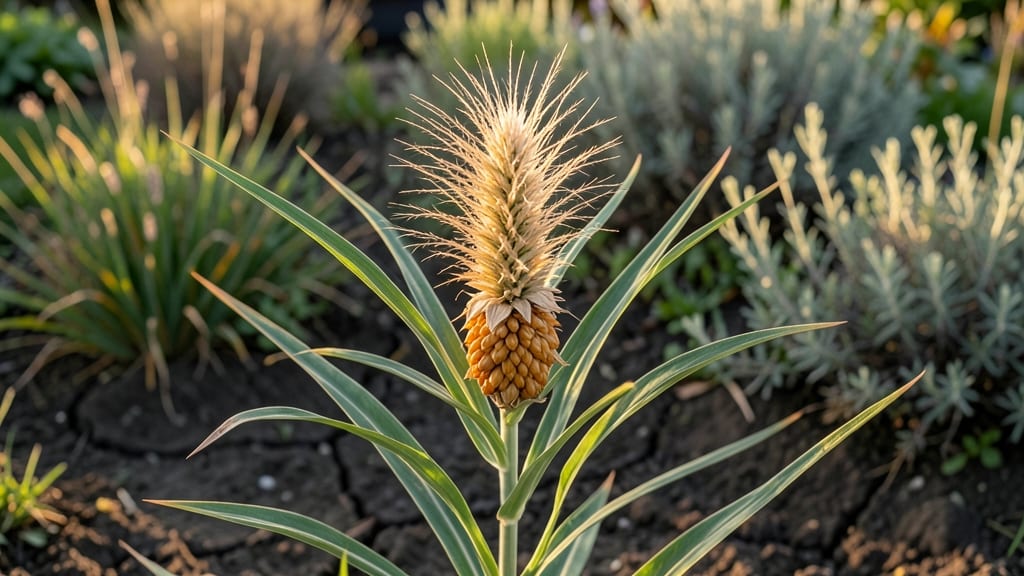
Your sorghum seed heads are nature’s fragrant masterpiece—golden plumes that sway in the breeze, ready to be preserved for next year’s garden drama. 🌾 I’ve learned that the key to drying them properly isn’t just patience; it’s timing, airflow, and a little know-how to keep those delicate seed clusters intact.
Skip this step, and you’ll end up with brittle stems or moldy seeds that won’t sprout—or worse, won’t even look good in dried arrangements.
First, harvest when the seed heads turn a deep, rich tan and the seeds rattle easily inside the plumes. Cut stems early in the morning when moisture is lowest, then bundle them upside-down in small groups with rubber bands or twine.
Hang them in a dry, well-ventilated spot—like a garage or shed—where they’ll get indirect sunlight and air circulation. Think of it like making homemade hay, but for your ornamental garden.
After about 2-3 weeks, the seed heads will be completely dry and crisp to the touch. Gently brush off any remaining chaff or debris, then store them in paper bags or breathable fabric sacks to keep pests at bay.
These dried plumes will perfume your space with a sweet, earthy scent and bring next year’s garden to life before the first seedling even sprouts.
Pro tip: If you’re growing sorghum for grain, let the seed heads stay on the stalk until fully mature and dry in the field—then thresh them by hand or with a flail.
For ornamental varieties, the dried seed heads make stunning centerpieces that last for months. Either way, you’re turning summer’s harvest into a winter garden treasure.
📚 In This Guide
- What you need
- Instructions
- Tips and common mistakes
- Wrapping up and next steps
What you need
- ● Mature sorghum plants (with fully developed seed heads—look for dry, golden-brown clusters).
- ● Sharp pruning shears or garden scissors (for clean cuts without damaging the stalk).
- ● Brown paper bags or breathable fabric sacks (1–2 per seed head; avoid plastic to prevent moisture buildup).
- ● Drying rack or mesh screen (to elevate seed heads off the ground while they dry).
- ○ Fan or dehumidifier (optional) (for faster drying in humid climates).
- ● Glove (to protect hands from sharp seed head edges).
- ● Labeling tags & marker (to note varieties and harvest dates).
- ● Air-tight storage containers (glass jars or sealed plastic bins with silica gel packets for long-term storage).
- ● Seed cleaning tray or fine mesh sieve (to remove debris before storage).
- ○ Thermometer/hygrometer (optional) (to monitor storage conditions—ideal temp: 50–60°F, humidity: below 40%).
How to harvest, dry, and store sorghum seed heads for next season
Skip the guesswork—here’s my foolproof method for preserving sorghum’s fragrant seed heads year after year.
🌿 Step 1: Harvest Seed Heads at Peak Maturity
Wait until the seed heads turn a rich golden-brown color and the seeds rattle when shaken—this means they’re fully mature and ready for harvest. I like to do this on a dry morning after the dew has evaporated, because damp seed heads take longer to dry properly.
Use clean, sharp pruning shears to cut the entire seed head from the stalk, leaving about 2 inches of stem attached. This extra stem helps support the seed head during drying. Harvest early in the day when the plants are still crisp, and avoid cutting during rain or high humidity.
💧 Step 2: Dry the Seed Heads Properly
Spread the harvested seed heads in a single layer on a clean, dry surface in a well-ventilated area. I use a mesh screen or an old window screen to allow airflow on all sides. Avoid direct sunlight, which can overheat the seeds and reduce their viability.
Turn the seed heads every 2-3 days to ensure even drying. They’re ready when the seeds inside are hard and dry to the touch, and the entire head feels light in your hand. This usually takes about 2-3 weeks, depending on your climate and humidity levels.
✂️ Step 3: Clean and Separate the Seeds
Once fully dried, gently rub the seed heads between your hands or use a clean cloth to remove loose seeds. I like to do this over a large tray or sheet of paper to catch any seeds that fall. Discard any seeds that appear shriveled, discolored, or damaged.
For extra clean seeds, you can spread them out on a baking sheet and let them air-dry for another 1-2 days. This step ensures you’ll have the highest-quality seeds for planting next season.
🪴 Step 4: Store Seed Heads or Seeds Properly
If you plan to use the entire seed head for decoration or crafts, store them in a cool, dry place away from direct sunlight. I keep mine in a breathable fabric bag or a cardboard box with holes punched in the sides to allow airflow.
For seeds meant for planting, transfer them to an airtight container like a glass jar or a sealed plastic bag. Label the container with the date and variety, then store it in a dark, cool place—like a pantry or fridge. Properly stored seeds remain viable for up to 3-5 years.
Tips & tricks for perfectly preserved sorghum seed heads
Took me years to perfect these tricks—here's how to avoid common pitfalls and get the best results every time.
Harvest Timing: The golden-brown color and that telltale rattle are your best indicators of maturity. I've learned the hard way that harvesting too early means seeds won't dry properly, while waiting too long can cause them to shatter when you try to clean them. That 2-inch stem attachment in Step 1 isn't just for show—it's what keeps your seed heads stable during the drying process, preventing them from toppling over and creating uneven drying conditions.
Drying Environment: Ventilation is everything during the 2-3 week drying period. I've tried using plastic bins, but condensation builds up and ruins the seeds. Instead, use a mesh screen or window screen in a spot with good airflow—like a covered porch or garage with fans running. If you notice any mold starting to form, move the seed heads immediately to a drier location. The goal is to mimic natural drying conditions without the risk of overheating.
Seed Quality Check: When you're ready to clean the seeds in Step 3, do a quick float test—fill a bowl with water and drop in a handful of seeds. Healthy seeds will sink while any that float are likely damaged or hollow. This simple test saves you from planting low-quality seeds later. For that extra cleanliness step, I've found using a fine-mesh sieve works better than baking sheets for catching stray seeds during the 1-2 day air-drying period.
Pro Tips for Sorghum Seed Head
- Took me years to perfect these tricks—here's how to avoid common pitfalls and get the best results every time.
- Harvest Timing: The golden-brown color and that telltale rattle are your best indicators of maturity. I've learned th...
- Drying Environment: Ventilation is everything during the 2-3 week drying period. I've tried using plastic bins, but c...
Frequently asked questions
Got questions about harvesting, drying, or storing sorghum seed heads? You’re not alone! Here are answers to the most common queries to help you preserve those fragrant blooms for next year’s garden.
When is the best time to harvest sorghum seed heads?
Harvest seed heads when they’ve turned tan or brown and the seeds rattle inside when shaken—usually 4–6 weeks after flowering. Wait too long, and seeds may scatter or sprout prematurely! Early morning harvests (when humidity is low) help prevent mold.
How long does it take to dry sorghum seed heads?
Drying time depends on humidity and airflow. In a well-ventilated, dry space (60–70°F), seed heads typically dry in 2–4 weeks. Hang them upside down in bundles or spread them on a screen. Pro tip: Add a dehumidifier if your climate is damp!
Can I store sorghum seed heads indoors?
Yes! Store dried seed heads in airtight containers (like glass jars or sealed bags) with a silica gel packet to absorb moisture. Keep them in a cool, dark place (like a pantry) to prevent pests or spoilage. Label containers with the harvest year!
How do I prevent pests from eating my stored seed heads?
Pests like weevils or moths love stored seeds. Freeze seed heads for 48 hours before storage to kill eggs/larvae, or sprinkle diatomaceous earth in containers. Bonus: Store with cedar blocks or lavender sachets for natural repellent power!
What if my seed heads mold during drying?
Mold means too much moisture! If you spot fuzzy spots, discard the batch—moldy seeds won’t sprout. Next time, speed up drying with a fan or move to a drier location. Avoid high-humidity areas like basements or garages.
Wrapping up and next steps
Harvesting and storing sorghum seed heads is a rewarding way to ensure next year’s fragrant blooms thrive! By following the right steps—like proper drying, cleaning, and airtight storage—you’re setting the stage for a bountiful garden. Your efforts today will pay off with vibrant, healthy plants tomorrow.
Ready to take the next step? Start small—try harvesting just a few seed heads this season to perfect your technique. Before you know it, you’ll be a sorghum storage pro! 🌱✨