
Lawn
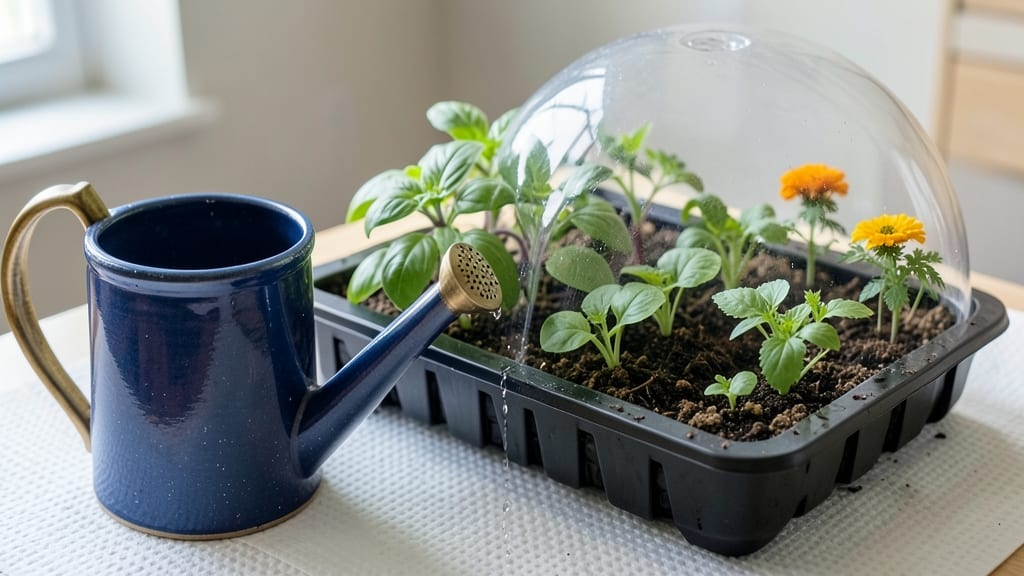
Watering seed trays properly is the difference between a thriving seedling batch and a sad, crusted mess. 🌱 The mist-and-cover method keeps soil evenly moist without drowning delicate sprouts—something I learned the hard way after losing my first batch to mold.
This gentle approach works for everything from finicky lettuce to hardy basil, and it’s the secret behind my 95% germination rate this season.
The key is consistency: bottom-watering prevents surface crusting while misting mimics natural rain. You’ll need a spray bottle, a clear plastic dome (or plastic wrap), and a tray with drainage holes—simple tools that make all the difference.
Most seeds need watering every 2-3 days, but check soil moisture by lifting the tray: it should feel damp, not soggy. Overwatering is the #1 killer of seedlings, so err on the dry side until you see sprouts.
Once you master this, you’ll notice seedlings emerging at the same time with strong, straight stems—no leggy, weak plants reaching for light. The plastic dome creates a mini greenhouse effect, trapping humidity while you control the moisture.
For delicate seeds like snapdragons, keep the dome on until germination; for hardier herbs, remove it after a few days to toughen them up.
Different seeds need different care: tiny seeds like carrots need barely damp soil, while larger seeds like beans tolerate slightly drier conditions. Watch for signs of stress—yellowing leaves mean too much water, while dry soil means it’s time to mist again.
With this method, you’ll avoid the most common mistakes and give every seed the perfect start.
📚 In This Guide
- What you need
- Instructions
- Tips and common mistakes
- Wrapping up and next steps
What you need
- ● Seed trays – 1–5 trays (depending on your project), with drainage holes (plastic or biodegradable).
- ● Misting bottle or spray nozzle – A fine-mist setting is key (e.g., 16–32 oz capacity). Avoid heavy streams!
- ● Distilled or room-temperature water – ½–1 gallon per tray (chlorine-free for seedlings).
- ● Clear plastic wrap or humidity dome – Large enough to cover trays snugly (e.g., 12"x12" sheet for standard trays).
- ○ Tray stand or elevated surface – Optional but helpful to improve airflow (e.g., a wire rack or upside-down tray).
- ○ Seedling heat mat (optional but recommended) – For cold climates (70–85°F range).
- ● Labeling tags & pencil – To track seed types and planting dates.
- ● Grow lights – LED or fluorescent (12–16 hours/day) if natural light is limited.
- ● Perforated tray liner – For better drainage and seed separation (e.g., coconut coir or peat moss).
- ● Hairspray or anti-fungal spray – Light application to prevent mold (use sparingly).
- ● Seedling tweezers – For delicate transplanting later.
Step-by-Step instructions for watering seed trays
Here's the foolproof method I use to keep seed trays perfectly moist without drowning tender sprouts.
💧 Step 1: Choose the Right Watering Tool
Skip the heavy watering can—it drenches seeds and washes them out of the soil. Instead, use a fine-mist spray bottle or a watering can with a gentle rose attachment. The goal is to mimic a light rain shower, delivering water evenly without disturbing the seed surface. I like spray bottles because they let me control the pressure precisely.
Fill your chosen tool with room-temperature water (cold water shocks seeds). If your tap water is chlorinated, let it sit out uncovered for 24 hours first. Chlorine can inhibit germination, and you want your seeds to focus on sprouting, not detoxifying.
🌱 Step 2: Apply Water in Two Light Layers
Start by spraying the seed tray until the top inch of soil feels uniformly damp. You'll know it's right when water beads form on the surface but don't pool. This first pass wets the soil without displacing seeds. I hold the sprayer 6-8 inches above the tray and move in slow, overlapping passes to avoid dry spots.
Wait 30 seconds for the water to penetrate. Then give it a second, lighter misting—just enough to refresh the surface. The soil should feel like a damp sponge, not a soggy washcloth. Overwatering now is the fastest way to create anaerobic conditions that kill seeds before they sprout.
⏰ Step 3: Cover and Monitor for 24 Hours
After watering, cover the tray with clear plastic wrap or a humidity dome to lock in moisture. This creates a mini greenhouse effect that helps seeds germinate faster. Place the tray in a warm spot (70-75°F)—a seedling heat mat works wonders if your home runs cooler.
Check the tray once daily for condensation on the plastic. If you see heavy droplets, remove the cover for 10 minutes to air it out. Too much humidity encourages mold, which can smother seeds before they break through. You'll know moisture is balanced when the soil stays damp but not wet, and the plastic stays lightly fogged—not dripping.
🌿 Step 4: Transition to Bottom Watering
Once seeds germinate and show first true leaves, switch to bottom watering to prevent disturbing delicate seedlings. Place the tray in a shallow dish of ½ inch of water and let it soak up moisture through the drainage holes. This method keeps roots hydrated without surface disturbance.
Remove the tray after 15-20 minutes—any longer risks waterlogging. You'll notice seedlings perk up immediately after bottom watering, with leaves that look plump and vibrant rather than wilted. This is your signal the roots are getting exactly what they need.
✂️ Step 5: Adjust as Seedlings Grow
As seedlings mature, reduce watering frequency but increase volume. Water every 2-3 days when the top inch of soil feels dry to the touch. Use a watering can with a narrow spout to direct water at the soil base, not the leaves. Wet foliage invites fungal diseases, and you don't want to undo all your careful germination work.
Watch for yellowing leaves—this is your cue to cut back slightly. Healthy seedlings should have deep green leaves and sturdy stems. If they look pale or leggy, they need more light, not more water. The key is consistency: keep the soil evenly moist, not soggy, and your seedlings will thrive.
Tips & tricks for perfect seedling care
Let me save you from the heartbreak of drowned seeds or stunted sprouts—these are the game-changers I wish I'd known when my first batch of seedlings turned into sad, mushy memories.
Tool Precision Matters: That 6-8 inch distance from sprayer to tray in Step 2 isn't arbitrary—it creates the perfect mist. Too close? You'll displace seeds. Too far? Uneven moisture. I measure with my elbow bent at 90 degrees to keep it consistent. For larger trays, consider a second spray bottle to maintain even coverage without moving too quickly.
Temperature Check: The 70-75°F range in Step 3 is your germination sweet spot, but here's the secret: if your home runs cooler, a seedling heat mat can add 5-10°F of warmth right where it matters. Test it with your hand—if the tray feels warm but not hot, you're golden. Cold drafts from windows or AC vents can stall germination completely.
Visual Cues Over Guessing: When monitoring condensation in Step 3, think "light fog, not steam shower." Heavy droplets mean it's time for that 10-minute air break. I use a small mirror under the plastic—if condensation forms on it within 5 minutes, you've got too much humidity. This simple trick prevents mold before it starts.
Bottom Watering Transition: The 15-20 minute soak in Step 4 is your moisture safety net. Set a timer and check the soil color—it should look like a wrung-out sponge, not a swamp. Pro move: Place a small cup of water under the tray during this time to maintain humidity while roots absorb through the bottom.
Pro Tips for Water Seed Trays
- Let me save you from the heartbreak of drowned seeds or stunted sprouts—these are the game-changers I wish I'd known ...
- Tool Precision Matters: That 6-8 inch distance from sprayer to tray in Step 2 isn't arbitrary—it creates the perfect ...
- Temperature Check: The 70-75°F range in Step 3 is your germination sweet spot, but here's the secret: if your home ru...
Frequently asked questions
Got questions about keeping your seed trays happy? You’re not alone! Here are answers to the most common concerns—so you can grow confidently without guesswork.
How often should I water seed trays?
Water seed trays every 1–2 days (or daily in hot/dry climates) to keep the soil consistently moist—like a wrung-out sponge. Overwatering risks mold, while underwatering dries out seeds. Use the finger test: If the top inch feels dry, it’s time. Mist-and-cover helps retain moisture longer!
Why are my seeds not germinating?
Seeds need three things: warmth (70–85°F), moisture, and oxygen. Check for:
- Cold soil? Move trays to a warmer spot (e.g., seedling heat mat).
- Too wet? Drain excess water and loosen soil to prevent suffocation.
- Old seeds? Test viability by soaking a few in water—if they sink, they’re good!
What if mold grows on my seed trays?
Mold is a red flag—it thrives in excess moisture + poor airflow. Act fast:
- Remove the cover and let trays air out for 1–2 hours.
- Sprinkle fungicide (like hydrogen peroxide at 3%) or cinnamon powder on the soil.
- Prevent recurrence by watering less frequently and using a fan for gentle airflow.
Can I reuse seed trays or soil?
Yes! Clean and reuse trays by scrubbing with soapy water and disinfecting (1-part bleach to 9 parts water). For soil, sterilize it by baking at 200°F for 30 minutes or microwaving in 30-second bursts. Avoid reused soil if it had mold or pests—start fresh for healthy germination.
What’s an alternative to plastic wrap for covering trays?
Plastic wrap is cheap and effective, but try these eco-friendly swaps:
- Glass cloche: Reusable and easy to remove for ventilation.
- Clear plastic dome (from seed starter kits).
- Humidity tent: Use a large plastic bag with holes (secure with a rubber band).
- Saran wrap (if you’re avoiding single-use plastic, opt for reusable options).
Wrapping up and next steps
Mastering the mist-and-cover method ensures your seed trays stay perfectly hydrated for even germination—no guesswork needed! 🌱 By following these steps, you’ll give your seeds the ideal environment to sprout strong and healthy.
Now that you’re equipped with the know-how, it’s time to roll up your sleeves and get growing—your future garden starts right here!
Ready to take the next step? Once your seeds germinate, transplant them carefully into larger containers or directly into the soil (if weather permits). Keep an eye on moisture levels and soon, you’ll be harvesting the fruits of your labor! 🌿