
Lawn
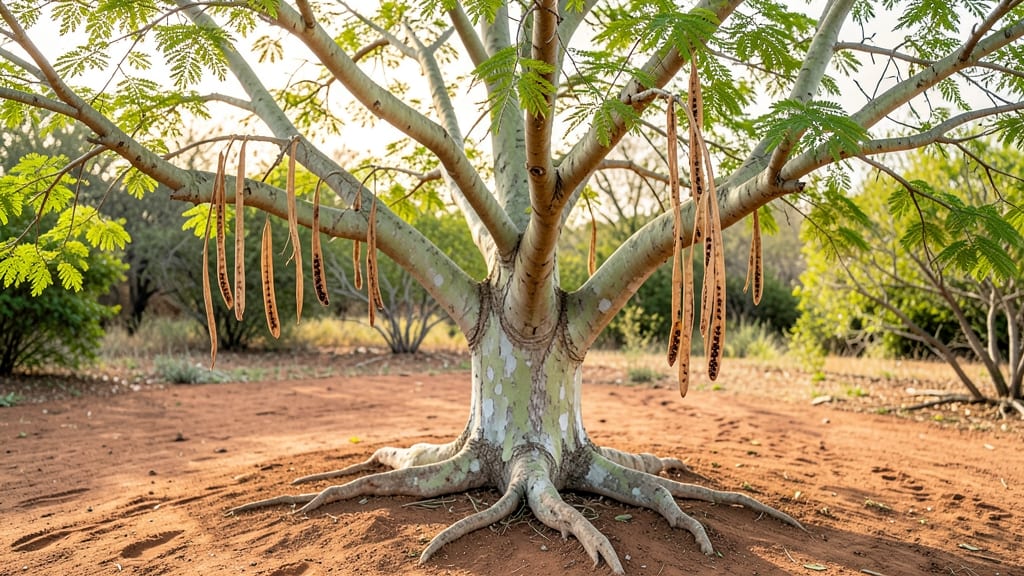
Harvesting palo verde seed pods without twisting them open is the secret to viable seeds year-round. 🌵 These papery pods split open naturally when dry, but forcing them too soon ruins the seeds inside—something I learned after my first impatient attempt left me with nothing.
The key is patience and knowing exactly when to collect them for the best germination rates.
You’ll need just a few simple tools: pruning shears for high branches, a bucket for collecting pods, and a dry, well-ventilated space to process them. Palo verde trees thrive in full sun and well-draining soil, making them perfect for arid landscapes where other plants struggle.
Once you’ve gathered the pods, let them dry completely before opening—they’ll release seeds that look like tiny black beans.
With the right technique, you’ll end up with seeds that sprout reliably in just 7-14 days when planted in warm soil. The young trees grow fast and handle drought like a champ, adding both beauty and resilience to your landscape.
Plus, the bright green bark and yellow flowers make them a standout ornamental tree.
Whether you’re restoring native habitat or adding drought-tolerant beauty to your yard, these seeds are your ticket to low-maintenance, long-lasting growth. Here’s how to do it right the first time—no wasted pods or failed sprouts.
📚 In This Guide
- What you need
- Instructions
- Tips and common mistakes
- Wrapping up and next steps
What you need
- ● Palo verde seed pods – Freshly fallen or hand-harvested (aim for at least 10-15 pods for a good seed yield).
- ● Pruning shears or gloves – For safe harvesting from trees (long-handled shears help avoid reaching too far!).
- ● Large bucket or mesh bag – To collect pods without crushing them (5+ gallons recommended).
- ● Newspaper or cardboard – For drying pods (avoid plastic; it traps moisture!).
- ● Fine-mesh sieve or colander – To separate seeds from chaff (¼-inch mesh works best).
- ● Paper towels or coffee filters – For final seed drying (absorbs excess moisture).
- ● Air-tight containers (glass jars or seed envelopes) – For long-term storage (label with date!).
- ● Magnifying glass – To inspect seed viability before planting.
- ● Food dehydrator or fan – Speeds up drying if humidity is high.
- ● Seed germination kit – For testing viability (if you’re impatient!).
- ● Garden twine – To bundle pods for hanging storage.
How to harvest palo verde seeds without twisting the pods
Skip the frustration—harvest these drought-resistant seeds the easy way.
🌱 Step 1: Wait for Pods to Turn Brown and Dry
Palo verde pods start green and firm, but they won’t release seeds until they’re fully mature. Wait until they turn a uniform tan or light brown—this usually happens in late summer to early fall after the tree’s blooming season. Give them a gentle squeeze: if the pod feels brittle and cracks slightly, it’s ready.
Don’t rush this step. Green pods contain immature seeds that won’t germinate, and forcing them open too early wastes your effort. If you harvest too soon, you’ll end up with shriveled, non-viable seeds that won’t sprout. Patience here ensures strong, healthy seedlings later.
☀️ Step 2: Harvest Pods on a Dry, Sunny Day
Choose a dry, sunny morning for harvesting—this prevents mold and speeds up drying. Wear gloves (the pods have small spines) and shake the tree lightly to dislodge ripe pods. If pods don’t fall easily, use pruning shears to cut them off the branch. Place them in a paper bag (not plastic) to allow airflow.
Here’s the thing—if you harvest on a humid day, the pods may sweat and develop mold before you even get them indoors. A dry day ensures they stay crisp and ready for seed extraction. Avoid harvesting after rain, as moisture trapped inside the pods can rot the seeds.
✂️ Step 3: Open Pods Without Twisting or Damaging Seeds
Lay a pod on a flat surface and use a small screwdriver or butter knife to gently pry open the seam. Avoid twisting—this can crush the seeds inside. Once the pod splits, pour the contents onto a light-colored tray (dark surfaces hide seeds). You’ll see flat, brown seeds mixed with a fine, powdery residue (this is normal and harmless).
If you twist the pod, you’ll end up with broken seeds or seed coats that won’t germinate. Work slowly and carefully—this is the step where most people lose viable seeds. A steady hand and a sharp tool make all the difference. Discard any pods that resist opening, as they likely contain immature seeds.
💧 Step 4: Clean and Store Seeds for Long-Term Viability
Spread the seeds on a clean, dry towel and let them air-dry for 24 hours in a warm, shaded spot. This removes any remaining moisture and prevents mold. Once dry, transfer them to a paper envelope (not plastic) and label it with the harvest date. Store in a cool, dark place (like a seed vault or even your fridge) for up to 5 years.
Don’t skip the drying step—even slightly damp seeds can develop mold in storage. If you rush and seal them while still moist, you’ll wake up to a musty, inedible mess months later. A little patience here means seeds that stay viable for years, ready to plant whenever you’re ready.
⏰ Step 5: Test Germination Before Planting
Before committing to a full planting, test 5-10 seeds in a small container with moist potting mix. Press them ¼ inch deep, cover lightly, and keep the soil consistently moist (not soggy). Place the container in a warm spot (70-80°F) and check for sprouts in 7-14 days. If germination is slow, try soaking seeds in lukewarm water for 12 hours before replanting.
This step saves you from planting dozens of seeds only to find they won’t grow. Palo verde seeds can be finicky—some batches germinate easily, while others need a little extra encouragement. If your test seeds sprout, you’re ready to plant. If not, try a fresh batch or adjust your storage conditions.
Tips & tricks for perfect palo verde seed pod harvesting
These simple strategies will help you collect viable seeds without the frustration of broken pods or wasted effort.
Timing is Everything: In Step 1, when you're checking for that uniform tan or light brown color, look for pods that have started to split open naturally along the seams. These are the ones ready for harvesting—no need to force them. The pods should feel brittle and crack slightly when you give them a gentle squeeze, but they shouldn't be completely dry and papery. This precise stage is what ensures you get plump, viable seeds rather than shriveled ones. I've learned this the hard way after collecting pods that were too green and ending up with seeds that wouldn't sprout.
Tool Selection Matters: For Step 3, when you're opening those pods, I recommend using a small, sharp butter knife instead of a screwdriver. The knife gives you better control and a cleaner cut along the pod's natural seam. If you don't have either, a pair of clean, sharp scissors can work in a pinch. The key is to make a straight cut along the pod's natural opening line—this prevents crushing the seeds inside. I've seen people try to use their fingernails, which always leads to broken seeds and frustration. Take your time here; this is where most people lose viable seeds.
Storage Wisdom: When you're following Step 4 to store your seeds, here's what nobody tells you—label your paper envelope with both the harvest date and the seed variety if you're working with multiple palo verde trees. This becomes crucial when you're checking seed viability years later. I've had to toss perfectly good seeds because I couldn't remember which batch was which. Also, while the instructions mention storing in a cool, dark place, I've found that a small glass jar with a tight lid works even better for small quantities—it keeps out moisture while still allowing you to see the seeds.
Pro Tips for Palo Verde Seed Pods
- These simple strategies will help you collect viable seeds without the frustration of broken pods or wasted effort.
- Timing is Everything: In Step 1, when you're checking for that uniform tan or light brown color, look for pods that h...
- Tool Selection Matters: For Step 3, when you're opening those pods, I recommend using a small, sharp butter knife ins...
Frequently asked questions
Got questions about harvesting and using palo verde seed pods? You’re not alone! Here are some of the most common queries—and answers—to help you navigate the process like a pro.
When is the best time to harvest palo verde seed pods?
The ideal time to harvest is late summer to early fall (August–October), when pods turn brown and dry but haven’t split open. Wait too long, and the seeds will scatter naturally—or get eaten by wildlife! Harvest before they release to maximize yield. Pro tip: Shake a few pods over a paper bag to test readiness.
Why are my seed pods splitting open before I can harvest them?
This happens when pods are overripe or exposed to moisture. Harvest pods as soon as they turn brown but are still firm to the touch. If you’re dealing with a heavy rain forecast, collect them immediately. Store harvested pods in a cool, dry place (like a mesh bag) to slow further splitting.
Can I use palo verde seed pods for anything other than planting?
Beyond seeds, the pods can be dried and used as natural mulch (they decompose slowly) or even as ornamental accents in dried flower arrangements. Just avoid using them if they’re moldy or pest-ridden. Bonus: The wood of the pod’s stem is lightweight and great for small crafts!
What if my palo verde tree isn’t producing seed pods?
Palo verde trees are dioecious, meaning male and female flowers grow on separate trees. If yours isn’t fruiting, you may need a female tree nearby for pollination. Young trees (under 5 years) may also take time to mature. Check for pests or disease (like scale insects) that could stress the tree—healthy trees produce pods reliably!
How do I store harvested seed pods for long-term use?
Store pods in a well-ventilated container (like a paper bag or mesh sack) in a cool, dark place (e.g., basement or garage). Avoid plastic bags to prevent mold. Seeds remain viable for 1–2 years if kept dry. For extra longevity, stratify seeds (mix with damp sand and refrigerate for 4–6 weeks) before planting.
Wrapping up and next steps
Harvesting palo verde seed pods is a rewarding way to ensure a steady supply of viable seeds year-round—without the hassle of twisting! 🌱 By following the right techniques, you’ll enjoy healthy seedlings and a thriving landscape.
Whether you’re a gardening novice or a seasoned green thumb, this twist-free method makes the process simple and effective.
Now that you’re equipped with the know-how, grab your tools and head outdoors. Start small—try harvesting just a few pods—and soon, you’ll be a pro at nurturing these drought-resistant beauties. Happy gardening! 🌿