
Lawn
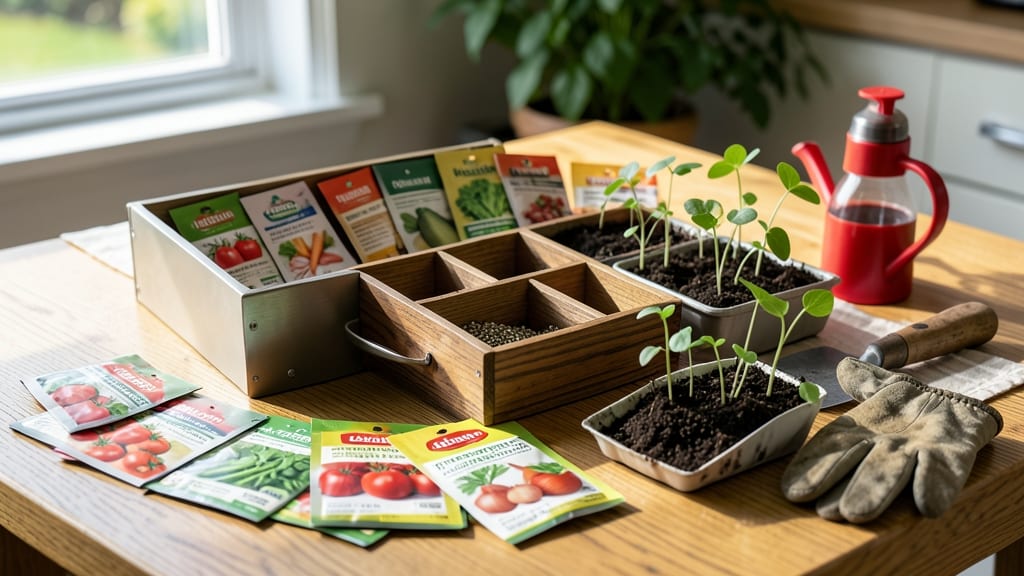
A vegetable seed vault kit keeps your garden legacy alive through the winter. 🌱 I used to lose half my heirloom seeds every year—until I invested in a proper storage system that protects viability for decades.
The right kit includes airtight containers, moisture absorbers, and labeling tools that turn seed saving from a guess into a science. Most kits come with everything you need: resealable mylar bags, silica gel packets, and even seed envelopes with printed planting dates.
The key is controlling temperature and humidity—store your seeds in a cool, dark place (like your fridge's crisper drawer) to prevent moisture damage and premature sprouting. Even the simplest kit extends seed life from 1-2 years to 10+ years with proper care.
You'll end up with a well-organized collection ready for next season, complete with notes on germination rates and planting windows. No more digging through old envelopes or wondering if those saved beans will still grow—just reliable, high-quality seeds that perform like new.
The payoff? A garden that stays true to your vision year after year. Perfect for beginners and seasoned gardeners alike, this system scales from a few packets to a full heirloom collection. Let's get those seeds preserved properly so you can plant with confidence next spring!
📚 In This Guide
- What you need
- Instructions
- Tips and common mistakes
- Wrapping up and next steps
What you need
- ● Seed vault kit: A pre-packaged kit (e.g., Mylar bags with oxygen absorbers, silica gel packets, or a seed storage box) or DIY supplies to assemble one.
- ● Vegetable seeds: Clean, dry seeds (1–2 tbsp per variety, depending on size). Pro tip: Harvest seeds from fully mature, healthy plants for best results! 🌱
- ● Oxygen absorbers: 1–2 per bag (200–500 cc capacity) to prevent moisture and pests.
- ● Silica gel packets: 1–2 per bag to absorb excess humidity.
- ● Permanent markers or labels: To tag seeds with variety names and dates.
- ● Small, airtight containers: Glass jars (e.g., mason jars with tight lids) or resealable plastic bags (if not using the vault kit’s packaging).
- ● Scissors or a knife: For opening Mylar bags or cutting labels.
- ● Paper towels or silica gel: To dry seeds thoroughly before storage (aim for <10% moisture).
- ● Freezer or cool, dark space: Ideal storage temp: 32–41°F (0–5°C). A home freezer works in a pinch! ❄️
- ○ Optional: Desiccant crystals (for extra humidity control).
- ● Vacuum sealer (to remove air and extend shelf life).
- ● Seed catalog or notebook (to track varieties and germination rates).
Step-by-Step instructions for preserving vegetable seeds with a seed vault kit
Here's how to turn this season's harvest into next year's garden—no guesswork, just reliable preservation.
🌱 Step 1: Harvest Mature Seeds at Peak Ripeness
Pick vegetables when they're fully mature but before they overripen or split. For tomatoes, wait until they're deep red and slightly soft to the touch—this ensures maximum seed viability. I always harvest on a dry morning after the dew has evaporated, as damp seeds mold faster during processing.
Cut open the fruit or pod with clean scissors (not your kitchen knife—cross-contamination matters!). Scoop the seeds into a bowl, leaving behind any pulp or membrane. If you're working with beans or peas, let them dry on the vine until the pods turn brittle—this makes seed removal effortless.
💧 Step 2: Clean and Ferment Seeds for Viability
Fill a clean jar with the seeds and cover them with water that's room temperature (about 70°F). Stir gently to release any remaining gel or pulp. Let the mixture sit for 2-5 days, stirring once daily. You'll see mold or foam forming—this is normal and helps separate viable seeds from non-viable ones.
After fermentation, pour the mixture through a fine-mesh strainer. Rinse the seeds with clean water until they're free of pulp. Spread them on a paper towel in a single layer, leaving 1 inch of space between seeds. This prevents clumping during drying.
☀️ Step 3: Dry Seeds Thoroughly Before Storage
Place the paper towel with seeds in a dry, well-ventilated spot away from direct sunlight. A dehumidifier-free area like a kitchen counter works well. The seeds are ready when they're completely dry—they should crumble slightly if you gently press two between your fingers. This usually takes 7-10 days, depending on humidity.
Don't rush drying—moisture is the enemy of long-term seed storage. If your home is humid, prop a small fan nearby to circulate air. Once dry, transfer seeds to paper envelopes (not plastic—they trap moisture). Label each envelope with the variety name, harvest date, and storage location.
🪴 Step 4: Store Seeds in Your Seed Vault Kit
Place the labeled envelopes inside airtight containers from your kit, like glass jars with silicone seals or metal tins. Store them in a cool, dark place—a refrigerator or root cellar is ideal. The goal is to maintain 40-50°F and 30-50% humidity for maximum longevity.
Check seeds annually for viability by doing a simple germination test: Place 10 seeds on a damp paper towel, cover with another towel, and keep in a warm spot for 7-10 days. If 80% or more sprout, your seeds are good for another year. If fewer sprout, store the remaining seeds for shorter-term use or save them for quick-sprouting varieties like radishes.
⏰ Step 5: Rotate and Monitor Seed Stock
Use the oldest seeds first—this is called first-in, first-out (FIFO). Mark each envelope with the year to track age. Most vegetable seeds stay viable for 3-5 years, but some (like onions and leeks) lose potency after 1 year. Check your seed vault every 6 months to ensure no moisture or pests have infiltrated the containers.
If you notice any musty smells or condensation inside containers, transfer seeds immediately to a new, dry storage spot. Properly stored seeds should remain dry and odorless. This system ensures you'll always have fresh, high-quality seeds ready for planting when the time comes.
Tips & tricks for perfect seed preservation with your seed vault kit
These simple strategies will help you maximize seed viability and make the most of your harvest—no guesswork involved.
Harvest Timing Matters: For tomatoes, harvest seeds when the fruit is fully ripe but still firm—this is when seed viability peaks. I've learned the hard way that overripe tomatoes release seeds that ferment too quickly, reducing germination rates. Harvest on a dry morning to prevent mold growth during processing, and always use clean scissors to avoid cross-contamination between varieties.
Fermentation Control: During the 2-5 day fermentation in Step 2, watch for excessive mold growth—this can indicate bacterial contamination. If you notice more than a thin layer of foam or mold, reduce the fermentation time to 2 days. The goal is to separate viable seeds from non-viable ones, not create a science experiment! Stirring once daily helps maintain even fermentation throughout the jar.
Drying Secrets: The 7-10 day drying period is where many people rush the process. I recommend placing seeds on a screen instead of just paper towels—this allows air to circulate from both sides, speeding up drying while preventing clumping. If your home is particularly humid, prop a small fan nearby to maintain consistent airflow. Test dryness by gently pressing two seeds between your fingers—they should crumble slightly, not feel damp.
Storage Environment: Maintaining the 40-50°F range in your seed vault is crucial for long-term viability. If you don't have a root cellar, the back of your refrigerator (not the freezer section) works perfectly. I've found that placing a small humidity pack in the container helps maintain the 30-50% humidity range—just check it every 6 months to ensure it's still effective. The refrigerator's darkness also prevents light-induced degradation of seed oils.
Pro Tips for Vegetable Seed Vault Kit
- These simple strategies will help you maximize seed viability and make the most of your harvest—no guesswork involved.
- Harvest Timing Matters: For tomatoes, harvest seeds when the fruit is fully ripe but still firm—this is when seed via...
- Fermentation Control: During the 2-5 day fermentation in Step 2, watch for excessive mold growth—this can indicate ba...
Frequently asked questions
What’s the best time to harvest seeds for my vault kit?
Harvest seeds when the plant’s pods turn dry, brown, or papery (like tomatoes or peppers) or when flowers fade (like beans or lettuce). For herbs, wait until they’re fully mature but before they shatter. Aim for late summer to early fall in most climates—just don’t rush! Overripe seeds lose viability.
Can I store seeds from hybrid plants (like store-bought tomatoes) in my kit?
Not reliably! Hybrid seeds (often labeled _F1_) may not grow true to type—meaning next year’s plants could be weak, sterile, or totally different. Stick to heirloom or open-pollinated seeds (marked on seed packets) for consistent results. Pro tip: Save seeds from heirloom varieties for the best long-term payoff!
How long will seeds last in my vault kit, and how do I check?
Properly stored seeds in your kit can last 5–10+ years, depending on the type. Test viability by placing a few seeds in damp paper towels for a week—if 50% sprout, they’re good to go! For extra peace of mind, label each packet with the harvest date. Cold, dry, and dark (like your kit’s conditions) = seed longevity!
What if my seeds sprout mold or smell bad after drying?
Mold or funky odors mean too much moisture during drying. Fix it by:
- Spreading seeds on a clean, dry surface (like parchment paper) in a well-ventilated area (e.g., a mesh bag in sunlight).
- Using a dehumidifier or silica gel packets in your kit if humidity’s high.
- Discarding moldy seeds—they won’t grow and could contaminate others.
Are there eco-friendly alternatives to my seed vault kit?
Try these zero-waste options:
- Envelope method: Store seeds in unbleached paper envelopes (label with a pencil!) and keep them in a glass jar with a silica gel packet.
- Clay seed pots: Bury seeds in small clay pots over winter—plant the pot next spring!
- Mason jar layers: Alternate seeds with dried rice or sand in a jar for compact storage.
Wrapping up and next steps
Preserving your vegetable seeds with a vegetable seed vault kit is a rewarding way to ensure a bountiful harvest for seasons to come—without the stress of guesswork or waste.
Whether you're a seasoned gardener or just starting out, this simple method empowers you to save, store, and sow with confidence. 🌱
Ready to take the next step? Gather your kit, follow the steps, and start building your seed library today! Happy gardening, and may your future harvests be as vibrant as your efforts!