
Lawn
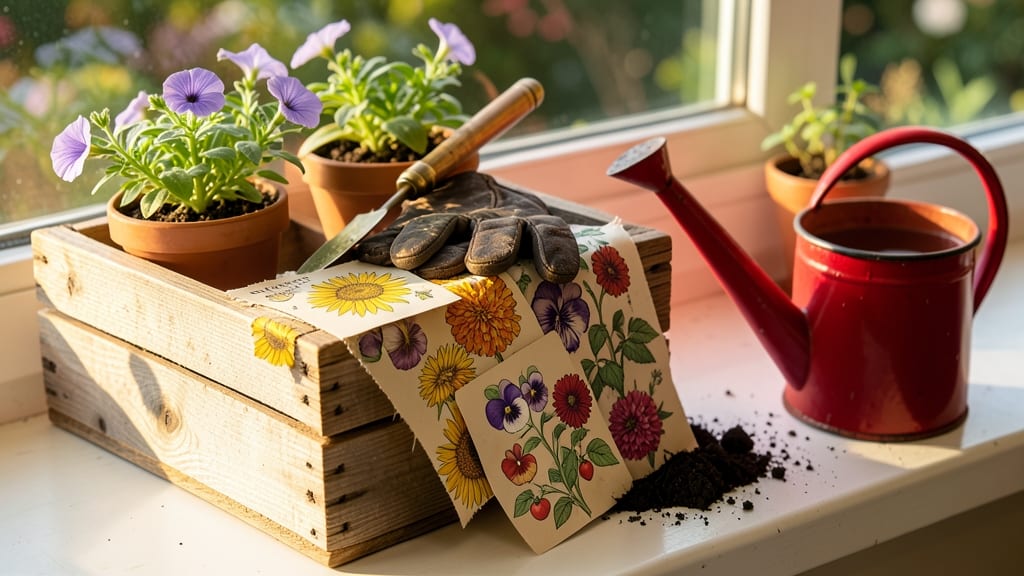
My pretty seed packets aren’t just for planting—they’re the colorful backbone of my garden planning. 🌸 These twist-free designs let you save seeds effortlessly while turning your garden journal into a work of art.
No more rummaging through drawers for next year’s varieties; everything stays organized, beautiful, and ready to inspire your designs.
Start by selecting packets with vintage illustrations, cottagecore charm, or bold typography—these become your garden’s visual language. I use them to label rows, create mood boards, or even wrap garden stakes for a whimsical touch.
The best part? You’ll never lose track of what you planted where, and your garden’s aesthetic ties back to the packets themselves.
By summer’s end, you’ll have a collection of saved seeds and a decorative system that makes planning feel like an artistic ritual. Imagine flipping through packets next spring, each one a memory of last year’s blooms—and a promise of what’s to come.
Works for any garden style, from wildflower meadows to structured cottage gardens. Here’s how to make them work for you—without sacrificing beauty or function.
📚 In This Guide
- What you need
- Instructions
- Tips and common mistakes
- Wrapping up and next steps
What you need
- ● Seed packets (or envelopes): 5–10 high-quality, acid-free kraft paper packets or decorative envelopes (3.5" x 5" or larger). Look for thick, durable options to prevent tearing.
- ● Dried flower seeds: 1–2 teaspoons per packet (adjust based on seed size—tiny flowers like bachelor’s buttons need less; large seeds like sunflowers need more). Ensure seeds are completely dry (no moisture = no mold!).
- ● Silica gel packets: 1–2 food-grade silica gel pouches (or DIY with uncooked rice in a small mesh bag) to absorb moisture.
- ○ Decorative elements (optional but fun!): Washi tape or ribbon (1–2 rolls)
- ● Stickers or labels (for labeling varieties)
- ● Twine or string (for sealing)
- ● Dried flowers/petals (for aesthetic flair)
- ● Scissors or a craft knife: For precise cutting (a self-healing mat helps if using a craft knife).
- ● Bone folder or flat tool: For crisp folds (a butter knife works in a pinch!).
- ● Pencil or fine-tip marker: For labeling seed types.
- ● Drying tray or paper towels: To spread seeds out and ensure they’re bone-dry before packaging.
- ● Humidity-free storage: A cool, dry place (like a seed vault box or airtight container) to keep packets until planting.
How to preserve flower seeds in stylish, functional packets
Skip the boring paper bags—these seed packets double as decor and next year's planting reminders.
🌱 Step 1: Harvest Seeds at Peak Maturity
Wait until flower heads dry completely on the plant—when they crumble easily between your fingers. For annuals like zinnias or cosmos, this usually happens 4-6 weeks after blooming. For perennials like coneflowers, harvest when seed heads turn brown but haven't scattered yet. I like to work on dry mornings when dew has evaporated, as damp seeds stick together and mold faster.
Use clean, sharp scissors to snip entire seed heads rather than picking individual seeds. This preserves the natural seed dispersal mechanism and prevents damage to the delicate seed coats. Place harvested heads in a paper bag (not plastic) to allow air circulation while they finish drying indoors. Real talk: if you wait too long, seeds will scatter before you can collect them.
🪴 Step 2: Clean and Dry Seeds Thoroughly
Spread the dried seed heads on a clean, dark surface like newspaper or a baking sheet. Gently rub the heads between your palms to release seeds—don't crush them, just separate the chaff. For seeds with wings (like dandelions) or fuzzy coatings (like milkweed), use a small fan on low to blow away debris without damaging the seeds.
Store the cleaned seeds in an airtight container for 2-4 weeks in a cool, dry place. This final drying step ensures maximum viability. I've found that seeds dried this way last 2-3 years when stored properly, while seeds dried too quickly often fail to germinate. Check periodically by gently squeezing a few seeds—if they feel brittle and break easily, they're ready for packaging.
✂️ Step 3: Design and Assemble Your Seed Packets
Choose decorative paper with a matte finish—glossy paper traps moisture and degrades faster. Fold standard seed packet templates (available free online) from cardstock or heavyweight paper. For a twist-free design, use a 3-panel fold with a clear plastic window to display seed color photos. I like to add a small label pocket on the back for planting notes.
Fill each packet with 1 teaspoon of seeds (about 50-100 seeds per packet, depending on size). Seal with a decorative sticker or wax seal for a polished look. Write the plant name, variety, harvest date, and planting instructions on the front—this turns your packets into next year's planting guide. Here's the thing: if you skip the clear window, you'll forget which seeds are which by spring.
💧 Step 4: Store Packets Properly for Long-Term Viability
Place completed packets in a cool, dark location with 35-40% humidity—a sealed tin or ceramic jar works perfectly. Avoid refrigeration unless you're storing for more than 5 years, as temperature fluctuations stress seeds. I keep mine in a labeled jar under my kitchen cabinets where it stays consistently cool and dry.
Check packets annually for moisture or pest damage. If you notice any condensation inside, open immediately and redistribute seeds into fresh packets. For extra protection, add a small silica gel packet (the kind that comes with electronics) to absorb any moisture. You'll know your storage is working if seeds remain firm and dark-colored—never powdery or discolored.
⏰ Step 5: Plan for Next Year's Planting
When spring arrives, use your decorative packets as planting reminders. The visual cues help you remember which varieties you loved most. I arrange them by bloom time—early spring, summer, fall—so I can rotate crops effectively. For perennials, include notes about their mature height and spacing needs directly on the packet.
Plant seeds according to the instructions on your packet, adjusting for your local climate if needed. The key is to plant at the same time each year for consistent blooms. If you notice any seeds failing to germinate after 2 years, replace them with fresh ones. This system has saved me hundreds of dollars over the years while keeping my garden looking intentional and beautiful.
Tips & tricks for beautiful, functional seed packets
These little details make all the difference between forgettable seed storage and a system that works beautifully year after year.
Harvest Timing: The 4-6 week window for annuals is critical—wait until the flower heads crumble easily between your fingers, but don't let them scatter on the plant. I've learned the hard way that harvesting too early means underdeveloped seeds, while waiting too long means losing your entire crop to wind. For perennials like coneflowers, aim for that perfect brown stage where the seed heads feel papery but haven't released their contents yet. A small magnifying glass helps verify seed maturity when visual cues are subtle.
Drying Strategy: That 2-4 week drying period in Step 2 is non-negotiable for seed viability. I've found that spreading seeds on newspaper (rather than plastic) creates the ideal airflow while preventing moisture buildup. For seeds with fuzzy coatings like milkweed, use a small fan on low to gently separate the fluff without damaging the seeds—this takes patience but prevents seed loss. The key test is that gentle squeeze: seeds should feel brittle but not powdery, like dried cornmeal.
Packet Design: The clear plastic window in Step 3 isn't just decorative—it's functional. I've seen gardeners forget which seeds are which by spring without this visual cue. For a twist-free fold, use cardstock that's at least 80 lb weight—lighter paper warps and makes sealing difficult. Pro tip: Add a small label pocket on the back of each packet to jot down planting depth and sunlight requirements. This turns your decorative packets into a mini garden planner.
Storage Wisdom: That 35-40% humidity range in Step 4 is crucial for long-term viability. I keep my silica gel packets in a labeled jar under kitchen cabinets where temperatures stay consistent. The annual check for condensation is worth it—moisture is the #1 enemy of seed longevity. For seeds you want to save beyond 3 years, consider vacuum-sealing them in addition to the decorative packets. The vacuum removes nearly all air and moisture, extending viability to 5+ years while still keeping them visually appealing.
Pro Tips for Pretty Seed Packets
- These little details make all the difference between forgettable seed storage and a system that works beautifully yea...
- Harvest Timing: The 4-6 week window for annuals is critical—wait until the flower heads crumble easily between your f...
- Drying Strategy: That 2-4 week drying period in Step 2 is non-negotiable for seed viability. I've found that spreadin...
Frequently asked questions
Can I reuse pretty seed packets for next year?
Yes! Many seed packets are designed for multi-year use if stored properly. Keep them in a cool, dry place (like a sealed container or ziplock bag with a silica packet) to prevent moisture damage. Just check the packet for expiration dates—some seeds lose viability after 1–2 years.
How do I know when to harvest seeds from my flowers?
Harvest seeds when the pods are fully mature but before they split open. For most flowers, this means waiting until the pods turn brown or papery. Gently twist or cut them off, then let them dry in a warm, well-ventilated spot for 1–2 weeks before storing.
Will pretty seed packets affect germination rates?
Not at all! The decorative designs are just printed on the outside—the seeds inside are identical to standard packets. However, if the packet is laminated or sealed with non-breathable materials, store the seeds separately in a paper envelope to avoid mold.
What if my harvested seeds don’t grow next year?
Low germination could mean the seeds weren’t fully dry before storing, or they’re past their prime. Try testing a few seeds on damp paper towels for 5–7 days—if they sprout, plant the rest! If not, blame Mother Nature and try again with fresh seeds.
Are there alternatives to saving seeds from pretty packets?
Buy bulk seeds from reputable suppliers (like Baker Creek Heirloom Seeds), swap with gardening friends, or check local seed libraries. Some nurseries even sell "seed saver" kits with extra seeds for sharing.
Wrapping up and next steps
Pretty seed packets aren’t just for show—they’re your secret weapon for a bountiful, twist-free harvest next season! By saving seeds from your favorite blooms, you’ll enjoy free, beautiful flowers while reducing waste and supporting pollinators. Plus, it’s a rewarding way to connect with nature and pass on gardening traditions.
Ready to grow your own seed stash? Start small—pick a few reliable flowers, follow the steps above, and soon you’ll be swapping seeds with fellow gardeners or gifting handmade packets. Happy harvesting! 🌸🌱