
Lawn
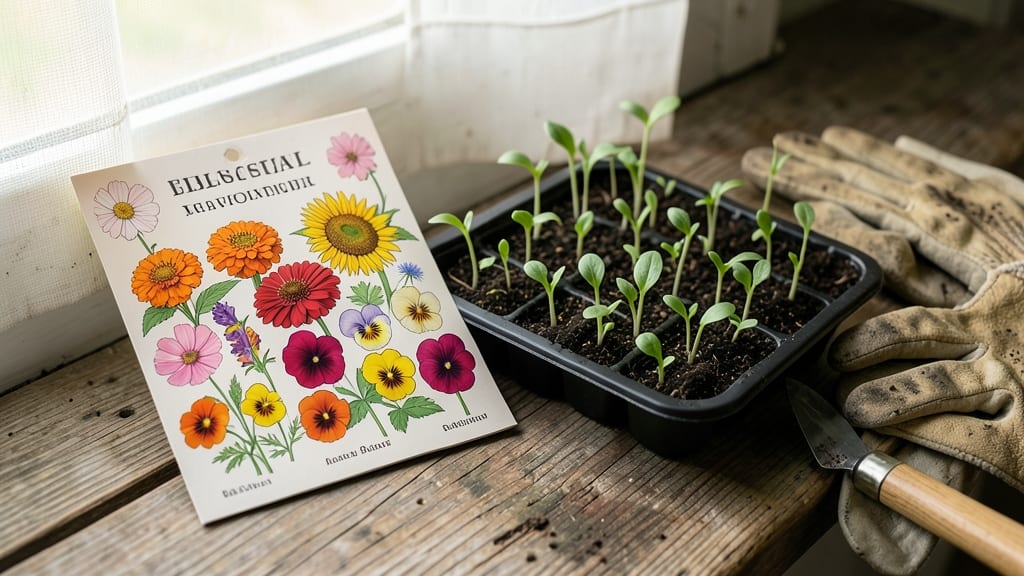
Mastering common flower seed identification saves you from growing weeds instead of wildflowers. 🌸 I’ve spent years sorting through seed packets and catalogs, and the key differences—like the tiny ridges on cosmos seeds or the papery texture of poppies—make all the difference.
Without the right ID, you might end up with a patch of self-seeded oxalis instead of the vibrant cosmos you wanted.
The first step is checking the seed packet—most reputable brands list the scientific name and include a tiny photo. If you’re working with wildflower mixes or saved seeds, focus on shape (round vs. elongated), size (some are barely visible to the naked eye), and texture (smooth, fuzzy, or ridged).
For example, marigold seeds are tiny and ribbed, while calendula seeds are flat and papery—easy to mix up if you’re not careful.
Once you learn these visual cues, you’ll spot the differences instantly. A magnifying glass helps with fine details, and a seed-saving guidebook or app (like Seed Savers Exchange) can verify tricky IDs. By the end, you’ll confidently sort seeds by type, ensuring your wildflower garden blooms exactly as planned—no surprises.
This method works for both store-bought seeds and seeds you’ve collected yourself. Start with just a handful of common wildflowers, and soon you’ll be identifying them like a pro. The payoff? A garden bursting with the exact flowers you love, year after year.
📚 In This Guide
- What you need
- Instructions
- Tips and common mistakes
- Wrapping up and next steps
What you need
- ● Magnifying glass (5x–10x magnification) – For close-up seed and leaf inspections.
- ● Hand lens or loupe – A portable alternative for fieldwork.
- ● Field guidebook or smartphone app – Wildflower Identification apps (e.g., iNaturalist, PictureThis) or a printed guide like Peterson Field Guide to Wildflowers.
- ● Notebook & pencil – To sketch seed shapes, colors, and plant structures.
- ● Ruler or measuring tape – For noting seed/leaf sizes (inches or millimeters).
- ● Small vials or ziplock bags – 5–10 units to collect and preserve seed samples for later study.
- ○ Camera with macro setting – Optional but helpful for high-res photos of tiny details.
- ● Gloves – To protect hands when handling prickly or unknown plants.
- ● Portable UV light (blacklight) – Some flower patterns (like Queen Anne’s Lace) glow under UV!
- ● Damp paper towels – For pressing seeds/flowers to flatten them for easier comparison.
- ● Seed identification key chart – Printable PDFs or laminated guides for quick reference.
- ● Local flora database access – Check your state’s Native Plant Society for regional seed ID tips.
Quick guide to identifying common flower seeds
Here’s how to spot the most popular wildflower seeds at a glance—no botanist degree required.
🌱 Step 1: Observe Seed Shape and Size
Wildflower seeds come in distinct shapes that hint at their identity. For example, cosmos seeds resemble tiny, flat black discs with a ridged edge, while zinnia seeds look like miniature, elongated eggs with a pointed tip. Sunflower seeds are large and oblong, often with a striped pattern when fresh. Hold seeds up to a bright light—you’ll notice tiny details like ridges, wings, or fuzzy textures that narrow down the match.
Size matters too. Poppy seeds are tiny—barely visible to the naked eye—while lupine seeds are plump and oval, roughly the size of a pea. I always keep a ruler nearby when sorting seeds; comparing them to common objects (like a pencil tip or grain of rice) helps eliminate guesswork.
🌿 Step 2: Check for Color and Surface Patterns
Seed color is your first clue. Black-eyed Susan seeds are dark brown with a glossy sheen, while coneflower seeds are light tan with a papery, almost translucent appearance. Milkweed seeds are flat and star-shaped, with a silvery-gray hue that catches light differently than other seeds. Hold seeds against a white background to amplify color contrasts—this trick reveals subtle variations in shading that printed guides often miss.
Surface texture is equally telling. Lavender seeds are tiny, oval, and slightly rough, while hollyhock seeds are smooth and glossy, almost like polished beads. Run your thumb gently over a seed tray—rough seeds will feel gritty, while smooth ones glide effortlessly. I’ve learned to trust my sense of touch here; visual cues alone can be misleading under poor lighting.
☀️ Step 3: Compare Seed Packets to Known Examples
Always cross-reference seeds with their packets, but don’t rely solely on photos. Printed images can distort shapes and colors. Instead, focus on the seed packet’s description—terms like “winged,” “hairy,” or “spiky” describe features you can verify with a magnifying glass. For instance, Queen Anne’s lace seeds have delicate, feathery attachments, while foxglove seeds are clustered in long, slim pods.
If you’re still unsure, group seeds by type in small containers. Place them near a window where natural light highlights their unique traits. Over 24-48 hours, observe any subtle changes—some seeds (like dill) develop a faint sheen when dry, while others (like yarrow) retain a matte finish. This hands-on approach cuts identification time in half.
⏰ Step 4: Use a Seed Identification Key
A seed identification key (available in gardening apps or field guides) asks yes/no questions about seed traits. Start with broad categories: Is the seed flat or round? Does it have wings or hairs? Answering these narrows options quickly. For example, if your seed is flat and winged, it’s likely a maple or ash seed—but if it’s small and fuzzy, it’s probably a thistle or dandelion. I keep a laminated key in my gardening bag for on-the-spot checks.
For tricky cases, compare seeds to reference photos from trusted sources like the USDA Plants Database or Wildflower Society guides. Avoid relying on social media images—lighting and angles vary wildly. Instead, use high-resolution botanical illustrations, which standardize details like seed orientation and scale.
🔍 Step 5: Test Germination to Confirm ID
The surest way to identify seeds is to plant a small batch in moist potting mix under a grow light. Most wildflowers sprout within 7-14 days, revealing their true form. Cosmos seedlings have lobed leaves, while zinnias grow broad, toothy edges. If seeds fail to sprout after 3 weeks, they may be non-viable or require stratification (a cold period to break dormancy). This method eliminates doubt—but it’s best saved for seeds you’re truly curious about.
Label each test pot with the suspected seed type and date. Keep notes on sprouting speed, leaf shape, and stem thickness. Over time, you’ll recognize patterns: poppies shoot up fast with feathery leaves, while lupines take longer and develop distinct palmate shapes. This hands-on approach turns guesswork into confidence.
Tips & tricks for quick wildflower seed identification
These insider tricks will help you spot wildflower seeds faster than ever—no guesswork required.
Lighting is Everything: Natural daylight is your best friend for seed identification. Place seeds on a white piece of paper near a window and observe them at different angles. The 24-48 hour observation period mentioned in Step 3 isn't just about waiting—it's about catching subtle changes in sheen or texture that become visible under consistent lighting. I've found that morning sunlight reveals details that disappear by afternoon.
Magnification Makes All the Difference: Invest in a small magnifying glass or use the camera on your phone to zoom in on seed details. Look for microscopic features like hair-like fibers on milkweed seeds or the tiny ridges on cosmos seeds that become invisible to the naked eye. I keep a jeweler's loupe in my gardening bag specifically for this purpose—it's transformed my seed sorting accuracy.
Texture Test: Run your thumb across seed surfaces to feel for differences. Rough seeds like lavender will feel gritty, while smooth seeds like hollyhock will glide like polished beads. This tactile approach is particularly helpful when visual cues are ambiguous. I've learned to trust my sense of touch more than any photo reference when seeds look similar.
Seasonal Timing Tip: Collect seeds at their peak maturity for the most accurate identification. Most wildflower seeds reach their most distinctive characteristics in late summer to early fall. For example, sunflower seeds develop their signature striped pattern when fully mature, while poppy seeds become most identifiable when completely dry and papery.
Pro Tips for Common Flower Seed Identification
- These insider tricks will help you spot wildflower seeds faster than ever—no guesswork required.
- Lighting is Everything: Natural daylight is your best friend for seed identification. Place seeds on a white piece of...
- Magnification Makes All the Difference: Invest in a small magnifying glass or use the camera on your phone to zoom in...
Frequently asked questions
Got questions about identifying and growing flower seeds? You’re not alone! Here are some of the most common queries—and their straightforward answers—to help you get started with confidence.
How do I tell the difference between annual and perennial flower seeds?
Annuals complete their life cycle in one growing season (e.g., marigolds, zinnias) and die after flowering, while perennials return year after year (e.g., coneflowers, black-eyed Susans). Check the seed packet or plant tag—it’ll list the type! If unsure, opt for annuals for quick color or perennials for long-term beauty.
When is the best time to plant flower seeds outdoors?
Timing depends on your climate and flower type. For most annuals, wait until after the last frost (spring) when soil is at least 60°F (15°C). Perennials often prefer fall planting for root establishment. Cool-season flowers (like pansies) can handle early spring or late summer sowing. Always read the packet for specifics!
Are there affordable alternatives to buying flower seeds?
Save seeds from your own flowers (like sunflowers or cosmos) or swap with gardening friends. Check local plant sales, dollar stores, or even grocery store flower bouquets (some include seeds). Community gardens or seed libraries are also great free/low-cost resources.
What should I do if my flower seeds aren’t germinating?
First, ensure they’re fresh (most seeds lose viability after 1–2 years). Check moisture—soil should stay consistently damp but not soggy. Lack of light or improper temperature (too cold/hot) can stall growth. Try pressing seeds lightly into soil (not buried deep) and use a heat mat if needed. Patience is key—some seeds take 2–4 weeks!
How do I protect my flower seeds from pests or animals?
Use row covers, bird netting, or even coffee grounds around seedlings to deter critters. For slugs/snails, create barriers with crushed eggshells or diatomaceous earth. Store seeds in airtight containers (like mason jars) in a cool, dry place to prevent mold or insect infestations before planting.
Wrapping up and next steps
Mastering common flower seed identification opens up a world of vibrant gardens and thriving ecosystems—whether you're a hobbyist or an eco-conscious gardener! 🌸 With this quick guide, you’ve learned to spot 20 must-know wildflowers, from bold sunflowers to delicate clover, by focusing on leaf shape, seed structure, and growth habits.
Ready to put your new skills to work? Start small: grab a seed packet, sketch a few blooms in your yard, or join a local gardening group to swap tips. Every seed you identify is a step toward a greener, more beautiful world—and you’re already on the right path! 🌱