
Propagation
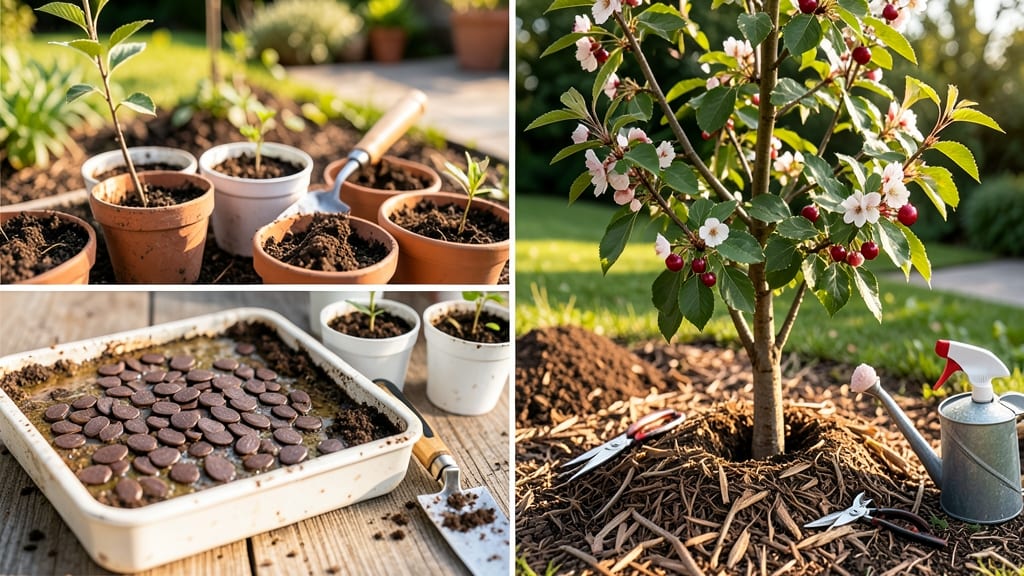
Growing a cherry tree from seed to fruit is the ultimate test of patience—and the reward is worth every decade of waiting. 🌱 I’ve nurtured three from seed, and while they won’t bear fruit for years, the journey transforms your backyard into a living legacy.
The key isn’t rushing; it’s creating the right conditions for nature to work its magic over time.
Start with fresh pits from sweet cherries (sour cherries are harder to grow). After a cold stratification period (mimicking winter), germination takes 4–8 weeks. The first few years focus on strong root and trunk development—think of it like building a skyscraper’s foundation.
Prune aggressively in early spring to encourage a sturdy, open canopy, and avoid overwatering (cherry roots hate soggy soil).
By year 5, you’ll see real growth: 6–10 feet tall with branches thick enough to support fruit. That’s when pollination becomes critical—plant two compatible varieties nearby. Once flowers appear, protect them from late frosts and watch for pests like aphids.
The first harvest? Maybe not until year 10, but the anticipation makes every pruning session worthwhile.
Here’s the secret: cherry trees grown from seed are unpredictable, but that’s part of the charm. They’ll surprise you with unique flavors, disease resistance, and a connection to the tree’s wild origins.
Just remember—this isn’t a quick harvest. It’s a commitment to something that’ll outlive you, and the first taste of those homegrown cherries? Priceless.
📚 In This Guide
- What you need
- Instructions
- Tips and common mistakes
- Wrapping up and next steps
What you need
- ● Cherry seeds: 5–10 fresh, high-quality seeds (preferably from a sweet cherry variety like Bing or Rainier). Note: Store-bought seeds may not produce true-to-type fruit.
- ● Seed-starting mix: 2–3 cups of sterile, well-draining potting soil (avoid garden soil—it can harbor pests or diseases).
- ● Small seed trays or pots: 3–5 biodegradable or plastic pots (3–4 inches in diameter) with drainage holes.
- ● Plastic wrap or humidity dome: To create a mini greenhouse effect and retain moisture.
- ● Spray bottle: For gentle watering (avoid over-saturating the soil).
- ● Grow lights or sunny windowsill: A south-facing window or a 12–16 hour LED grow light for seedlings.
- ● Small hand trowel: For planting and transplanting delicate seedlings.
- ○ Pruning shears (optional): For shaping young trees or removing suckers.
- ○ pH testing kit (optional): To ensure soil pH is between 6.0–7.0 (cherries prefer slightly acidic to neutral soil).
- ● Fertilizer (balanced, 10-10-10 or organic): A slow-release granular or liquid fertilizer for young plants.
- ○ Mulch (optional): Straw or wood chips to retain moisture and suppress weeds once planted outdoors.
- ● Patience: Cherry trees grown from seed can take 5–10 years to bear fruit—plan accordingly!
- ● Climate check: Cherries thrive in USDA Zones 5–9 with full sun (6+ hours daily).
- ● Space: Mature trees need 15–20 feet of space (dwarf varieties may require less).
- ● Pollination plan: Most cherries are self-pollinating, but planting two varieties nearby can boost fruit production.
Step-by-Step guide to growing cherries from seed to fruit
Here's how to turn a single pit into a tree bearing real fruit—no grafting required.
🌱 Step 1: Extract and Stratify the Seed
Wash the cherry pit thoroughly to remove any remaining fruit pulp, then dry it completely. The key to germination is stratification—mimicking winter's cold period. Place the pit between two damp paper towels, fold them, and store in a sealed plastic bag. Keep it in your refrigerator's crisper drawer for 6-8 weeks at 35-40°F.
Check weekly to ensure the towels stay moist but not soggy. You'll know it's ready when the pit develops a small white root breaking through the shell. This cold treatment tricks the seed into thinking winter has passed, signaling it's time to sprout.
☀️ Step 2: Plant and Provide Warmth
Once the root appears, plant the pit ½ inch deep in a 4-inch pot filled with sterile seed-starting mix. Use a small container because cherry roots are sensitive to disturbance. Place the pot in a warm spot (70-75°F)—I like a sunny windowsill or under a grow light on a 14-hour cycle.
Keep the soil consistently moist but never waterlogged. You'll see first true leaves in 4-6 weeks. This is your signal to transition to regular potting soil in a 6-inch container—cherry trees need room to develop strong roots before transplanting outdoors.
🌿 Step 3: Transplant and Train the Sapling
After 2-3 months when the seedling reaches 12 inches tall, harden it off by moving it outside for 2 hours daily over 10 days. Plant it in full sun in a well-draining garden bed or 15-gallon container (if growing in pots). Space multiple trees 15-20 feet apart—they need room to develop properly.
Prune leggy branches to encourage bushier growth. I always cut back one-third of the tallest stems in early spring to redirect energy into fruit production. Mulch around the base with 2-3 inches of organic matter to retain moisture and suppress weeds.
⏰ Step 4: Nurture for Fruit Production
Cherry trees grown from seed take 5-7 years to bear fruit, but patience pays off. Fertilize annually in early spring with a balanced 10-10-10 formula (follow package rates). Water deeply once weekly during dry spells—1-2 gallons per tree—but reduce in winter.
Watch for pests like aphids (they love new growth) and birds (they love ripe cherries). Cover young trees with floating row fabric during fruiting season if birds are a problem. Thin fruit clusters to 6-8 cherries per stem in early summer—this ensures larger, sweeter fruit.
🍒 Step 5: Harvest and Prevent Common Mistakes
Cherries ripen in late summer to early fall, depending on your climate. Pick when they easily detach from the stem and have deep color. Store in the fridge for up to 2 weeks or freeze for longer storage.
Here's the thing—don't twist pods. Gently cradle the cherry in your palm and pull straight down. Twisting snaps stems and weakens the tree. Also, avoid over-pruning—cherry trees need their foliage to produce energy for fruit. With proper care, your seedling will reward you with homegrown cherries for decades.
Tips & tricks for growing cherries from seed
A few small adjustments can make all the difference when growing cherries from seed—especially when you're working with nature's timeline.
Stratification Success: In Step 1, don't rush the 6-8 weeks in the refrigerator. I've learned this the hard way—skipping the full cold period often results in pits that either rot or sprout too slowly. Place a small cup of water in the bag with your pit to maintain consistent humidity without over-saturating the towels. The white root emerging is your only signal it's ready—don't guess!
Lighting Matters: For Step 2, if you don't have a sunny windowsill, a simple LED grow light on a 14-hour cycle works wonders. Position it just 6 inches above the seedling—closer than that can scorch tender leaves. I notice seedlings grow taller and stockier with proper light exposure, which translates to stronger roots later.
Transplanting Timing: When your sapling reaches 12 inches in Step 3, don't be tempted to rush the 10-day hardening off period. Start with just 2 hours outside on day one, gradually increasing exposure. I've seen seedlings shocked by sudden full-sun exposure—leaves turn yellow and crisp within hours. Take it slow, and your tree will thank you with vigorous growth.
Pruning Precision: In Step 4, when you're pruning those leggy branches, focus on removing only the very top third of the tallest stems. This encourages bushier growth without stressing the young tree. I always use clean, sharp pruners to avoid tearing the bark—cherry trees are sensitive to damage in their early years.
Pro Tips for Cherry From Seed To Fruit
- A few small adjustments can make all the difference when growing cherries from seed—especially when you're working wi...
- Stratification Success: In Step 1, don't rush the 6-8 weeks in the refrigerator. I've learned this the hard way—skipp...
- Lighting Matters: For Step 2, if you don't have a sunny windowsill, a simple LED grow light on a 14-hour cycle works ...
Frequently asked questions
Got questions about growing cherries from seed to fruit? You're not alone! Here are some of the most common queries—plus straightforward answers to help you avoid frustration and maximize your harvest.
How long does it take for a cherry seed to grow into a fruit-bearing tree?
A cherry tree grown from seed can take 5–10 years to bear fruit, depending on the variety and growing conditions. Patience is key—seedlings often produce smaller, less predictable fruit compared to grafted trees. For faster results, consider grafting a known variety onto your seedling later.
Do cherry seeds need cold stratification before planting?
Yes! Cherry seeds require stratification (60–90 days in cold, moist conditions) to break dormancy. After harvesting, clean the pits, dry them, then refrigerate in a damp paper towel. This mimics winter and boosts germination rates. Skip this step, and you’ll likely end up with slow or no sprouts.
Why aren’t my cherry trees producing fruit, even after years of growth?
Several factors could be at play: lack of pollination (cherries need cross-pollination), improper pruning (overcrowded branches reduce fruit set), or nutrient deficiencies (especially nitrogen or potassium). Ensure you have at least two compatible cherry trees nearby and prune annually for airflow. If issues persist, test soil pH (ideal: 6.0–6.5).
Can I grow cherry trees from store-bought cherries?
Technically yes, but with limitations. Store-bought cherries are often hybrids or treated to prevent germination. For best results, use seeds from organic, heirloom, or locally sourced cherries. Avoid pits from processed or waxed fruit—they may not sprout. If you’re determined, try it, but expect lower success rates!
What pests or diseases should I watch for in cherry trees?
Common threats include:
- Canker disease (fungal, causes sunken wounds)
- Cherry fruit fly (larvae burrow into fruit)
- Aphids (sap-sucking insects on leaves)
- Powdery mildew (white fungal coating on foliage)
Wrapping up and next steps
Growing cherries from seed to fruit is a rewarding journey that blends patience with the joy of nurturing life.
From selecting the right seed to mastering gentle harvesting techniques, each step brings you closer to a bountiful harvest—without the frustration of twisted pods! 🌱✨ Whether you’re a beginner or an experienced gardener, this process teaches resilience and the simple magic of nature.
Ready to take the next step? Start by planting that seed today—your future cherry tree (and delicious fruit) are waiting! For extra guidance, explore local gardening resources or connect with fellow growers to share tips and triumphs.