
Plants
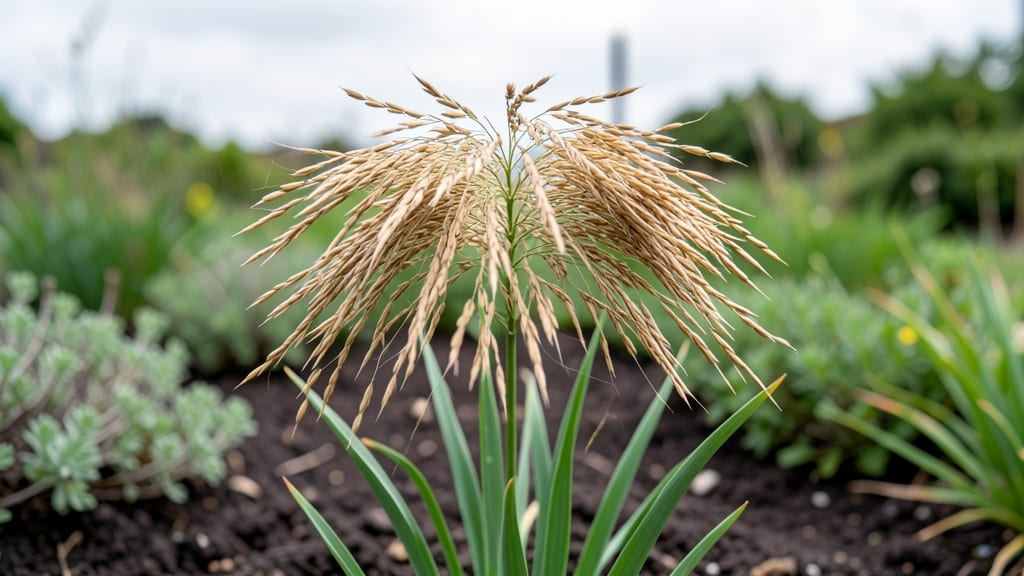
Growing wheatgrass seed heads turns your kitchen counter into a zero-waste goldmine. 🌱 The moment those delicate seed pods form, you’ve unlocked a treasure trove for propagation, compost, or even homemade remedies—no fancy equipment needed, just patience and the right timing.
Seed heads thrive when wheatgrass gets plenty of light and consistent moisture, but don’t overwater—soggy soil kills the pods before they mature. I’ve learned the hard way that skipping this step means watching those potential seeds wither away.
The pods typically ripen in 8-10 weeks, turning from green to a golden hue, signaling they’re ready for harvest.
Once mature, gently twist the seed heads free and let them dry completely before storing in a paper bag. You’ll end up with seeds that sprout faster than store-bought varieties, plus the satisfaction of knowing every part of your plant went to good use. No waste, just pure gardening magic.
This method works for both indoor countertop setups and outdoor patches, making it perfect for small spaces or urban gardeners. Here’s how to make sure your wheatgrass doesn’t skip the seed stage—ever.
📚 In This Guide
- What you need
- Instructions
- Tips and common mistakes
- Wrapping up and next steps
What you need
- ● Wheatgrass seeds: 1–2 tbsp (organic, untreated preferred—check for non-GMO labels)
- ● Growing container: Shallow tray (8"–12" wide) or
- ● Repurposed plastic container (with drainage holes)
- ● Potting soil: 2–3 cups (well-draining, seed-starting mix or organic potting soil)
- ● Watering can or spray bottle (with a fine mist setting)
- ● Light source: Sunny windowsill (6+ hours of direct light daily) or
- ● Grow light (LED, 12–16 hrs/day, 6"–12" above plants)
- ● Drainage layer: Small pebbles or perlite (½ cup, for containers without holes)
- ● Scissors or pruning shears (for harvesting seed heads)
- ● Paper towels or compostable paper (to line trays for easy cleanup)
- ● Plant markers (to track growth stages)
- ○ Humidity dome or plastic wrap (optional, for germination boost)
Step-by-step guide to harvesting wheatgrass seed heads
Here's how to transform your wheatgrass into a zero-waste resource by harvesting those nutrient-packed seed heads.
🌱 Step 1: Identify and Wait for Maturity
The key moment arrives when your wheatgrass reaches 4-6 weeks of growth—this is when the seed heads form. You'll notice the tall, slender blades begin developing small, dense clusters at the top, resembling tiny wheat stalks. These seed heads should appear golden-brown and firm to the touch, not still green or soft.
Harvesting too early means immature seeds that won't store well, while waiting too long risks the heads shattering before you can collect them. Run your fingers gently over a seed head—if it feels dry and crumbly, it's ready. I like to harvest on a dry, sunny morning when humidity is low, as this prevents moisture from clinging to the seeds.
✂️ Step 2: Cut the Seed Heads Properly
Use clean, sharp scissors to snip the entire seed head cluster about 2 inches below the base of the seed head. This leaves a small stem attached, making handling easier. Avoid pulling or twisting the stalks, as this can damage the plant and leave behind debris. Place the cut seed heads in a paper bag (not plastic—it traps moisture) and store them in a dry, shaded spot for 3-5 days to fully dry.
Real talk: If you have multiple plants, harvest a few seed heads at a time rather than all at once. This prevents overloading your drying space and ensures you can monitor the drying process closely. You'll know they're fully dry when the seed heads rattle when shaken and the seeds easily separate from the stalks with a gentle squeeze.
🪴 Step 3: Dry and Store the Seed Heads
Spread the dried seed heads on a clean, dry towel or baking sheet in a single layer. Let them sit in a well-ventilated area for another 1-2 days to ensure all moisture evaporates. This step is critical—any lingering dampness will cause the seeds to mold or spoil during storage. I keep mine in a sunny windowsill during the day and move them indoors at night to avoid temperature fluctuations.
Once completely dry, gently rub the seed heads between your palms to release the seeds. Sift the mixture through a fine-mesh strainer to separate the seeds from any remaining chaff or plant debris. Store the seeds in an airtight glass jar in a cool, dark place. Properly stored, these seeds will remain viable for up to 1 year, making them a fantastic zero-waste resource for future plantings.
💧 Step 4: Repurpose or Replant the Seeds
Now that you've harvested the seeds, you have two options: replant them or repurpose them. For replanting, sprinkle the seeds directly onto fresh soil in your wheatgrass growing tray. Cover lightly with a thin layer of soil and mist gently—no need to soak. You'll see new sprouts in 3-5 days, and you can repeat the cycle for continuous harvests.
For repurposing, these seeds are packed with nutrients and can be ground into a fine powder to use as a nutrient-rich supplement in smoothies, teas, or homemade granola. Here's the thing—wheatgrass seeds are also a fantastic natural fertilizer. Crush a handful and sprinkle it around the base of other plants to boost soil health and deter pests. Just don’t overdo it; a little goes a long way.
Tips & tricks for perfect wheatgrass seed head harvesting
Here's what nobody tells you about maximizing your wheatgrass harvest without the frustration.
Timing Secret: The 4-6 week window for maturity is non-negotiable—this is when the seeds develop maximum nutritional potency. I've learned the hard way that harvesting too early means seeds won't germinate properly, while waiting too long causes them to shatter before you can collect them. Check maturity by gently squeezing a seed head—it should feel dry and crumbly, not springy or green. This tactile test is more reliable than visual cues alone.
Cutting Technique: That 2-inch stem you leave attached isn't just for aesthetics—it creates a natural handle when you're rubbing the seed heads later. Use clean, sharp scissors to avoid crushing the delicate seed clusters. I've found that harvesting on dry mornings prevents moisture from clinging to the seeds during the drying process, which is why I always schedule my harvests for these conditions.
Drying Strategy: The 3-5 day drying period in Step 2 is your critical quality control window. Spread seed heads in a single layer where they can get good airflow—this prevents mold and ensures even drying. I keep mine in a well-ventilated area with indirect sunlight to avoid overheating. The rattle test is your best indicator of readiness: fully dry heads will sound hollow when shaken, while damp ones will feel heavy and make a dull thud.
Storage Wisdom: That airtight glass jar isn't just for keeping seeds fresh—it preserves their viability for up to a year. Before sealing, let seeds cool completely to prevent condensation buildup inside the jar. I like to label my jars with the harvest date so I can track freshness. The cool, dark storage environment mimics natural seed dormancy conditions, which helps maintain germination rates over time.
Pro Tips for Wheatgrass Seed Head
- Here's what nobody tells you about maximizing your wheatgrass harvest without the frustration.
- Timing Secret: The 4-6 week window for maturity is non-negotiable—this is when the seeds develop maximum nutritional ...
- Cutting Technique: That 2-inch stem you leave attached isn't just for aesthetics—it creates a natural handle when you...
Frequently asked questions
Got questions about growing and harvesting wheatgrass seed heads? You’re not alone! Here are some of the most common queries—and their simple solutions.
When do wheatgrass seed heads appear after planting?
Seed heads typically emerge 6–8 weeks after planting, depending on light and temperature. If you’re growing indoors, supplement with 12–16 hours of bright light daily to speed things up. Outdoor plants may take slightly longer, especially in cooler climates. Watch for tall, feathery plumes—those are your ready-to-harvest seed heads!
How long do wheatgrass seed heads stay viable for harvesting?
Once the seed heads form, they’re best harvested within 1–2 weeks to ensure maximum seed quality. Wait too long, and the seeds may scatter or lose potency. If you miss the window, store dried heads in a paper bag in a cool, dry place for up to 6 months—just shake occasionally to prevent mold.
Can I grow wheatgrass seed heads from store-bought wheatgrass juice?
Nope! Store-bought wheatgrass juice is pasteurized and won’t regrow into seed heads. For seeds, you’ll need to sprout whole wheat berries (available at health stores or online). Start with organic, untreated grains for the best results.
What if my wheatgrass seed heads aren’t forming?
Missing seed heads? Check these fixes:
- Light: Wheatgrass needs full-spectrum light (grow lights work indoors).
- Water: Keep soil consistently moist but not soggy.
- Nutrients: Use a balanced organic fertilizer (like fish emulsion) if growth stalls.
- Patience: Some varieties take 10–12 weeks to flower in cooler temps.
Are there alternatives to wheatgrass seed heads for zero-waste saving?
If you’re after nutrient-dense greens, try:
- Barleygrass (similar benefits, faster growth).
- Oatgrass (milder taste, great for smoothies).
- Chia seeds (sprout into gel-like greens for salads).
- Alfalfa sprouts (quick-harvest, high in protein).
Wrapping up and next steps
Growing your own wheatgrass seed heads isn’t just rewarding—it’s a sustainable way to embrace zero-waste living while enjoying fresh, nutrient-packed harvests! 🌱 From selecting the right variety to mastering pod harvesting, every step brings you closer to a thriving garden and a greener lifestyle.
Now that you’re armed with tips and tricks, why not take the plunge? Start small, experiment with different methods, and soon you’ll be sharing your wheatgrass bounty with friends or even selling it locally. Happy growing—and here’s to a future full of lush, homegrown goodness! 🌟