
Propagation
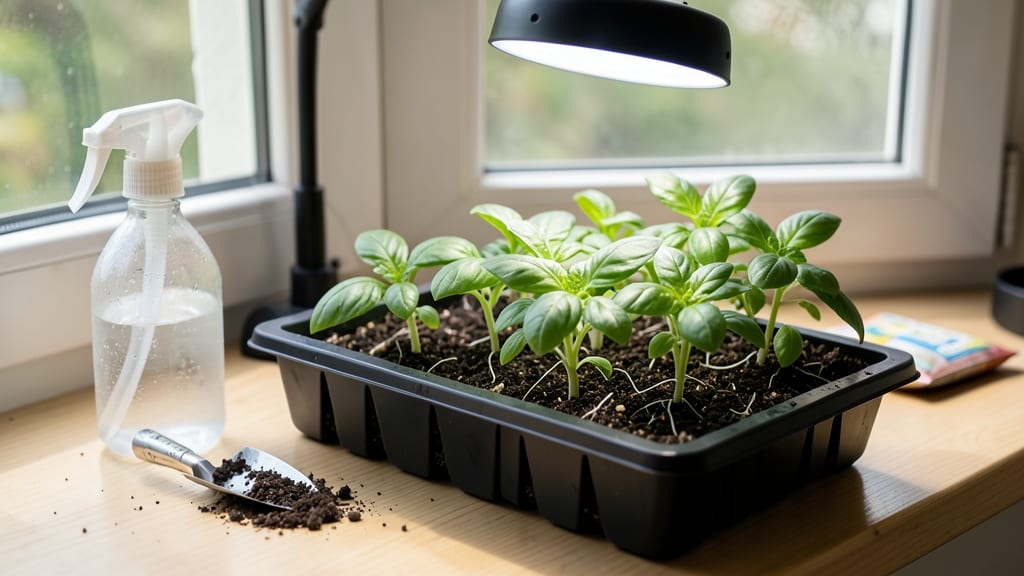
My Promix seed starting mix transformed my germination rates from hit-or-miss to reliable—no more sad, leggy seedlings or moldy trays. 🌱 The secret lies in its perfect balance of moisture retention and aeration, which keeps roots happy while preventing the dreaded "damping-off" that wipes out seedlings before they even sprout.
Unlike heavy peat mixes that stay soggy or coco coir that dries out too fast, Promix stays lightly moist without turning into a swamp. It’s pre-fertilized with gentle nutrients, so you don’t need to fuss with starter supplements right away.
Just mix it with a little perlite or vermiculite for extra fluff, and you’re ready to sow.
What you’ll get are sturdy, dark-green seedlings with strong roots that transplant like champs. No more weeks of wilting after moving them outdoors—these babies are ready for their permanent homes in 3-4 weeks, not 6.
The mix even resists compaction, so you won’t have to replant seeds as they grow.
Works for everything from tiny lettuce seeds to finicky herbs like basil. Just avoid overwatering (that’s the #1 killer), and you’re golden. Here’s how to make the most of it without the common pitfalls.
📚 In This Guide
- What you need
- Instructions
- Tips and common mistakes
- Wrapping up and next steps
What you need
- ● Promix Seed Starting Mix – 1 bag (1.5–2 cubic feet), depending on your seedling tray size.
- ● Seedling trays or pots – 4–6 inch deep with drainage holes (plastic, biodegradable, or peat pots).
- ● Watering can or spray bottle – Fine mist setting to avoid disturbing seeds.
- ● Seeds – High-quality, fresh seeds (check planting depth on seed packets).
- ● Grow lights or sunny windowsill – 12–16 hours of light daily for optimal growth.
- ○ Humidity dome or plastic wrap – Optional but helpful for retaining moisture in early stages.
- ○ pH testing kit (optional but recommended) – Promix is slightly acidic (5.8–6.5 pH); adjust if needed.
- ● Gloves – To keep hands clean while handling mix and seeds.
- ● Small hand trowel or spoon – For filling trays evenly without compacting soil.
- ● Labeling tags & marker – Track seed varieties and planting dates.
- ○ Thermometer (optional) – Monitor soil temps (60–75°F ideal) for germination.
- ● Fertilizer (balanced, water-soluble) – Diluted to half-strength once seedlings sprout (2–3 weeks in).
How to use Promix seed starting mix for healthy seedlings
This light, airy mix is designed to prevent damping-off while keeping roots happy—here’s how to get the most out of it.
🌱 Step 1: Sterilize and Prep Your Containers
Start with clean containers—whether that’s seed trays, peat pots, or recycled plastic cells. Rinse them with a 10% bleach solution (1 part bleach to 9 parts water) to kill any lingering pathogens, then let them dry completely in the sun. I always give them a final rinse with plain water to remove bleach residue before use.
Promix’s lightweight texture means it won’t compact like garden soil, but you’ll still want to avoid crusted surfaces. If using reused containers, add a thin layer of fresh mix to the bottom before filling the rest. This ensures the first layer stays loose and breathable for emerging roots.
💧 Step 2: Moisten the Mix Before Planting
Fill your containers with Promix, leaving about ½ inch of space at the top for watering. The mix should feel like a damp sponge—not soggy, not dry. I like to use a spray bottle to mist it evenly, then let it sit for 10-15 minutes so moisture distributes fully. Overwatering now can create anaerobic pockets that stunt root growth.
Gently press the surface with your fingers to settle the mix without compacting it. You’ll notice it holds its shape when squeezed lightly but crumbles easily—this is the ideal balance for seedling roots. If it feels too dry, add a little more water; if it’s clumping, let it air out for another 10 minutes.
☀️ Step 3: Sow Seeds at the Right Depth
Promix’s fine texture makes it easy to handle tiny seeds. Use a toothpick or pencil to create small holes at the correct depth—typically twice the seed’s diameter—and drop in 1-2 seeds per spot. Cover lightly with a sprinkle of additional mix, just enough to obscure the seeds but not bury them too deep.
Here’s the thing—Promix’s moisture retention means you won’t need to water immediately after sowing. A light mist with a spray bottle is enough to settle the seeds. For larger seeds like beans or peas, press them gently into the mix to ensure good soil contact, which speeds up germination.
🌿 Step 4: Maintain Even Moisture Without Overwatering
Place your trays in a warm, bright spot (ideally 70-75°F) and keep the mix consistently moist but never waterlogged. Promix’s blend of peat, perlite, and compost breaks down slowly, so it won’t compact as seedlings grow. Water from the bottom by placing trays in a shallow tray of water for 10-15 minutes—this encourages roots to grow downward.
Watch for the top ½ inch of mix to dry out between waterings. If you see the surface crusting or pulling away from the container edges, it’s time to water again. Overwatering here is the biggest mistake—it leads to damping-off, where seedlings collapse at the soil line. A humidity dome helps, but remove it as soon as sprouts appear.
✂️ Step 5: Transplant When Seedlings Are Ready
When seedlings develop their first true leaves (not the initial cotyledons), they’re ready to move to larger containers or the garden. Promix’s lightweight nature makes it easy to transplant without disturbing roots. Gently squeeze the sides of the container to loosen the mix, then slide the seedling out intact.
Hardening off is critical—gradually expose seedlings to outdoor conditions over 7-10 days before planting. Promix’s balanced nutrients will support strong early growth, but transition to regular potting mix once they’re established. You’ll know they’re thriving when new leaves emerge within 3-5 days of transplanting.
Tips & tricks for perfect seed starting with Promix mix
Here’s what I’ve learned after years of using this mix—small details that make all the difference for sturdy, healthy seedlings.
Sterilization Secret: Don’t rush the drying time after bleach sterilization. While the instructions call for complete drying, I’ve found that leaving containers in direct sunlight for 30-45 minutes after rinsing actually speeds up evaporation and ensures no moisture remains. This prevents the first layer of Promix from becoming too damp once planted. For extra peace of mind, I sometimes use a hairdryer on low heat for 5 minutes after rinsing—just until everything feels completely dry to the touch.
Moisture Mastery: The 10-15 minute settling time after moistening is your chance to check moisture distribution. I press my finger about ½ inch deep—if it comes out clean but the mix feels cool to the touch, you’ve got perfect moisture. If it feels warm, you’ve overwatered; if it feels dry, add just enough water to make it feel like a wrung-out sponge. Pro tip: Use a moisture meter if you’re serious about seed starting—it takes the guesswork out of this critical step.
Transplanting Technique: When seedlings reach the first true leaves stage, I’ve found that gently tapping the container on all sides before removing them from the mix minimizes root disturbance. Promix’s lightweight nature means you can actually lift seedlings out by their leaves if needed—just support the base with your other hand. This works especially well for delicate seedlings like lettuce or herbs that might otherwise break apart.
Hardening Off Hack: The 7-10 day hardening off period can be tricky with temperature fluctuations. I start by placing trays in a sheltered outdoor spot for just 1 hour on day 1, then gradually increase exposure. On cloudy days, I’ll extend the time slightly since seedlings won’t get as much direct sun. Keep a close eye for wilting—if you see that, bring them back in immediately. This slow acclimation prevents transplant shock and gives you seedlings that’ll thrive in their permanent home.
Pro Tips for Promix Seed Starting Mix
- Here’s what I’ve learned after years of using this mix—small details that make all the difference for sturdy, healthy seedlings.
- Sterilization Secret: Don’t rush the drying time after bleach sterilization.
- Moisture Mastery: The 10-15 minute settling time after moistening is your chance to check moisture distribution.
Frequently asked questions
Got questions about getting the most out of your Promix Seed Starting Mix? You’re in the right place! Here are some of the most common queries from gardeners just like you—plus quick, actionable answers to keep your seedlings thriving.
What’s the best way to sterilize Promix Seed Starting Mix before use?
Sterilizing your mix prevents mold and damping-off. Spread it in a thin layer on a baking sheet and bake at 200°F (93°C) for 30 minutes. Let it cool completely before use. For larger batches, microwave it in 1-minute intervals, stirring between each, until steaming stops. Always wear gloves—sterilized mix is hot!
How often should I water seedlings in Promix?
Keep the mix consistently moist but never soggy. Water gently from the bottom (using a tray) or top when the surface feels dry to the touch. Overwatering is the #1 killer—aim for light misting daily or every other day, adjusting for humidity. A spray bottle works great for delicate seedlings!
Can I reuse Promix Seed Starting Mix after transplanting?
While Promix isn’t designed for long-term reuse, you can refresh it for a second round of seedlings. Remove old debris, fluff the mix, and sterilize it again (see above). For best results, mix in 20% fresh Promix or compost to restore nutrients. Avoid reusing it for more than 2 cycles—seedlings need fresh growing power!
Why are my seedlings leggy in Promix?
Leggy seedlings (tall, weak stems) usually mean too little light. Move your trays to a sunny windowsill or under grow lights (12–16 hours/day). If you’ve already transplanted, try burying stems deeper to encourage root growth. Avoid overcrowding—thin seedlings if they’re competing for light.
What’s a good alternative if I can’t find Promix?
Look for peat-based seed-starting mixes with perlite or vermiculite (like Black Gold Seedling Mix or FoxFarm Seedling Mix). Avoid garden soil—it’s too dense and can harbor pathogens. For a DIY option, blend 70% peat moss + 30% perlite. Just remember: sterilization is key with homemade mixes!
Wrapping up and next steps
Starting seeds with Promix Seed Starting Mix gives you the perfect foundation for vibrant, healthy plants—thanks to its balanced moisture retention and aeration.
Whether you're a seasoned gardener or just beginning, this mix simplifies the process while ensuring strong, resilient seedlings. Now that you're equipped with the right tools and know-how, it’s time to roll up your sleeves and watch your garden bloom!
🌱 Your Next Step:
- Grab your Promix mix, fill those trays, and plant those seeds!
- Monitor moisture and light, and soon you’ll be transplanting thriving seedlings into your garden.
- Share your progress—tag us @YourGardenCommunity for tips and inspiration!