
Lawn
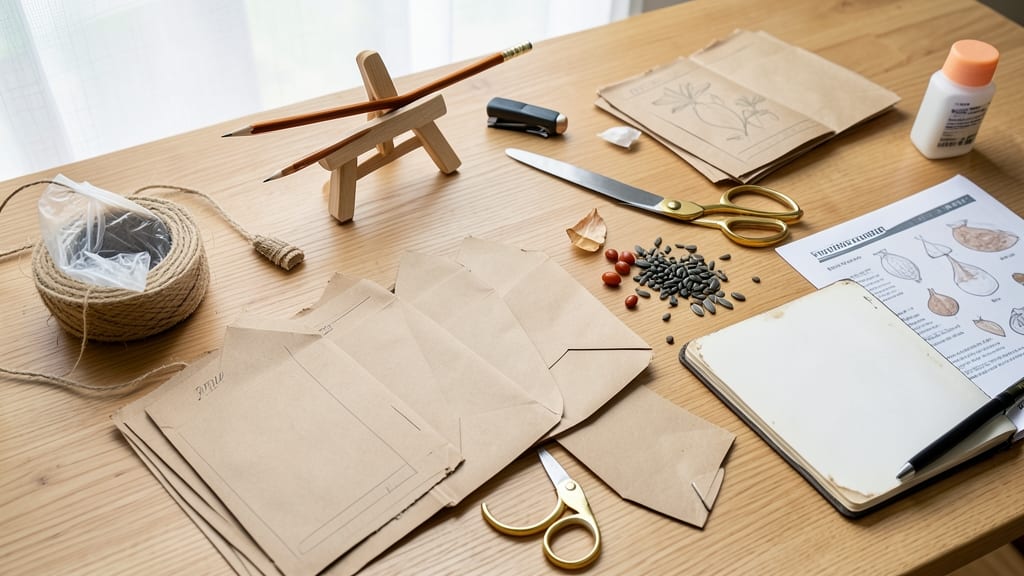
Making seed packets preserves your harvest's potential and cuts costs year after year. 🌱 I learned the hard way when damp seeds lost viability—until I discovered these simple paper envelopes that keep them dry and labeled for planting.
You'll need basic supplies: kraft paper envelopes, silica gel packets (or rice in a small bag), and a fine-tip marker for labels. The key is drying seeds completely before storage—spread them on a tray for 1-2 weeks until crisp. Then seal them in envelopes with a desiccant to fight moisture.
By winter, you'll have organized packets ready for next season's garden. Each one holds 100+ seeds, labeled with variety and planting dates—no more guessing or wasted money on store-bought seeds. This method works for flowers, vegetables, and herbs alike. Here's how to make them last for years!
📚 In This Guide
- What you need
- Instructions
- Tips and common mistakes
- Wrapping up and next steps
What you need
- ● Seed paper or kraft paper: 3" x 5" sheets (or slightly larger) – 10-20 sheets depending on your batch size. Choose acid-free, lignin-free paper to prevent mold and ensure longevity.
- ● Non-toxic glue or starch-based adhesive: 1 small bottle (e.g., white glue or flour-water paste). Avoid PVA glue—it can inhibit germination!
- ● Seeds: Fresh, high-quality seeds (organic if possible). Aim for 10-50 seeds per packet, depending on the seed type and size.
- ● Water: For mixing adhesive or dampening paper.
- ● Ruler: A 12-inch metal or plastic ruler for precise measurements.
- ● Pencil or marker: For labeling (use archival-quality ink to prevent fading).
- ● Scissors or paper cutter: For clean, even cuts.
- ○ Bone folder (optional but helpful): For crisp folds and sealing edges.
- ● Herb or flower petals: For decorative, fragrant packets (e.g., lavender or rose petals).
- ● Dried herbs (e.g., chamomile, mint): Adds natural preservation properties and scent.
- ● Wax seal or twine: For a polished, professional finish. Use beeswax or soy wax for eco-friendliness.
- ● Seed-saving envelope inserts: Small silica gel packets (food-grade) to absorb moisture and extend shelf life.
- ● Printed seed-saving labels: Pre-designed templates for a cohesive look (check Pinterest for inspiration!).
Step-by-Step instructions for creating custom seed packets
Here’s how to craft professional-quality seed packets that keep your saved seeds viable and organized.
📄 Step 1: Select the Right Materials for Longevity
Start with acid-free paper—this prevents seed degradation over time. I recommend using kraft paper for its sturdy, archival quality, or manila folders cut into 3x5-inch envelopes for a polished look. Avoid glossy or dyed papers, as they can break down faster and may react with seed oils.
Gather a bone folder (or a stiff paper folder) to create crisp folds without tearing. For sealing, use wax paper or a wax seal stamp—this adds an extra moisture barrier. Labeling is key, so have a fine-tip black marker ready for permanent ink. Pro tip: Store seeds in small glassine envelopes inside the paper packet for extra protection against humidity.
📏 Step 2: Measure and Fold for Maximum Protection
Cut your paper to 3x5 inches (standard seed packet size) or adjust based on seed quantity. Fold the long edges inward first, creating a 1-inch border on all sides. This ensures your seeds have room to breathe while staying secure. Press firmly along each fold with your bone folder—uneven folds can tear when sealed.
For the final seal, fold the bottom flap up ½ inch and the top flap down ½ inch, overlapping slightly. This creates a double-layer barrier against moisture. If using wax paper, place a small piece inside the flap before sealing to add an extra moisture-proof layer. Test the seal by gently pressing the edges—it should hold without gapping.
✍️ Step 3: Label with Essential Seed Information
Write the seed variety name clearly at the top of the packet. Below that, include the harvest year and date saved—this helps track germination rates over time. For example: "Heirloom Cherry Tomato – Harvested 2023 – Saved Oct 2023." Use a light pencil first for draft labels, then trace over with the marker for permanence.
Add storage instructions like "Store in cool, dry place" or "Test germination before planting." If you’ve tested viability, note the germination rate (e.g., "85% viable"). This turns your packets into a living record of your seed-saving journey. For extra clarity, use a small sticker with the seed’s photo if you have one—visual cues make identification effortless.
🌱 Step 4: Seal and Store for Long-Term Viability
Apply a thin layer of wax along the sealed edge using your wax paper or stamp. This adds a final moisture barrier—critical for seeds like beans or peas, which can spoil in damp conditions. Place the sealed packet in a cool, dark place (like a pantry or seed vault) until planting. Avoid refrigeration unless storing for 5+ years, as temperature fluctuations can stress seeds.
For humidity control, store packets in a small airtight container with a silica gel packet (the kind that comes with electronics). Check the silica gel monthly—if it turns from blue to pink, replace it immediately. Label the container with the storage date so you can rotate seeds properly. This method keeps seeds viable for 3-5 years or longer for hardy varieties like beans and peas.
⏰ Step 5: Test Germination Before Planting
Before using saved seeds, perform a germination test: place 10 seeds between damp paper towels in a sealed bag. Keep them in a warm (70-75°F) spot and check daily. Count the number of seeds that sprout within 7-14 days—this gives your viability percentage. If fewer than 50% sprout, consider refreshing your seed stock or adjusting storage conditions.
Discard any packets that show signs of mold, discoloration, or musty smells—these indicate compromised seeds. For seeds that pass the test, update the packet’s label with the new germination rate and test date. This keeps your seed-saving system accurate and efficient. Now you’re ready to plant with confidence, knowing your seeds are fresh and ready to grow!
Tips & tricks for perfect DIY seed packets
Between us, these small details make all the difference in keeping your seeds viable for years. The right materials and precise folding techniques aren't just about aesthetics—they're about preserving that germination power.
Material Selection Matters: For Step 1, I can't emphasize enough how critical acid-free paper is. Regular printer paper or newsprint contains acids that will degrade your seeds over time, even within months. Kraft paper and manila folders are your best bets—they're archival quality and won't break down. If you're using glassine envelopes inside (as mentioned in the instructions), opt for the unbleached variety to avoid any chemical reactions with your seeds.
Folding Precision: When creating that 1-inch border in Step 2, use a ruler to ensure consistency across all packets. Uneven borders can create weak points where moisture might seep in. For the final seal, press each fold with your bone folder while holding the packet horizontally—this creates a more secure barrier than vertical pressing. Think of it like creating a tiny, portable climate-controlled environment for your seeds.
Labeling Strategy: In Step 3, I've found that adding a tiny QR code sticker with a photo of your plant can be a game-changer. Since we're limited to physical labels, this visual reference prevents mix-ups when you're ready to plant next season. For the storage date, I recommend using a small sticker that can be peeled off and replaced annually—this keeps your packet looking fresh while maintaining all the critical information.
Storage Environment: While the instructions mention storing in a cool, dark place, I've learned this the hard way: basements can be too humid. If your storage area has any moisture issues, add a small packet of uncooked rice to your container—it acts as a natural moisture absorber. And that 70-75°F warm spot for germination testing? Use a seedling heat mat set to low if your home doesn't naturally maintain that temperature consistently.
Pro Tips for Make Seed Packets
- Between us, these small details make all the difference in keeping your seeds viable for years. The right materials a...
- Material Selection Matters: For Step 1, I can't emphasize enough how critical acid-free paper is. Regular printer pap...
- Folding Precision: When creating that 1-inch border in Step 2, use a ruler to ensure consistency across all packets. ...
Frequently asked questions
Got questions about crafting your own seed packets? You’re not alone! Here are answers to the most common queries to help you create perfect, long-lasting seed envelopes with ease.
How long do homemade seed packets last before seeds lose viability?
Most seeds stay viable for 1–5 years when stored properly in airtight, dry conditions (like your DIY packets). Cool, dark spaces—such as a fridge or basement—extend shelf life. Check seed-specific guidelines (e.g., lettuce seeds last ~1 year, while beans may last 3–4 years). Label packets with the harvest date to track freshness!
Can I reuse old seed packets for new seeds?
Yes! Clean and dry old envelopes before reuse—just ensure they’re free of moisture or mold. For hygiene, swap out the paper if it’s brittle or stained. Pro tip: Add a silica gel packet inside for extra moisture control if storing long-term.
What’s the best time of year to make seed packets for spring planting?
Start in late summer or early fall (August–October) to dry seeds thoroughly before winter. For spring crops, harvest seeds when pods split open naturally (e.g., tomatoes, peppers). Store packets until 6–8 weeks before your last frost date for optimal germination timing.
What if my seeds won’t dry properly in the envelopes?
If seeds stay damp, spread them on a paper towel or mesh screen in a warm, dry spot (like a sunny windowsill) for 1–2 weeks. Avoid direct sunlight to prevent overheating. Once fully dry (no moisture left), seal them in fresh envelopes with a desiccant packet (like rice or silica gel) to absorb lingering humidity.
How can I make my seed packets look professional and attractive?
Use thick cardstock or kraft paper for a polished look, and add labels with:- Seed name & variety
- Harvest date
- Germination instructions
- Optional: Hand-drawn illustrations or waterproof ink for durability.
Wrapping up and next steps
Creating your own seed packets is a rewarding way to preserve heirloom varieties, reduce waste, and share gardening joy with others! With just a few simple materials and a little patience, you can craft durable, informative envelopes that keep seeds viable for years.
Whether you're saving seeds from your garden or preparing for next season, this DIY project is both practical and eco-friendly.
Now that you’re equipped with the know-how, why not start small? Try making seed packets from a few of your favorite plants this week—experiment with designs, labels, and storage tips. Happy gardening, and may your seeds grow into a thriving harvest! 🌱✨