
Flowers
Seed paper flowers bring color to life without the usual fuss—just water and wait. 🌸 I’ve turned these delicate blooms into my go-to gift for weddings, showers, and even my own desk, and they last weeks without wilting. The best part?
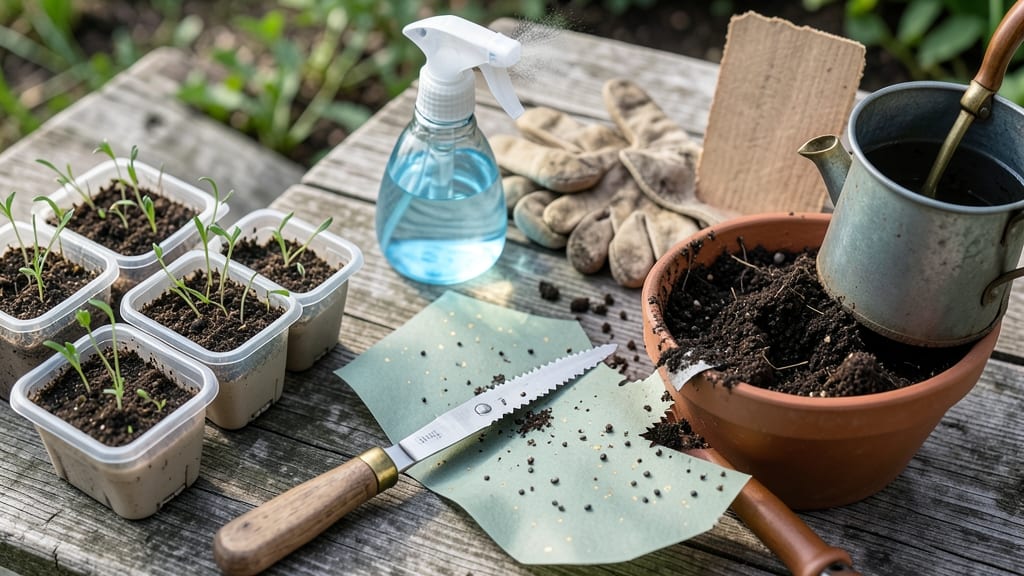
They’re planted by simply pressing the paper into soil, no digging required. You’ll need seed paper (available online or at craft stores), a shallow tray, potting mix, and a spray bottle. Place the paper on damp soil, mist lightly, and set in bright, indirect light.
Germination happens in 7-14 days, and once blooms appear, they’ll stay vibrant for 2-4 weeks—longer if kept dry. These flowers thrive in partial sun, making them perfect for windowsills or shaded patios. The eco-friendly paper breaks down naturally, leaving no trace behind.
Plus, they’re lightweight and travel-friendly, ideal for events or last-minute decor. Try them in terrariums, framed as art, or tucked into books for a pop of color. The possibilities are endless—and so easy even a busy gardener can handle them.
📚 In This Guide
- What you need
- Instructions
- Tips and common mistakes
- Wrapping up and next steps
What you need
- ○ Seed paper: 1–2 sheets (pre-made or DIY—see optional below). Look for blends like wildflower, herb, or veggie seeds.
- ● Floral wire: 1 roll (18–22 gauge, 12–18 inches long). Copper or green-coated wire works best for durability.
- ● Floral tape or twine: 1 small roll (for securing stems). Bamboo twine adds a rustic touch!
- ● Scissors: 1 pair (sharp, for clean cuts). Craft scissors or floral shears work.
- ● Water: Small bowl or spray bottle (for dampening paper).
- ○ Glue (optional but helpful): A dab of white glue or Mod Podge to reinforce folds.
- ● Acrylic paint or markers: For customizing seed paper with designs or colors.
- ● Dried flowers/leaves: To layer texture or add depth to your blooms.
- ● Ribbon or lace: For elegant stems or decorative accents.
- ● Seed paper DIY kit: If starting from scratch: cotton lint, water, seeds, and a blender (for homemade pulp).
- ● A flat, dry workspace (newspaper or parchment paper helps contain mess).
- ● Patience! Let seed paper dry fully (1–2 hours) before handling.
- ● Access to sunlight or a warm spot (seed paper blooms best outdoors after planting).
Step-by-Step instructions for crafting seed paper flowers
Here's how I make these beautiful, water-independent blooms that keep giving long after they're made.
🌱 Step 1: Gather and Prepare Your Materials
Start with 4 sheets of seed paper—each pre-loaded with wildflower seeds and designed to bloom without soil. Cut each sheet into 4 equal petal shapes using scissors or a craft knife, aiming for 3-4 inch wide petals. I like to trace a flower template first to keep shapes consistent. The edges don't need to be perfect—just organic and slightly irregular for a natural look.
While cutting, keep a spray bottle filled with warm water nearby. Seed paper needs moisture to activate, but too much too soon will warp the shapes. Lay your cut petals flat on a clean, dry surface—newspaper or parchment works best. This is where the magic begins: the paper will start to soften and become pliable within minutes.
💧 Step 2: Shape and Assemble the Flowers
Once the petals are damp but not soggy, carefully shape each one into a gentle curve—think of a teardrop shape with the narrow end at the base. You'll need 4 petals per flower, so arrange them in a circular pattern with the narrow ends meeting at the center. This creates the flower's core where you'll add the final touch.
For the center, cut a small ½-inch circle from the remaining seed paper. Mist it lightly and press it into the center of your petal arrangement. Gently fold the petal edges inward to secure the center. Here's the thing—don't press too hard. You want the petals to stay flexible enough to open naturally when planted.
☀️ Step 3: Let Them Dry and Cure
Place your assembled flowers on a flat, dry surface in a spot with indirect light—direct sun will dry them too quickly and cause cracking. Let them air dry for 24-48 hours until completely stiff. You'll know they're ready when the petals hold their shape without bending when touched lightly.
Once dry, store them in a cool, dry place until you're ready to plant. I keep mine in a shallow box lined with tissue paper. The longer you wait to plant, the more dormant the seeds become—so plant them within 2-3 months for best results. If you notice any petals curling or warping during storage, just let them sit in a warm, dry spot for another hour to re-flatten.
🌿 Step 4: Plant and Water for Blooms
When you're ready to plant, dig a small hole in your garden bed or container—about ½ inch deep and the size of your flower's base. Gently press the flower into the hole so the base sits flat against the soil. Water the area thoroughly until the soil is 1 inch deep moist. The seed paper will start to break down within 1-2 weeks, releasing the seeds.
Here's where it gets exciting: within 4-6 weeks, you'll see tiny sprouts emerging from the soil. These flowers are designed to bloom without additional watering for 4-6 weeks after planting. The paper absorbs and holds moisture during the initial watering, slowly releasing it to the seeds as they germinate. After that, normal watering resumes—just like any other plant.
⏰ Step 5: Maintain and Enjoy Your Blooms
Once the flowers have established, treat them like any other wildflower planting. Water 1-2 times per week unless you've had recent rain, keeping the soil 1 inch deep moist. You'll see blooms appear in 6-8 weeks, and they'll continue to flower for several months, attracting pollinators to your garden.
The best part? These flowers are perfect for gifts, weddings, or garden decor because they're lightweight and easy to transport. Just keep them dry until planting day. If you're giving them as a gift, include a small card with planting instructions—it's a thoughtful touch that makes the recipient feel like they're part of the process. And remember, the longer you wait to plant, the more dramatic the blooms will be when they finally appear!
Tips & tricks for perfect seed paper flowers
These simple tricks will help you create stunning, long-lasting blooms that bring nature's beauty indoors or out.
Petal Shape Matters: When cutting your 3-4 inch wide petals in Step 1, use a template for consistency. I trace a simple flower shape on scrap paper first—this keeps all petals uniform and makes assembly easier. The slight irregularities in edges actually make them look more natural, but starting with a guide prevents uneven shapes that could ruin the flower's balance.
Moisture Control: The warm water in your spray bottle should be just warm to the touch, not hot. Too much heat can weaken the seed paper fibers, causing them to warp or lose their shape before you've even assembled the flowers. After misting, let the petals sit for 2-3 minutes before shaping—this gives the moisture time to distribute evenly without making them soggy.
Drying Strategy: For the 24-48 hour drying period in Step 3, I use a small fan on low setting to speed up evaporation without causing cracks. Place your flowers on a wire rack over a baking sheet to allow airflow on all sides. If you notice any curling during drying, gently press them flat with your fingers once they're partially dry—they'll hold their shape better after full curing.
Planting Depth: In Step 4, the ½ inch deep hole is crucial—any deeper and the seeds may not get enough light to germinate, while shallower planting can leave them vulnerable to drying out. Press the flower's base firmly into the soil so it makes good contact with the earth, but don't compact the surrounding soil too tightly. This ensures proper moisture absorption while allowing roots to establish easily.
Pro Tips for Seed Paper Flowers
- These simple tricks will help you create stunning, long-lasting blooms that bring nature's beauty indoors or out.
- Petal Shape Matters: When cutting your 3-4 inch wide petals in Step 1, use a template for consistency. I trace a simp...
- Moisture Control: The warm water in your spray bottle should be just warm to the touch, not hot. Too much heat can we...
Frequently asked questions
Got questions about seed paper flowers? You’re not alone! Here are some of the most common queries—and their easy answers—to help you bloom with confidence.
How long do seed paper flowers last before they need water?
Seed paper flowers are designed to last months without water—typically 4 to 8 weeks in dry conditions. Once planted, they’ll sprout within 7 to 21 days (depending on sunlight and soil). Store them in a cool, dry place to extend their shelf life!
Can I plant seed paper flowers in any soil?
While seed paper flowers are low-maintenance, they thrive best in well-draining soil with a mix of organic matter (like compost). Avoid heavy clay or waterlogged soil—these can suffocate the roots. A 50/50 blend of potting soil and sand works wonders for germination!
Do seed paper flowers need sunlight to grow?
Yes! Most seed paper flowers require 4 to 6 hours of sunlight daily for optimal growth. Place them in a bright, indirect spot (like a windowsill or garden bed) until they sprout. Once planted, they’ll adapt to partial shade but may bloom less vibrantly.
What if my seed paper flower doesn’t sprout?
Don’t worry—seed paper can be finicky! First, check for moisture (gently mist the soil) and warmth (a sunny windowsill helps). If it’s still dormant after 3 weeks, try planting a new sheet—some seeds may need extra coaxing. Pro tip: Label your flowers!
Are there alternatives to seed paper flowers for gifting?
If seed paper isn’t your style, consider:
- Dried flowers (last years with zero care)
- Succulent arrangements (thrive in low light)
- Air plants (tillandsias) (need almost no soil!)
- Preserved botanicals (no water, no fuss)
Wrapping up and next steps
Seed paper flowers are the perfect blend of creativity, sustainability, and low-maintenance beauty—giving you vibrant blooms that thrive without the fuss of watering or replanting. Whether you're a gardening newbie or a seasoned eco-warrior, these handmade flowers are a joy to craft and a breeze to care for. 🌸
Ready to bring a touch of nature indoors or brighten up someone’s day? Start small: grab your supplies, follow the steps, and let your green thumb shine. Who knows? You might just inspire others to grow their own stress-free blooms!