
Lawn
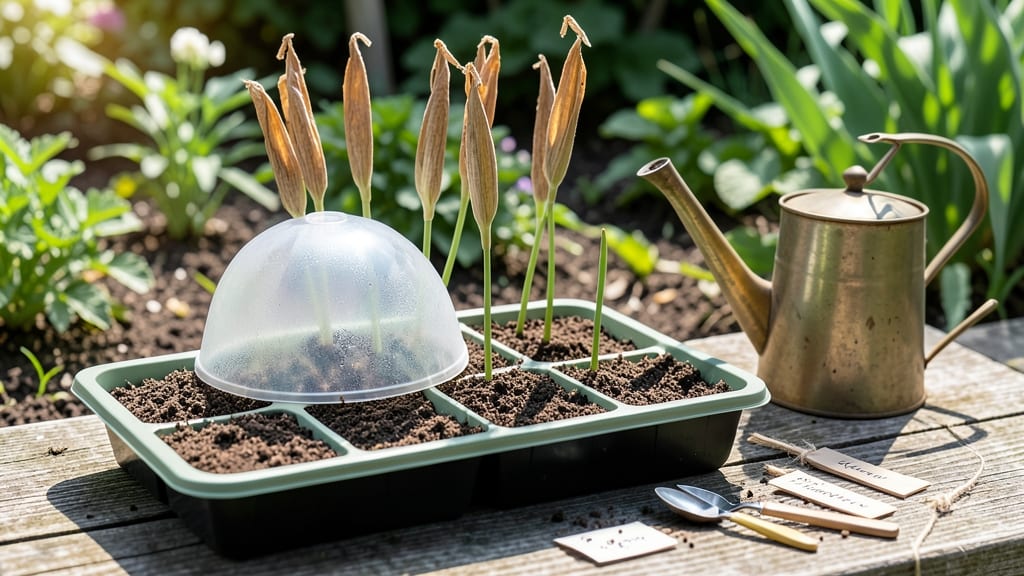
Gentle extraction of iris seed pods unlocks the secret to year-round blooms that outshine store-bought plants. 🌸 I’ve watched my own irises multiply from a single pod—each one a promise of purple, blue, or yellow spikes returning every season.
The key isn’t rushing the process; it’s letting nature’s timing guide you.
Start by harvesting mature pods when they turn brown and papery—usually late summer or early fall. Inside, you’ll find tiny, flat seeds that look more like dust than planting material. These need cold stratification (a winter chill) to break dormancy, so don’t plant them right away.
Instead, store them in a sealed bag in the fridge for 6-8 weeks before sowing.
When spring arrives, scatter the seeds on well-draining soil in partial shade. They’re slow to germinate—6 months to 2 years—but patience pays off with clumps of irises that thrive for decades. The first blooms might take 3-4 years, but once established, they’ll spread like wildfire.
Common mistakes? Overwatering (they hate soggy roots) or planting too deep (seeds need light). For best results, mark their location—you’ll forget where you tucked them. Once they’re up, divide clumps every 3-4 years to keep them vigorous. That first bloom? Worth every wait.
📚 In This Guide
- What you need
- Instructions
- Tips and common mistakes
- Wrapping up and next steps
What you need
- ● Mature iris seed pods: 5–10 pods (ensure they’re fully ripe and slightly papery to the touch).
- ● Well-draining potting mix: 1–2 gallons (use a blend of peat moss, perlite, and compost for optimal aeration).
- ● Small pots or seed trays: 4–6 (4-inch diameter or larger, with drainage holes).
- ● Watering can or spray bottle: With a fine mist setting to avoid displacing seeds.
- ● Plastic wrap or humidity dome: To maintain moisture during germination.
- ● Scissors or pruning shears: Sharp and sterilized (for gently opening seed pods).
- ○ Fine-tip tweezers: For handling tiny seeds (optional but helpful!).
- ● Labeling markers & tags: To track seed varieties and planting dates.
- ○ Gloves (optional): To protect hands from seed pod fibers.
- ● Sunlight access: A bright, indirect spot (6+ hours of light daily) for seed trays.
- ● Warmth: Ideal germination temp: 65–75°F (18–24°C).
- ● Patience: Germination can take 4–12 weeks—stay consistent!
Step-by-Step guide for planting iris seed pods
Growing irises from seed pods is a rewarding way to cultivate unique blooms—here's how to handle them with care.
🌱 Step 1: Harvest and Prepare the Seed Pods
Collect mature iris seed pods once they turn brown and begin to dry on the plant. Gently twist them off the stem to avoid damaging the seed inside. Store them in a cool, dry place for 4-6 weeks to complete ripening—this ensures the seeds are fully viable. If you rush this step, germination rates drop significantly.
Open the pods carefully with a small knife or your fingers, avoiding any sharp tools that could damage the tiny seeds. You'll find flat, dark seeds inside that resemble small beans. Spread them on a paper towel to air-dry for another 2-3 days before planting. This prevents rot and prepares them for sowing.
🌿 Step 2: Sow Seeds in a Controlled Environment
Fill a shallow tray or small pots with a well-draining seed-starting mix. Moisten the soil lightly until it's damp but not soggy—irises hate sitting in waterlogged conditions. Scatter the seeds on the surface, spacing them about ½ inch apart. Since iris seeds are tiny, I use a toothpick to place them precisely.
Cover the seeds with a thin layer of soil, no more than ¼ inch deep. Press lightly to ensure good contact with the soil. Place the tray in a warm spot with indirect light, ideally 65-75°F. Germination can take 2-4 weeks, so patience is key—don’t disturb the soil until you see tiny green shoots.
☀️ Step 3: Provide Light and Gradual Care
Once seedlings emerge, move them to a bright location with 4-6 hours of filtered sunlight daily. Direct sun can scorch young iris leaves, so a sheer curtain or shade cloth works well. Keep the soil consistently moist but never waterlogged—irises are drought-tolerant once established, but seedlings need steady moisture.
After 4-6 weeks, when seedlings have 2-3 true leaves, transplant them into individual pots with a well-draining potting mix. Use pots that are at least 3-4 inches deep to accommodate their rhizome growth. Avoid overwatering—let the top inch of soil dry out between waterings.
⏰ Step 4: Harden Off and Plant Outdoors
When seedlings are 6-8 inches tall and show signs of strong growth, it’s time to harden them off. Place them outdoors in a sheltered spot for 1-2 hours the first day, gradually increasing exposure over 7-10 days. This prepares them for outdoor conditions and prevents shock.
Plant the hardened-off seedlings in a sunny spot with full sun to partial shade. Space them 12-18 inches apart to allow room for growth. Irises thrive in well-draining soil, so amend the planting area with compost or sand if your soil is heavy. Mulch lightly to retain moisture but avoid piling mulch around the base.
Tips & tricks for perfect iris seed pod planting
Here's what nobody tells you about growing irises from seed pods—these little details make all the difference.
Patience Pays Off: Those 4-6 weeks of storing seed pods might feel long, but it's the secret to high germination rates. I learned this the hard way after planting pods too soon and getting spotty results. Store them in a paper bag with a few holes for airflow—this mimics natural drying conditions and prevents mold. Trust me, the extra time ensures your seeds are ready to sprout when you're ready to plant.
The Gentle Touch: When opening seed pods in Step 1, use your fingers more than tools—sharp objects can crush the delicate seeds. I find a small butter knife works best if I need precision, but always cut along the seam carefully. Once you've exposed the seeds, lay them flat on the paper towel to dry. This prevents them from curling up and makes handling much easier when it's time to sow.
Light Matters: The 65-75°F warm spot for germination is crucial, but so is the light source. I use a grow light on a timer for 12 hours per day—this prevents leggy seedlings that stretch toward weak sunlight. If you don't have a grow light, place your tray near an east-facing window where morning sun is gentle. Avoid south-facing windows that can get too intense for young seedlings.
Transplanting Timing: Wait until you see 2-3 true leaves before transplanting in Step 3—those first leaves are just baby leaves. I check for true leaves by looking for the classic iris shape with parallel veins. When you do transplant, handle the seedlings by their leaves, not the stems, to avoid damaging the delicate roots. Use a small spoon to lift them from the tray if they're tangled.
Pro Tips for Planting Iris Seed Pods
- Here's what nobody tells you about growing irises from seed pods—these little details make all the difference.
- Patience Pays Off: Those 4-6 weeks of storing seed pods might feel long, but it's the secret to high germination rate...
- The Gentle Touch: When opening seed pods in Step 1, use your fingers more than tools—sharp objects can crush the deli...
Frequently asked questions
Got questions about planting iris seed pods? You’re not alone—these delicate blooms can be tricky! Here are answers to the most common queries to help you grow thriving irises year-round.
When is the best time to plant iris seed pods?
Plant iris seed pods as soon as they’re ripe (late summer to early fall) or store them in a cool, dry place until spring. If sowing outdoors, aim for spring planting in well-draining soil after the last frost. For faster germination, start seeds indoors 6–8 weeks before the last frost date.
How do I know if my iris seed pods are viable?
Viable pods are firm, plump, and turn a light brown or tan when mature. If they’re shriveled, moldy, or hollow, they’ve likely dried out or rotted. Gently squeeze a pod—if it releases seeds easily, it’s ready for planting! Discard any with holes or discoloration.
Can I plant iris seeds directly in the ground, or do they need stratification?
Iris seeds don’t require stratification like some bulbs, but a cold snap (or 4–6 weeks in the fridge) can boost germination. For direct planting, sow seeds ½-inch deep in loose, sandy soil. If your climate is warm, consider a greenhouse or indoor tray first for better control.
Why aren’t my iris seeds germinating?
Common culprits include overwatering (seeds rot), poor drainage, or planting too deep. Ensure soil stays moist but not soggy and provide bright, indirect light. Slow germination (6–12 months!) is normal—patience is key! If mold appears, reduce moisture and improve airflow.
How long does it take for iris seed pods to bloom?
From seed to flower, irises typically take 2–3 years (sometimes longer for heirloom varieties). First-year seedlings focus on roots; expect tiny foliage in year two. With proper care, you’ll see stunning blooms in year three or four—worth the wait!
Wrapping up and next steps
Growing irises from seed pods is a rewarding journey that connects you to nature’s cycles—patience and gentle care yield stunning, year-round blooms. By following these steps, you’ve unlocked the secret to nurturing vibrant irises from scratch, whether you’re a seasoned gardener or just starting out. 🌱
Now that you’re equipped with the know-how, why not take the next step? Share your progress with fellow plant enthusiasts, experiment with different iris varieties, or even gift your new seedlings to friends. Every seed pod holds the potential for beauty—so get growing and watch your garden flourish!