
Lawn
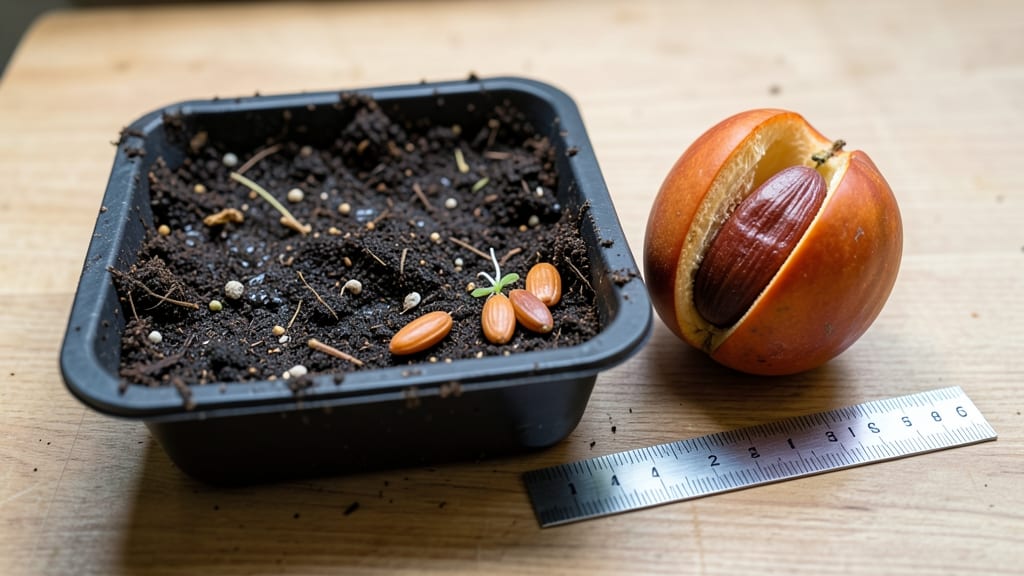
Saving persimmon seeds through winter turns your fall harvest into next year's trees—no twisty surprises. 🌱 The key is simple: dry the seeds properly, then store them in a cool, dry spot until spring planting.
I've saved seeds from my Asian persimmons for years using this method, and the seedlings always sprout strong. The process starts with fresh, ripe fruit. Scoop out the seeds, rinse off any pulp, and let them dry on paper towels for 3-5 days until completely dry.
Then, place them in a sealed container with a bit of sand or peat moss to keep moisture out. This mimics nature's way of handling seeds through cold months. By spring, you'll have viable seeds ready to plant. The twist-resistant pods I mention?
That's the dried fruit casing—it protects seeds from moisture and pests until you're ready to sow. Just pop the pods open when planting time arrives, and you'll have fresh starts without the usual seed-saving headaches. Works for both edible Asian persimmons (Diospyros kaki) and ornamental varieties.
Whether you're growing for fruit or just love the fall color, this method keeps your persimmon legacy growing year after year.
📚 In This Guide
- What you need
- Instructions
- Tips and common mistakes
- Wrapping up and next steps
What you need
- ● Fresh persimmons: 6–12 ripe persimmons (preferably Diospyros kaki or Diospyros virginiana varieties). Choose firm, fully ripe ones—they should dent slightly when pressed!
- ● Persimmon seeds: Harvested from the fruit (see instructions for extraction). Aim for 20–30 clean, dry seeds per pod batch.
- ● Small seed pods or containers: Option 1: 3–5 biodegradable mesh pods (e.g., 2" x 3" seed starting trays or reusable fabric seed pods).
- ● Option 2: Plastic mesh produce bags (like those for onions or mushrooms) with holes punched for drainage.
- ● Coco coir or peat moss: 1–2 cups (sterilized and moistened). Avoid soil—it retains too much moisture!
- ● Twist-ties or rubber bands: 3–5 pieces (1/4" width) to secure pods without crushing.
- ● Sharp knife or spoon: For seed extraction (a small paring knife works best).
- ● Paper towels or mesh strainer: To dry seeds thoroughly (24+ hours required).
- ● Spray bottle: With water (for lightly moistening coco coir).
- ● Permanent marker: To label pods with the date and variety.
- ○ Optional: Desiccant packets (for extra dryness in humid climates).
- ● Clear plastic wrap (to create a mini greenhouse effect during germination checks).
- ● Drill with small bit (if modifying plastic containers for drainage).
- ● Time: 1–2 hours for prep + 24+ hours for seed drying.
- ● Space: A cool, dry area (50–60°F) for storage (e.g., basement, garage, or seed fridge).
- ● Knowledge: Basic understanding of persimmon seed stratification (cold stratification is key for germination!).
How to preserve persimmon seeds through winter without rotting
Here's the foolproof method I use to save seeds from fall persimmons until spring—no fancy tools, just a few clever tricks.
🌱 Step 1: Harvest Ripe Persimmons and Extract Seeds
Wait until persimmons are fully ripe—when they're soft enough to dent with your thumbnail and smell sweet. Cut open the fruit and scoop out the seeds along with the surrounding gel-like flesh. Place the seed-and-flesh mixture in a clean bowl.
Let it sit uncovered at room temperature for 2-3 days until the flesh dries out and shrinks away from the seeds. You'll notice the seeds will naturally separate and become easier to handle. This drying process prevents mold growth during storage.
💧 Step 2: Clean and Dry the Seeds Thoroughly
Rinse the seeds gently under cool water to remove any remaining fruit pulp, then spread them out on a paper towel. Pat them dry with another towel to remove excess moisture—this is critical for preventing rot. I like to place them in a single layer on a wire rack for 3-4 days in a warm, dry spot.
Check daily for any seeds that start to darken or develop a musty smell—these should be discarded immediately. Properly dried seeds will feel light and papery when you handle them. You'll know they're ready when they rattle slightly when shaken in their container.
🪴 Step 3: Create Twist-Resistant Seed Pods
Take small, breathable containers like paper envelopes or mesh seed packets—these allow airflow while keeping pests out. Place 4-5 seeds per pod (since not all will germinate) and label each with the variety and harvest date. I use a fine-tip marker to write directly on the paper.
Store the pods in a cool, dark place like a pantry or refrigerator. The key is maintaining consistent 35-40°F temperatures and 30-50% humidity. Check them monthly and discard any pods that feel damp or develop condensation inside.
⏰ Step 4: Stratify Seeds Before Spring Planting
In late winter, remove the pods and place them in a moist paper towel inside a sealed plastic bag. Store this in the refrigerator for 6-8 weeks—this cold treatment mimics winter conditions and breaks seed dormancy. You'll see the towels stay damp but not soggy during this time.
After stratification, plant the seeds ½ inch deep in well-draining soil. Keep the soil consistently moist (not wet) until germination, which typically occurs in 14-21 days. Watch for the first true leaves to appear before thinning seedlings.
🌿 Step 5: Monitor and Maintain Viability
Test seed viability annually by planting a few seeds in spring. If germination rates drop below 50%, it's time to harvest fresh seeds. I always keep a backup batch of seeds in the freezer for up to 2 years as an extra precaution.
For long-term storage beyond 2 years, place sealed pods in a -4°F freezer. The extreme cold preserves viability for 5+ years. Just remember to thaw them slowly before planting—never expose them to sudden temperature changes.
Tips & tricks for perfect persimmon seed preservation
A few clever adjustments will help you keep your persimmon seeds viable and ready for spring planting all winter long.
Ripeness Test: Never rush the ripening process—persimmons should be so soft they dent easily when pressed with your thumbnail. The sweet smell is your best indicator. I've learned the hard way that underripe seeds won't store properly, so take the extra time to wait for that perfect sweet aroma before harvesting.
Drying Strategy: The 2-3 days of uncovered drying in Step 1 is non-negotiable for preventing mold. Place your bowl in a spot with good airflow, like near an open window or under a fan. If you're in a humid climate, you might need to extend this to 4 days—just keep checking until the seeds separate cleanly from the flesh.
Pod Organization: When labeling your seed pods in Step 3, include both the variety name and harvest date. I use a simple system: "American Persimmon - Oct 2023" written lightly with a pencil. This helps track which seeds are freshest when you're ready to plant in spring. The 4-5 seeds per pod is perfect—it accounts for natural germination variability while keeping your storage space efficient.
Stratification Hack: For the 6-8 week cold treatment in Step 4, I like to use small plastic bags with a few drops of water added to the paper towel before sealing. This creates a mini greenhouse effect that keeps the towels consistently damp without making them soggy. The refrigerator's crisper drawer is ideal for maintaining that 35-40°F range.
Pro Tips for Persimmon Seed Winter
- A few clever adjustments will help you keep your persimmon seeds viable and ready for spring planting all winter long.
- Ripeness Test: Never rush the ripening process—persimmons should be so soft they dent easily when pressed with your t...
- Drying Strategy: The 2-3 days of uncovered drying in Step 1 is non-negotiable for preventing mold. Place your bowl in...
Frequently asked questions
Got questions about preserving persimmon seeds through winter? Here are some of the most common ones—and their answers—to help you save time, effort, and seeds!
Can I store persimmon seeds in the ground over winter?
While persimmons thrive in well-drained soil, storing seeds directly in the ground isn’t the best winter strategy. The cold and moisture can cause rot or sprouting too early. Instead, dry and refrigerate seeds in a sealed container until spring planting for better survival rates.
How long can persimmon seeds stay viable in the freezer?
Persimmon seeds can last 1–2 years in a freezer (0°F or below) if stored in an airtight, moisture-free container. For best results, label them with the harvest date and test a few seeds in spring to confirm viability before planting.
What’s the easiest way to prevent seeds from twisting or drying out?
Twisting happens when seeds lose moisture. To prevent it, keep them in a cool, dark place with 30–50% humidity (a sealed jar with a silica packet works well). If seeds twist, soak them in water for 24 hours before replanting—they’ll often recover!
Are there alternatives to storing seeds in pods?
Yes! If you don’t have pods, try these methods:
- Paper envelopes (breathable, but check for pests)
- Glass jars with rice (absorbs moisture naturally)
- Vacuum-sealed bags (extends shelf life but requires a vacuum sealer)
What if my seeds sprout too early in winter?
If seeds sprout prematurely, move them to a cool, bright spot indoors (like a sunny windowsill). Avoid warmth—it speeds up growth. Once spring arrives, transplant them into pots with well-draining soil and keep them indoors until the last frost.
Wrapping up and next steps
Saving persimmon seeds for winter isn’t just clever—it’s a game-changer for gardeners and homesteaders alike! With twist-resistant pods like Persimmon Seed Winter, you can preserve your harvest effortlessly, ensuring a steady supply of seeds for next year’s garden.
Whether you’re a seasoned pro or just starting out, this method simplifies the process and keeps your gardening dreams alive all winter long.
Ready to take the next step? Grab your pods, follow the steps, and enjoy the satisfaction of a well-prepped garden—no guesswork, just growth! 🌱✨