
Propagation
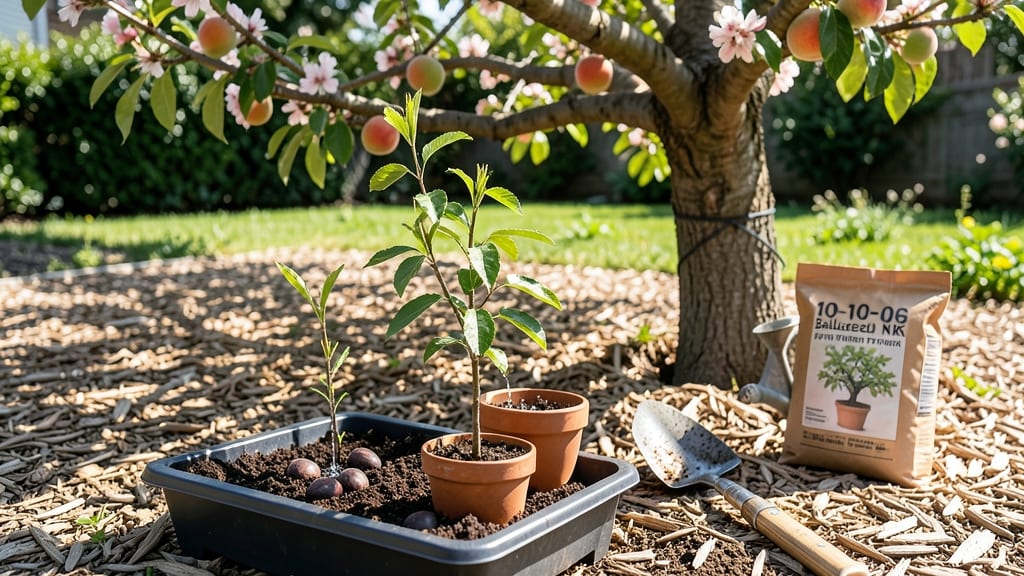
Growing a peach tree from seed to fruit is a 7-year patience test that rewards you with sun-ripened peaches straight from your own backyard. 🌱 I've watched my first seedling grow from a wrinkled pit to a sturdy sapling, and the journey—though slow—beats buying a $100 nursery tree any day.
The secret isn't rushing it; it's giving the tree exactly what it needs at each stage, from a cozy germination spot to full sun and deep roots.
You'll start with a single peach pit, some potting mix, and a sunny windowsill or greenhouse. Germination takes 30–60 days, and the seedling grows slowly at first—expect 6–12 inches in its first year.
The real magic happens in years 3–5, when proper pruning and pollination set the stage for fruit. Most seed-grown trees take 5–7 years to bear fruit, but with the right care, your peaches will taste sweeter than any store-bought variety.
By year 5, you'll be thinning fruit, protecting against peach leaf curl, and watching those fuzzy blossoms turn into juicy, freestone peaches. The payoff? A tree that's uniquely yours, adapted to your climate, and producing fruit for decades.
It's not a quick harvest, but the satisfaction of growing something from nothing? That's the real reward.
This method works best in USDA zones 5–9, where peach trees thrive. If you're in a colder zone, start seeds indoors early and protect young trees with frost cloth. The key is consistency—water deeply but infrequently, prune in late winter, and cross-pollinate if you only have one tree.
Patience isn't just a virtue; it's the difference between a sad sapling and a fruit-bearing giant.
📚 In This Guide
- What you need
- Instructions
- Tips and common mistakes
- Wrapping up and next steps
What you need
- ● Peach pit: 1 fresh, organic, and untreated pit (avoid store-bought peaches with chemical sprays).
- ● Well-draining potting soil: 2–3 gallons of a mix designed for seedlings or seed-starting (e.g., 50% peat moss, 30% perlite, 20% vermiculite).
- ● Small pots or seed trays: 2–4 biodegradable pots (3–4 inches deep) or a seed tray with individual cells.
- ● Plastic wrap or humidity dome: To retain moisture during germination.
- ● Grow lights or sunny windowsill: A south-facing window or a 12–16 hour LED grow light for seedlings.
- ● Watering can with a fine rose: For gentle hydration (avoid overwatering!).
- ● Pruning shears: Sharp, sterilized shears for transplanting and shaping.
- ● Fertilizer: A balanced, organic fertilizer (e.g., 10-10-10 or compost tea) for young trees.
- ○ Twist-free seed pod: 1–2 custom-made or DIY zero-waste seed-saving pods (optional but highly recommended for long-term storage!).
- ● Seed stratification setup: A refrigerator or cold frame to mimic winter conditions (if your climate is warm).
- ● Soil moisture meter: To monitor hydration levels without guesswork.
- ● Epsom salt: A spoonful in planting soil for magnesium boost (peach trees love it!).
- ● Mulch (straw or wood chips): To protect young trees from temperature swings.
- ● Pest control: Neem oil or insecticidal soap for aphids or mites.
- ● Sturdy stakes or trellis: For supporting the tree as it grows (3–4 feet tall).
- ● pH test kit: To ensure soil is slightly acidic (6.0–7.0, ideal for peaches).
Step-by-Step instructions for growing a peach tree from seed to fruit
Here's how to nurture a peach tree from a single seed—no twists, no waste, just pure fruit potential.
🌱 Step 1: Extract and Stratify the Seed
Start with a fresh peach pit—never dried or stored for months. Cut the pit open carefully with a knife to remove the seed inside. The seed has a hard outer shell; you’ll need to break it open to access the actual seedling. Place the seed between two paper towels, dampen them until just moist (not soggy), then fold and seal in a plastic bag.
Store the bag in your refrigerator for 6-8 weeks. This cold treatment, called stratification, mimics winter conditions and breaks the seed’s dormancy. Check the seed weekly—if the towels dry out, mist them lightly. After 6-8 weeks, the seed should be ready to sprout. Here’s the thing—patience is key. If you rush this step, germination rates drop dramatically.
💧 Step 2: Germinate the Seed in a Warm, Moist Environment
Once stratified, remove the seed from the bag and plant it ½ inch deep in a small pot filled with sterile seed-starting mix. Use a 4-inch pot—just enough room for the seedling’s first roots. Water the soil until it feels damp 1 inch deep, then cover the pot loosely with plastic wrap to retain moisture. Place the pot in a warm spot, ideally 70-75°F, like on top of your fridge or near a sunny window.
Germination can take 2-4 weeks. You’ll know it’s working when a tiny sprout pushes through the soil. Don’t overwater now—keep the soil consistently moist but never waterlogged. If the soil feels dry to the touch, add a little water. If it’s soggy, wait. Overwatering at this stage is the fastest way to lose your seedling.
☀️ Step 3: Transplant and Provide Full Sun
Once the seedling has 2-3 sets of true leaves (not the first tiny leaves), it’s time to transplant. Choose a 6-inch pot with drainage holes and fill it with well-draining potting mix. Gently remove the seedling from its first pot, keeping the root ball intact, and place it in the new pot. Water it deeply to settle the soil around the roots.
Move the pot to a location with full sun—at least 6-8 hours daily. Peach trees are sun-hungry, and without enough light, they’ll grow leggy and weak. If you’re growing indoors, supplement with a grow light kept 4-6 inches above the plant. You’ll see the difference in a week—stronger stems, darker green leaves, and faster growth. Here’s the moment that matters: watch for new leaves to form. That’s your sign the transplant worked.
🪴 Step 4: Care for the Young Tree and Prepare for Outdoors
Keep the soil evenly moist but not soggy. Water when the top inch of soil feels dry. Fertilize lightly with a balanced, water-soluble fertilizer (10-10-10) every 4-6 weeks during the growing season. By the time your seedling is 12-18 inches tall, it’s ready for its first taste of outdoor life.
Harden off the seedling over 2 weeks before moving it outside. Start by placing it in a sheltered, shaded spot for 1-2 hours the first day, then gradually increase its outdoor time. After a week, it can handle 4-6 hours of sun. By the end of the two weeks, it should be able to stay outside all day. Choose a permanent outdoor spot with full sun and well-draining soil. Plant it in spring, after the last frost, to give it the best start.
⏰ Step 5: Nurture to Fruit-Bearing Age
Peach trees grown from seed take 4-6 years to bear fruit. During this time, focus on pruning in late winter to shape the tree and remove dead or crossing branches. Water deeply once a week during dry spells, and fertilize twice a year—once in early spring and again in early summer. Mulch around the base of the tree with 2-3 inches of organic mulch to retain moisture and regulate soil temperature.
Real talk: Growing a peach tree from seed is a long game. But here’s the payoff—you’ll have a tree that’s uniquely yours, with fruit that’s a direct result of your patience. Keep an eye out for peach tree borers or leaf curl disease, and treat them early if they appear. With consistent care, your seedling will grow into a strong, fruitful tree that rewards your effort for decades.
Tips & tricks for growing a peach tree from seed
Here's what nobody tells you about nurturing a peach tree from a single seed—these are the lessons I learned after watching my first seedling wither from impatience.
Stratification is Non-Negotiable: That 6-8 week cold treatment in Step 1 is your seed's winter break. I tried skipping it once—big mistake. The seed sat in my warm kitchen for weeks, and nothing happened. Cold stratification mimics natural winter conditions, breaking dormancy so your seedling can focus on growing instead of surviving. Place your bag on the fridge's top shelf where it's consistently cold, not near the door where temps fluctuate.
Germination Patience Pays Off: When you plant that stratified seed in Step 2, resist the urge to check it daily. The 2-4 week germination window is a waiting game. I learned this after digging up my seedling too soon—only to find it still buried. Keep the soil consistently moist (like a wrung-out sponge) and watch for that first tiny sprout. If nothing appears after 4 weeks, your seed may not have survived stratification, but don't give up—try another fresh peach pit.
Sunlight is the Secret Weapon: Those 6-8 hours of daily sun in Step 3 aren't just recommended—they're essential. I once kept my seedling in a north-facing window and watched it stretch toward the light like a sad balloon animal. If growing indoors, position your grow light 4-6 inches above the plant and run it for 12-14 hours daily. You'll notice the difference within days: stockier stems and vibrant green leaves instead of pale, leggy growth. For outdoor trees, south-facing locations get the most intense sunlight.
Hardening Off is Your Insurance Policy: The 2-week hardening process in Step 4 might feel like overkill, but trust me—it's worth it. I moved my first seedling outside too quickly after only 3 days of sun exposure, and it crisped up like overcooked fries. Start with just 1-2 hours of shade on day one, then gradually increase exposure. By day 14, your tree should be ready for full sun all day. This gradual transition helps prevent transplant shock that can stunt growth for months.
Pro Tips for Peach Tree From Seed To Fruit
- Here's what nobody tells you about nurturing a peach tree from a single seed—these are the lessons I learned after wa...
- Stratification is Non-Negotiable: That 6-8 week cold treatment in Step 1 is your seed's winter break. I tried skippin...
- Germination Patience Pays Off: When you plant that stratified seed in Step 2, resist the urge to check it daily. The ...
Frequently asked questions
Got questions about growing peaches from seed to fruit? You’re not alone—this journey has its quirks! Here are answers to the most common queries to help you avoid pitfalls and celebrate sweet victories along the way.
How long does it take for a peach seed to grow into a fruit-bearing tree?
A peach tree grown from seed can take 5–7 years (or longer!) to produce fruit. This is because the tree must first mature, develop roots, and establish itself. Patience is key—grafted trees, by comparison, often bear fruit in 2–4 years. Pro tip: Choose disease-resistant varieties if you’re in a hot/humid climate to speed up the process!
Can I speed up germination? What’s the fastest method?
Yes! The hot water soak + cold stratification method works best:
- Soak seeds in warm water for 24 hours to soften the pit.
- Scratch the pit lightly with sandpaper to break dormancy.
- Stratify in moist peat moss in the fridge for 6–8 weeks.
- Plant outdoors after last frost—germination can take 2–6 weeks.
Why isn’t my seedling growing? Troubleshooting weak or dying peach trees.
Common culprits:
- Overwatering: Peach trees hate soggy roots—ensure well-draining soil.
- Pests: Aphids or borers? Spray neem oil or introduce ladybugs.
- Nutrient deficiency: Yellow leaves? Add compost or a balanced fertilizer.
- Frost damage: Young trees need protection until established (use frost cloth!).
Can I grow a peach tree indoors? What about in a pot?
Peach trees prefer outdoor growing due to their size (20–30 ft tall!) and need for pollination. However, you can try dwarf varieties in large pots (15+ gallons) with full sun. Place them outside in summer and bring them indoors when temps drop below 40°F. Pro tip: Hand-pollinate with a paintbrush if no bees visit!
Will my homegrown peaches taste like the store-bought ones?
Probably not—and that’s okay! Seed-grown peaches often have unique flavors (sweeter, more complex) but may vary in size, shape, and ripening time. Store-bought peaches are bred for uniformity and shelf life, while heirloom or seedling varieties prioritize flavor and adaptability. Pro tip: Save seeds from your favorite peaches to grow a tree with your own signature taste!
Are there peach tree alternatives if seeds don’t work for me?
Try these low-maintenance alternatives:
- Grafted trees: Buy a nursery tree (e.g., ‘Elberta’ or ‘Redhaven’) for guaranteed fruit in 2–4 years.
- Dwarf varieties: ‘Bonanza’ or ‘Flavor Grenade’ thrive in small spaces.
- Peach hybrids: Try pluot (plum + apricot) or aprium for easier growing.
- Container growing: Dwarf peach trees in pots work well for patios!
Wrapping up and next steps
Growing a peach tree from seed to fruit is a rewarding journey that connects you to nature—and your future harvest! 🌱 From selecting the perfect seed to mastering twist-free pod saving, every step brings you closer to juicy, homegrown peaches.
The key? Patience, consistency, and a little creativity—like using those twist-free pods to ensure zero-waste seed saving.
Ready to take the next step? Start small: plant your seed, nurture your sapling, and soon, you’ll be enjoying the sweet taste of success. Happy growing! 🍑✨