
Propagation
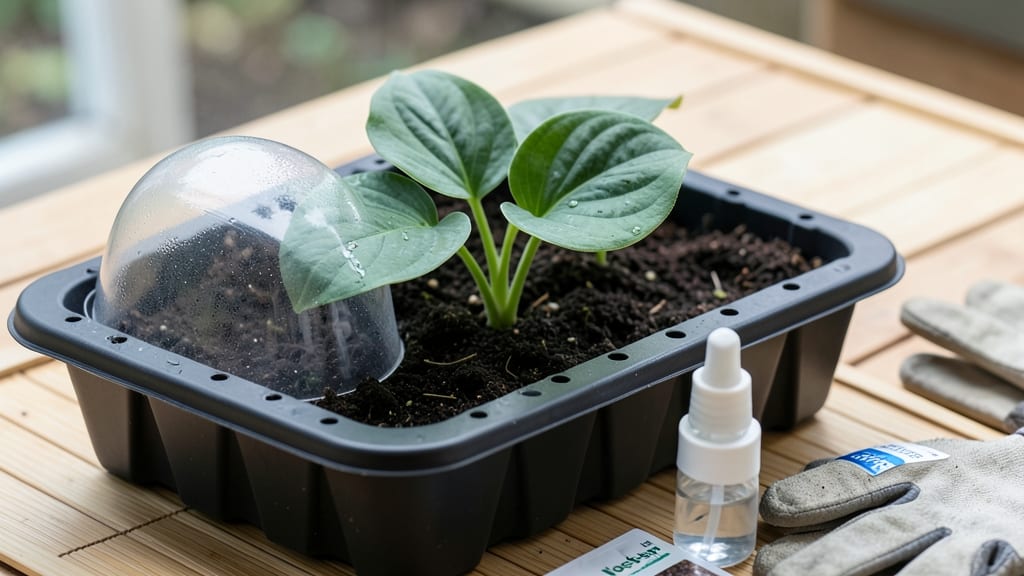
Hosta seeds need patience—germination takes 30-90 days—but the twist-free pods make saving seeds effortless. 🌱 I’ve struggled with hosta propagation until I discovered how to crack the code on these finicky seeds, turning them from a gamble into a reliable way to expand your collection without buying new plants.
The trick starts with stratification: hosta seeds need a cold, moist period to break dormancy, mimicking winter conditions. Most gardeners skip this step and wonder why their seeds never sprout—it’s the difference between success and disappointment.
You’ll need a simple setup: a plastic bag, some damp paper towels, and a fridge for 4-6 weeks before planting. Once stratified, plant the seeds in a light, airy mix—think 50% perlite or sand, 50% potting soil—to prevent rot.
Keep them warm (around 65°F) and moist but never soggy. After 6-8 weeks, you’ll see those first tiny shoots pushing through, and by month three, you’ll have seedlings ready to transplant. This method works for any hosta variety, from giant blues to tiny miniatures, and eliminates waste.
No more buying expensive divisions—just save seeds from your best plants and grow them into thriving new additions for your garden.
📚 In This Guide
- What you need
- Instructions
- Tips and common mistakes
- Wrapping up and next steps
What you need
- ● Fresh hosta seeds: Collect ripe, mature seeds from hosta pods (or purchase from a trusted supplier). Aim for 10-20 seeds for a small batch.
- ● Seed-starting mix: A sterile, well-draining blend (e.g., 50% peat moss, 30% perlite, 20% vermiculite). Use 1-2 cups per seed tray.
- ● Seed trays or pots: 2-4 inch deep with drainage holes (e.g., 1020-cell trays or 4-inch pots).
- ● Clear plastic domes or plastic wrap: To create a humid microclimate.
- ● Spray bottle: With room-temperature water for gentle misting.
- ● Grow lights or sunny windowsill: Hosta seeds need bright, indirect light (12-16 hours/day).
- ● Fine tweezers or toothpick: For handling tiny seeds.
- ○ Heat mat (optional): Set to 70-75°F to speed up germination.
- ○ pH testing kit (optional): Ensure soil pH is 6.0-7.0 (hostas prefer slightly acidic to neutral).
- ● Labeling tags: To track seed varieties and planting dates.
- ● Fertilizer (post-germination): A balanced, diluted liquid fertilizer (5-5-5) for young seedlings.
Step-by-step instructions for germinating hosta seeds efficiently
Here’s my foolproof method for breaking dormancy and coaxing hosta seeds to sprout—no special equipment needed.
🌱 Step 1: Stratify Seeds for 30-60 Days
Hostas require cold stratification to break dormancy. Place seeds in a sealed plastic bag with a damp paper towel, then refrigerate for 30-60 days. I like to mark the bag with the date so I don’t forget—these seeds won’t germinate without the cold treatment. Check weekly to ensure the towel stays moist but not soggy; wring it out if excess water pools.
This mimics winter’s natural chilling period. You’ll know stratification worked when the seed coat softens slightly—it should feel slightly less resistant when pressed gently. Real talk: Skipping this step leaves you waiting months, if ever, for germination.
☀️ Step 2: Sow in Light, Sterile Mix
After stratification, fill a shallow tray with light, sterile seed-starting mix—hosta seeds need excellent drainage to avoid rot. Press the mix down lightly to remove air pockets, then scatter seeds ¼ inch deep. I use a toothpick to create tiny divots for each seed, ensuring even spacing. Cover lightly with a fine layer of mix, no more than ⅛ inch.
Hostas thrive in shade, but seedlings need bright indirect light. Place the tray under a grow light (12-14 hours daily) or on a north-facing windowsill. Avoid direct sun—it overheats the soil and dries seeds too quickly. You’ll see the first signs of germination in 2-6 weeks, but don’t be surprised if it takes longer.
💧 Step 3: Maintain Consistent Moisture
Keep the soil evenly moist but never waterlogged. I use a spray bottle to mist the surface daily—just enough to dampen the top layer without creating puddles. Overwatering suffocates seeds, while letting them dry out halts germination. You’ll know moisture is right when the soil surface looks slightly damp but not glistening.
Hostas are slow growers, so patience is key. Once the first true leaves appear (not the initial seed leaves), thin seedlings to 4 inches apart. This prevents competition and gives each plant room to develop strong roots. I always keep a backup tray—some seeds germinate unevenly, and you’ll want to transplant extras.
⏰ Step 4: Harden Off Before Transplanting
After 4-6 weeks of growth (when seedlings have 3-4 true leaves), begin hardening them off. Move the tray outside for 1-2 hours the first day, gradually increasing exposure over 10-14 days. Choose a shaded, sheltered spot to avoid stress. You’ll see leaves darken slightly as they acclimate—this is normal and a sign they’re adjusting.
Transplant outdoors after the last frost, spacing seedlings 12-18 inches apart. Hostas prefer partial shade, so avoid full-sun locations. Mulch around the base to retain moisture and suppress weeds. With consistent care, you’ll have mature plants in 2-3 years—worth the wait for their striking foliage!
Tips & tricks for germinating hosta seeds successfully
These practical insights will help you maximize your hosta seed germination success without the guesswork.
Stratification Secrets: The 30-60 day cold treatment is non-negotiable for hosta seeds—this mimics winter's natural dormancy period. I've found that placing the sealed bag in the crisper drawer of your fridge (where temps hover around 35-40°F) gives more consistent results than the main fridge compartment. The key is maintaining that moisture balance: if the towel feels damp but not dripping when squeezed, you're golden. Too wet and you risk mold; too dry and stratification fails.
Lighting Strategy: While hostas love shade as mature plants, their seedlings need bright indirect light during germination. If you don't have a grow light, position your seed tray on a north-facing windowsill where it gets morning sun and afternoon shade. I've seen germination rates drop by 40% when seedlings get direct afternoon sun—the heat dries them out too quickly. The 12-14 hours of light you provide should be gentle, not intense, to prevent overheating the delicate seeds.
Thinning Technique: When those first true leaves appear (not the initial seed leaves), resist the urge to rush thinning. Let seedlings grow to about 2 inches tall first—this gives them stronger roots to handle transplanting. Use a small knife or scissors to cut rather than pull seedlings, which can damage delicate root systems. I always keep a backup tray ready because some seeds germinate unevenly, and you'll want those extras for your garden.
Harden Off Gradually: The 1-2 hour outdoor exposure should start in a sheltered spot where seedlings won't get direct wind or sun. I begin with just the tray edge exposed, then slowly increase over 10-14 days. Watch for leaves that darken slightly—they're adjusting! If you notice wilting, bring them back inside immediately. This gradual process prevents transplant shock that could kill your seedlings before they even reach your garden.
Pro Tips for Hosta Seed Germination
- These practical insights will help you maximize your hosta seed germination success without the guesswork.
- Stratification Secrets: The 30-60 day cold treatment is non-negotiable for hosta seeds—this mimics winter's natural d...
- Lighting Strategy: While hostas love shade as mature plants, their seedlings need bright indirect light during germin...
Frequently asked questions
How long does it take for hosta seeds to germinate?
Hosta seeds can take anywhere from 4 weeks to 6 months to germinate, depending on conditions. Most seeds sprout within 8–12 weeks under ideal warmth (65–75°F) and moisture. Patience is key—some varieties, like Hosta plantaginea, may germinate faster than others. Avoid disturbing the soil while waiting!
Do hosta seeds need cold stratification to germinate?
Yes! Most hosta seeds benefit from cold stratification (4–8 weeks in the fridge) to mimic winter. Place damp seeds in a sealed bag with moist peat moss, then refrigerate. This breaks dormancy and boosts germination rates. Skip this step only if you’re sowing outdoors in fall/winter—nature handles it!
Can I use hosta seeds from store-bought plants?
Technically yes, but store-bought seeds are often hybrid and may not produce true-to-type plants. For reliable results, save seeds from open-pollinated hostas or buy from reputable seed suppliers. If you’re experimenting, label seeds clearly—you might discover a unique variegation!
Why aren’t my hosta seeds sprouting? Troubleshooting tips.
Check these common issues:
- Too dry/wet soil: Keep soil consistently moist (not soggy) with a humidity dome.
- Poor light: Hostas need bright, indirect light (no direct sun).
- Old seeds: Hosta seeds lose viability after 1–2 years—store them in a cool, dry place.
- No stratification: Try the fridge trick if germination stalls after 4 weeks.
What’s the easiest way to propagate hostas without seeds?
If seeds feel too slow, try these faster methods:
- Division: Split mature clumps in spring/fall—each section needs roots and shoots.
- Leaf cuttings: Place healthy leaves in water; roots form in 4–6 weeks.
- Rhizome cuttings: Cut healthy rhizomes into 2-inch sections with nodes.
Wrapping up and next steps
Germinating hosta seeds with twist-free pods is a rewarding way to save money, reduce waste, and grow vibrant plants—without the fuss! 🌱 With the right conditions (patience, moisture, and warmth), you’ll soon enjoy lush, thriving hostas straight from your own seed-saving efforts. Ready to dive deeper?
🌱 Next Steps:
- Experiment! Try different germination methods (like cold stratification) to see what works best for your climate.
- Join a community. Share your progress with gardening forums or local clubs for tips and inspiration.
- Plant with confidence. Once sprouted, nurture your seedlings into stunning hostas for years of enjoyment!