
Lawn
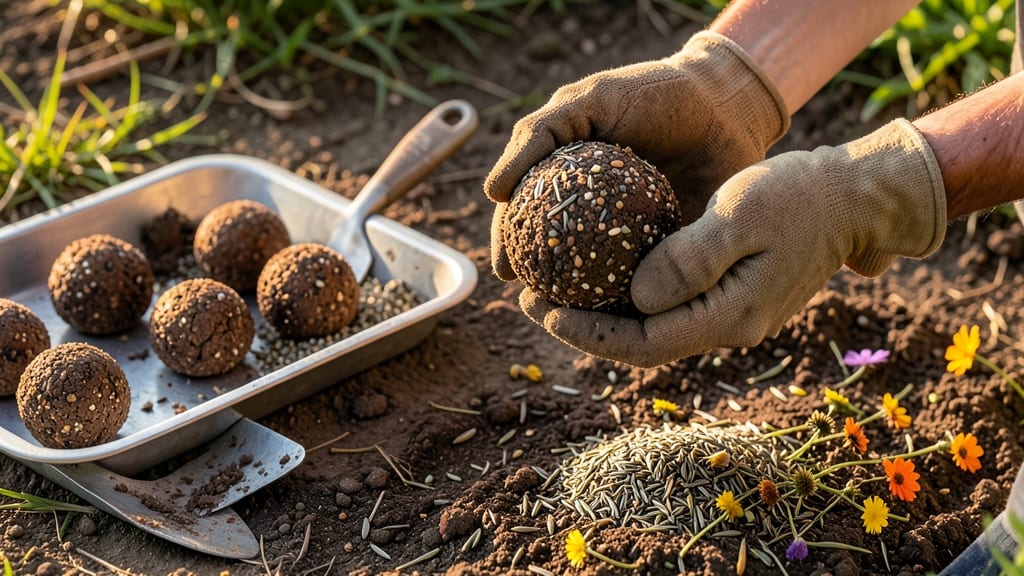
Transforming bare spots into bursts of color takes just minutes with paper seed bombs—my secret weapon for guerrilla gardening and instant wildflower lawns. These biodegradable paper balls pack wildflower seeds into a single, easy-to-toss package that dissolves in rain, leaving only vibrant blooms behind.
No soil prep, no waiting for spring—just scatter and watch nature take over.
I first tried them in a cracked sidewalk near my apartment, where nothing else would grow. Within weeks, cheerful wildflowers emerged, attracting bees and butterflies to a place that had been concrete for years. The beauty?
You can make them with supplies you already have—wildflower seeds, paper, flour, and water—and customize colors to match your garden’s vibe. Perfect for urban gardens, community projects, or even as artistic garden accents.
What you’ll end up with is a low-maintenance, pollinator-friendly lawn that thrives with minimal effort. The paper dissolves harmlessly, leaving only seeds to sprout where they land—ideal for slopes, medians, or forgotten corners.
And because they’re lightweight, you can toss them from a distance, making them the ultimate lazy gardener’s tool. Plus, kids love making them, turning gardening into a fun, hands-on activity.
Works year-round in mild climates, or store them for spring planting in colder zones. Whether you’re reviving a dull patch of earth or adding a whimsical touch to your garden, these seed bombs deliver instant beauty with zero fuss.
Let’s get crafting—your future wildflower meadow starts with a single ball of paper.
📚 In This Guide
- What you need
- Instructions
- Tips and common mistakes
- Wrapping up and next steps
What you need
- ● Wildflower seeds: Choose native, drought-resistant varieties (e.g., clover, poppies, or black-eyed Susans). Aim for 1–2 tablespoons per seed bomb (adjust based on seed size).
- ● Clay: Use air-drying clay (e.g., Crayola Model Magic or natural clay powder). You’ll need about ½ cup per 10 seed bombs.
- ● Water: Enough to mix clay into a moldable, dough-like consistency.
- ● Newspaper or junk mail: Recycle old paper—cut into 2–3 inch squares (1 sheet ≈ 10–15 squares).
- ● Mixing bowl & spoon: For blending clay and seeds smoothly.
- ● Rolling pin or smooth surface: To flatten clay-seed mixtures.
- ● Plastic wrap: Keeps seed bombs moist while drying (24–48 hours).
- ● Gloves: Protects hands from clay and seeds (especially if allergic).
- ● Label tags: Write seed types or planting dates on dried bombs.
- ● Pick a sunny, well-drained spot for planting (wildflowers thrive in full sun!).
- ● Check local planting seasons—spring or early fall is ideal for most regions.
- ● Ensure seeds are fresh and untreated (no pesticides or coatings).
Step-by-Step instructions for crafting paper seed bombs
Here’s how to transform wildflower seeds into easy-to-handle, eco-friendly seed bombs that spread beauty effortlessly.
Mix the Base Components
Combine 1 cup clay and 1 cup compost in a bowl. The clay acts as a binding agent while the compost provides nutrients for emerging seedlings. I like to use a small trowel to break up any clumps in the compost—smooth texture ensures even distribution later. Add ½ cup sand next, which prevents the mixture from compacting too tightly and allows water to penetrate quickly.
Moisten the mixture gradually with water until it holds together when squeezed but doesn’t feel sticky. Think of it like damp sandcastle sand—it should crumble slightly when pressed but stay intact when shaped. If it feels too dry, add water drop by drop; if too wet, sprinkle in a bit more sand to absorb excess moisture. This balance is critical for the bombs’ structural integrity.
Incorporate Seeds and Optional Additives
Gently fold in 2 tablespoons wildflower seeds (or your chosen native mix) into the damp clay-compost blend. Be careful not to crush the seeds—use your fingers to distribute them evenly. For extra nutrients, add 1 tablespoon worm castings or 1 teaspoon alfalfa meal, which boosts germination rates. If you’re planting in a sunny area, you can also mix in 1 teaspoon mycorrhizal fungi to help roots establish faster.
For a stronger structure, some gardeners add 1 tablespoon powdered milk to deter pests. I’ve found this works best in urban areas where slugs might be a problem. Stir everything together until the seeds are fully integrated but still visible—this ensures even dispersal when you toss the bombs later.
Shape the Seed Bombs
Wet your hands slightly to prevent sticking and roll the mixture into 1.5-inch diameter balls. The size matters—too small and they’ll crumble when thrown; too large and they may not break apart properly. I like to roll them on a smooth surface like a silicone mat or parchment paper. Press gently to firm up each bomb, but avoid compacting it too tightly, which could suffocate emerging seedlings.
Place the finished seed bombs on a tray or flat surface to dry for 24-48 hours in a shaded area. They’re ready when they feel firm to the touch and no longer leave damp prints when pressed. Store them in a cool, dry place until you’re ready to use them—just don’t let them sit in direct sunlight for long, or they’ll harden too much and become brittle.
Deploy and Maintain
Toss the seed bombs into prepared soil, spacing them 6-12 inches apart depending on the wildflower mix. Water the area lightly after planting to help the clay dissolve and seeds settle into the soil. The bombs will break down naturally, releasing seeds and nutrients over time. In 2-4 weeks, you should see the first sprouts emerging, especially if the soil stays consistently moist during germination.
Once established, wildflowers require minimal care—just occasional watering during dry spells. Avoid mowing until the flowers have gone to seed, as this ensures next year’s blooms. The best part? These seed bombs attract pollinators and support local ecosystems while creating a low-maintenance, vibrant landscape.
Tips & tricks for perfect paper seed bombs
Transforming wildflower seeds into seed bombs is easier than you think—these tricks ensure your eco-friendly project thrives from start to finish.
Mixing Precision: When combining the 1 cup clay, 1 cup compost, and ½ cup sand in Step 1, aim for a consistency like damp sandcastle sand. If the mixture feels too dry after adding water, sprinkle in an extra tablespoon of water at a time. Too wet? Add a pinch more sand to absorb excess moisture. This balance is everything—it ensures your seed bombs hold together during drying but won’t suffocate emerging seedlings.
Seed Distribution: In Step 2, gently fold in the 2 tablespoons wildflower seeds with your fingers to avoid crushing them. For even distribution, divide the seeds into quarters and fold each portion into the mixture separately. This method prevents clumping and ensures every seed bomb contains seeds. If you’re using larger seeds like sunflower, reduce the quantity slightly to maintain the 1.5-inch diameter size.
Drying Strategy: During the 24-48 hour drying phase in Step 3, place your seed bombs on a tray lined with parchment paper in a shaded area. Avoid direct sunlight, which can cause uneven drying and cracking. If your kitchen is particularly humid, prop open a window nearby to improve airflow. Test for readiness by gently pressing a seed bomb—it should feel firm without leaving a damp imprint.
Storage Wisdom: Store finished seed bombs in a cool, dry place like a sealed container with a paper towel to absorb any excess moisture. They’ll keep for up to 6 months if stored properly. For long-term storage, place them in a breathable fabric bag rather than plastic to prevent condensation buildup, which can cause mold.
Pro Tips for Paper Seed Bombs
- Transforming wildflower seeds into seed bombs is easier than you think—these tricks ensure your eco-friendly project ...
- Mixing Precision: When combining the 1 cup clay, 1 cup compost, and ½ cup sand in Step 1, aim for a consistency like ...
- Seed Distribution: In Step 2, gently fold in the 2 tablespoons wildflower seeds with your fingers to avoid crushing t...
Frequently asked questions
Got questions about creating your own paper seed bombs? You’re not alone! Here are some of the most common queries—plus straightforward answers to help you get started with confidence.
What’s the best time of year to plant paper seed bombs?
For most wildflower varieties, aim to plant seed bombs in early spring (after the last frost) or late summer/early fall. This gives seeds time to establish roots before winter. Avoid planting in extreme heat or drought—water them in well after tossing to boost survival rates.
How often should I water seed bombs after planting?
Water seed bombs daily for the first 2 weeks to keep the paper moist (but not soggy). After that, reduce to 2–3 times per week, depending on rainfall. Once wildflowers sprout, they’re more drought-resistant. Pro tip: Morning watering prevents evaporation and fungal issues.
Will seed bombs attract bees or pests? Are they safe?
Yes! Wildflower seed bombs attract pollinators like bees and butterflies, which is great for ecosystems. As for pests, they’re generally safe—just avoid invasive species (check local guidelines). If you’re concerned, opt for native wildflower blends. Bonus: The paper decomposes naturally, leaving zero waste.
Can I reuse or recycle the paper after planting?
No need to recycle—the paper is designed to dissolve as the seeds germinate! If you’re crafting for fun (not planting), you can reuse the paper for other DIY projects. For seed bombs, let nature take its course—the paper breaks down within weeks, enriching the soil.
What if my seed bombs don’t sprout? Troubleshooting tips.
Don’t worry! Common issues include:
- Too dry: Water deeply and mulch with straw to retain moisture.
- Too shady: Most wildflowers need 6+ hours of sun daily.
- Birds ate the seeds: Plant in less accessible spots or use a light mesh cover temporarily.
- Poor soil: Amend with compost if your lawn is compacted.
Patience is key—some seeds take 3–4 weeks to sprout!
Wrapping up and next steps
Creating paper seed bombs is a fun, eco-friendly way to transform your lawn into a vibrant wildflower haven—without the hassle of traditional planting! 🌿 Whether you're reviving a patch of grass or reclaiming a forgotten corner of your yard, these seed-packed paper spheres make gardening effortless and rewarding.
Start small, experiment with native seeds, and watch your outdoor space bloom with life.
Ready to take the next step? Grab your materials, gather some friends for a DIY session, and let nature do the rest! Your future wildflower meadow awaits—just toss, water, and admire the results. 🌸