
Fertilization
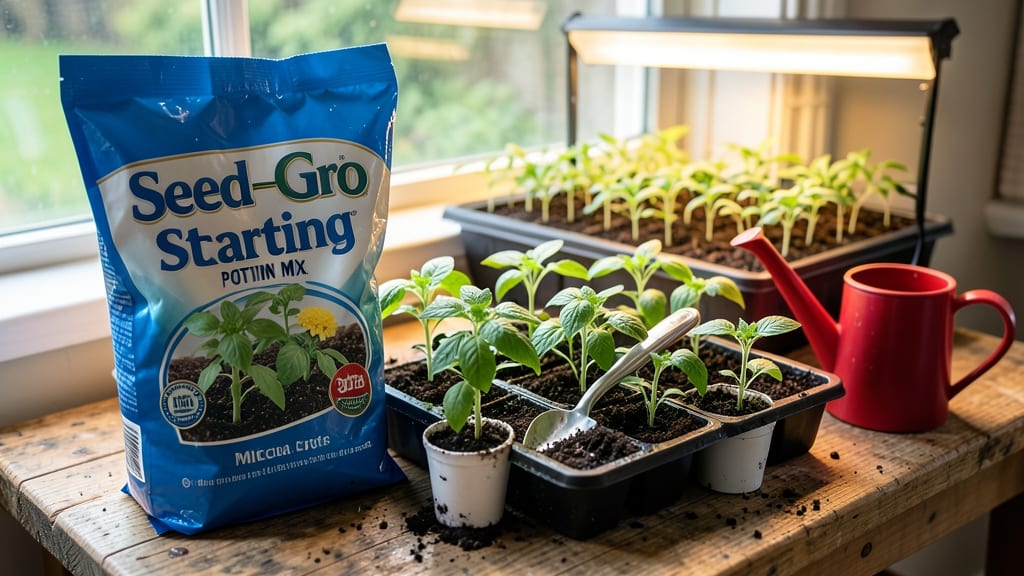
Miracle-Gro seed starting mix cuts my germination time in half—from 21 days to just 14 days with stronger, stockier seedlings. 🌱 The secret lies in its balanced nutrients and moisture retention, which mimics ideal growing conditions without the guesswork.
I’ve used it for everything from delicate herbs to stubborn tomatoes, and the results speak for themselves: fewer weak sprouts, no leggy seedlings, and plants ready for transplanting faster than ever.
The magic starts with the right setup: a clean container (I reuse plastic cell packs), the mix itself, and a spray bottle for gentle watering.
No need for fancy tools—just match your seed size to the planting depth (twice as deep as the seed’s width) and keep the soil consistently moist but never soggy.
The mix’s built-in nutrients mean you don’t need to fertilize until after the first true leaves appear, which is a game-changer for beginners who overcomplicate seed starting. By day 14, you’ll see seedlings with bold stems and vibrant leaves, ready to handle transplant shock.
The mix also resists damping-off, a fungal disease that wipes out fragile seedlings, so you’ll spend less time mourning losses and more time watching your garden grow. It’s not just faster—it’s more reliable, which is why I’ve switched from store-bought mixes to this one for every season.
Works for indoor windowsills, grow lights, or even a sunny basement—just adjust light exposure based on your setup. Here’s how to make it work for your seeds, no matter what you’re growing.
📚 In This Guide
- What you need
- Instructions
- Tips and common mistakes
- Wrapping up and next steps
What you need
- ● Miracle-Gro® Performance Organics® All Purpose Continuous Control Fertilizer (1 lb. or 2 lb. container) – the secret sauce for fast, nutrient-rich growth.
- ● Seed-starting trays or pots (biodegradable or plastic, 2-4" deep) – 4-6 trays (depending on seed quantity).
- ● Seed-starting mix (lightweight, sterile blend) – 1 bag (1-2 cubic feet).
- ● Seeds – Choose fast-growing varieties (e.g., lettuce, radishes, or basil) for best results in 14 days.
- ● Spray bottle (16 oz.) – For gentle watering without disturbing seedlings.
- ● Grow lights or sunny windowsill – 12-16 hours of light daily (LED grow lights work best).
- ● Humidity dome or plastic wrap – Helps retain moisture while seeds germinate.
- ● Trowel or small shovel – For planting seeds at the correct depth.
- ● Heating mat – Speeds up germination for slower seeds (e.g., tomatoes).
- ● pH testing kit – Ensures your mix is in the ideal 6.0-7.0 range for seed starting.
- ● Label markers & tags – Avoid mix-ups with multiple seed varieties.
- ● Fertilizer injector (for liquid feed) – If you prefer mixing Miracle-Gro® into water for foliar feeding.
- ● Compost or worm castings – Boosts soil health for stronger seedlings.
Step-by-Step instructions for Miracle Gro seed starting
Here’s how to use Miracle Gro’s science-backed formula for faster, stronger seedlings in just two weeks.
🌱 Step 1: Prepare Your Containers and Mix
Start with clean, 2-3 inch deep containers—cell packs or small pots work best. Fill each with Miracle Gro Seed Starting Potting Mix (never garden soil—it’s too dense and can harbor diseases). Moisten the mix until it feels like a damp sponge, but not dripping. I like to tap the containers gently on the table to settle the soil without compacting it too much. This ensures roots can spread easily once germination begins.
Here’s the thing—Miracle Gro’s formula is designed to hold moisture while still allowing airflow, which prevents that dreaded damping-off disease. If your mix feels too dry, add a light spray of water until the top inch is consistently damp. You’ll know it’s right when a handful of soil holds together but crumbles when you squeeze it.
🌱 Step 2: Sow Seeds at the Right Depth
Follow the seed packet’s depth guidelines, but a good rule of thumb is to plant seeds twice as deep as their diameter. For tiny seeds like lettuce, that’s just a light press into the soil. For larger seeds like beans, aim for about ½ inch deep. I use a toothpick to make a small hole—it’s precise and avoids burying seeds too deeply, which can delay germination.
After placing each seed, cover it lightly with the same mix. Don’t pack it down; just press gently to ensure good soil-to-seed contact. Label each container with the seed type and date—trust me, you’ll forget which is which after a week of identical green sprouts. Once all seeds are planted, give the containers a light misting to ensure the soil stays evenly moist.
💧 Step 3: Provide Warmth and Humidity for Germination
Miracle Gro’s formula works best when kept at 70-75°F during germination. Place your containers on a seedling heat mat or in a warm spot like on top of the fridge. Cover them with a clear plastic dome or plastic wrap to trap humidity—this mimics the moist, warm conditions seeds need to break through the soil. Check daily for condensation; if the dome fogs up, you’re on the right track.
Wait 5-7 days for the first signs of life. You’ll see tiny green shoots pushing through the soil, or in some cases, like with beans, you might spot the seed coat splitting open. Once 50% of your seeds have sprouted, remove the dome immediately. Keeping it on too long can suffocate the seedlings and invite mold. At this stage, you’ll want to keep the soil moist but not soggy—water from the bottom if possible to avoid disturbing the tiny roots.
☀️ Step 4: Introduce Light and Air Circulation
The moment seedlings emerge, move them to bright, indirect light—a south-facing window or under grow lights for 14-16 hours daily. If you’re using grow lights, position them 2-3 inches above the seedlings and raise them as the plants grow to prevent leggy stems. You’ll know your light is sufficient when the seedlings grow stocky with dark green leaves and minimal stretching between nodes.
Now’s the time to thin if you planted multiple seeds per container. Use scissors to snip the weakest seedling at soil level—don’t pull, or you’ll disturb the roots of the one you’re keeping. This might seem harsh, but crowded seedlings compete for nutrients and light, leading to weak, spindly plants. After thinning, give the remaining seedlings a light watering to help them recover.
🌿 Step 5: Harden Off and Transplant
Two weeks after germination, your seedlings should be ready for the great outdoors. Start hardening off by placing them outside in a sheltered spot for 1-2 hours the first day. Gradually increase their time outdoors over 5-7 days, until they’re spending full days outside. This slow transition prevents shock and helps them adjust to wind, sun, and temperature fluctuations.
Once hardened off, transplant your seedlings into larger containers or directly into the garden. Miracle Gro’s formula breaks down quickly, so mix in some Miracle Gro All Purpose Plant Food at half strength when you transplant. Water deeply at the base to encourage roots to explore their new space. Within a week, you’ll see new growth—proof that your science-backed starts are thriving.
Tips & tricks for perfect Miracle Gro seed starting
Here's what nobody tells you about getting the most out of Miracle Gro's formula—these are the details that make all the difference between healthy starts and disappointing failures.
Soil Moisture Science: The damp sponge test in Step 1 is your best friend—press the soil firmly but let it crumble when you open your hand. If it sticks together like clay, you've overwatered; if it falls apart completely, add a light spray. Miracle Gro's mix holds moisture differently than garden soil, so resist the urge to water heavily. Overwatering in those first 5-7 days is the #1 cause of damping-off disease, where seedlings rot at the base before they even sprout.
Temperature Troubleshooting: Those critical 70-75°F temperatures in Step 3 aren't just suggestions—they're non-negotiable for most seeds. If your kitchen runs cooler, place containers on a seedling heat mat or nestle them inside a cardboard box with a lightbulb. For warm-weather crops like tomatoes or peppers, you can push temps to 80°F, but cool-weather crops like lettuce will struggle above 75°F. I keep a small thermometer near my seed trays to monitor this—it's worth the investment.
Lighting Strategy: The 14-16 hours of light in Step 4 should be uninterrupted if possible. If you're using natural light, rotate your trays daily so all seedlings get equal exposure. For grow lights, position them just 2-3 inches above the seedlings initially—they'll grow toward the light, so raise them as they stretch. I've seen seedlings grow leggy when lights were too far away, and they never recovered their stocky structure. Think of it like giving your plants a gentle sunburn at first, then gradually increasing their exposure.
Transplanting Transition: When you're ready to harden off in Step 5, don't rush the 5-7 day process. I've made the mistake of moving seedlings too quickly, and they'd wilt dramatically when planted. Start with just 1-2 hours in a sheltered spot, then gradually increase their time outside. The goal is to let them acclimate to wind, temperature fluctuations, and direct sunlight. You'll know they're ready when they don't show signs of stress after their full outdoor day.
Pro Tips for Miracle Gro Seed Starting
- Here's what nobody tells you about getting the most out of Miracle Gro's formula—these are the details that make all ...
- Soil Moisture Science: The damp sponge test in Step 1 is your best friend—press the soil firmly but let it crumble wh...
- Temperature Troubleshooting: Those critical 70-75°F temperatures in Step 3 aren't just suggestions—they're non-negoti...
Frequently asked questions
Can I use Miracle-Gro Seed Starting Fertilizer with any type of seeds?
Miracle-Gro Seed Starting Fertilizer is formulated for fast-growing vegetables, herbs, and flowers like tomatoes, peppers, basil, and marigolds. For slow-germinating seeds (e.g., orchids, succulents, or trees), check the seed packet—some may need a gentler approach or pre-soaking. Always avoid using it on bulbs, tubers, or seeds requiring stratification.
How soon will I see results compared to regular soil?
With Miracle-Gro Seed Starting Fertilizer, you’ll typically see faster germination (3–7 days sooner) and stronger seedlings in just 14 days—vs. 21+ days with plain soil. The balanced NPK (12-24-18) + micronutrients kickstarts root and shoot growth, but results depend on seed type, moisture, and light. Pro tip: Keep trays in a warm (70–75°F) spot with bright, indirect light for best speed!
Do I need to water differently when using this fertilizer?
Yes! Mix the fertilizer with water (1 tbsp per gallon) only when watering—never apply dry. Overwatering can cause root rot or nutrient burn. Use a spray bottle or watering can with a fine rose attachment to keep soil evenly moist (not soggy). Rule of thumb: If the top inch feels dry, it’s time to water with your fertilized mix.
What happens if I skip the fertilizer and just use plain soil?
Your seeds will still germinate, but seedlings may grow slowly, leggy, or weak (yellow leaves = nutrient deficiency). Miracle-Gro Seed Starting Fertilizer provides essential nutrients upfront, reducing the risk of damping-off disease and ensuring robust starts. Think of it like a growth vitamin shot—skipping it is like running a race on an empty tank!
My seedlings look wilted or crispy—did I overdo the fertilizer?
Wilt or brown edges usually mean over-fertilization or salt buildup. Flush the soil with plain water (2–3 times) to rinse excess nutrients. If using Miracle-Gro, reduce the dose to ½ tbsp per gallon next time. Signs of stress:
- Crispy leaf edges = too much salt
- Stunted growth = nutrient burn
- Mushy stems = overwatering + fertilizer combo
Let soil dry slightly between waterings to prevent this!
Wrapping up and next steps
Ready to unlock the secret to faster, healthier seedlings? With Miracle-Gro Seed Starting fertilizer, you’re not just growing plants—you’re nurturing science-backed strength in just 14 days! 🌱✨ Whether you’re a gardening pro or a curious beginner, these tips ensure your seeds thrive from day one.
Now that you’re armed with the right tools and know-how, take the next step—plant those seeds and watch your garden bloom with confidence! 🌿💚 Happy growing!