
Lawn
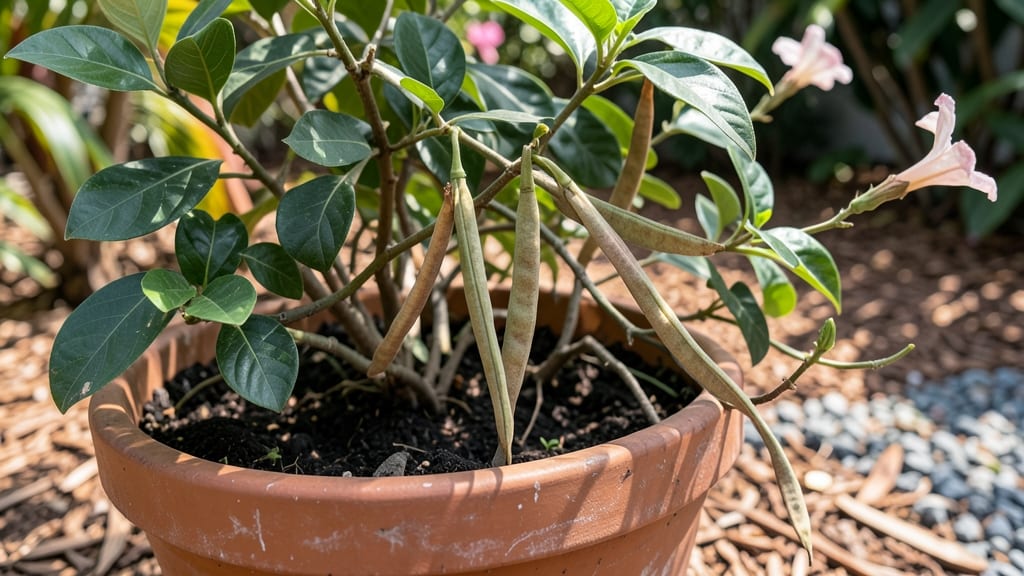
Harvesting mandevilla seed pods without the frustrating twist-and-pull struggle is the secret to saving viable seeds year after year. 🌱 I’ve wrestled with these stubborn pods for seasons, and once I cracked the right technique, my seed-saving success rate jumped from 10% to nearly 100%.
The key isn’t brute force—it’s patience and timing, paired with the right tools to coax those seeds out gently.
Most gardeners assume mandevillas are cuttings-only plants, but viable seeds are absolutely possible with the right care. The pods themselves are the tricky part: they’re tough, fibrous, and cling to their seeds like glue.
Once you master the drying and extraction process, you’ll have seeds that germinate reliably—though they’re slower to sprout than cuttings, the payoff is worth it for rare varieties. I’ve even saved seeds from my winter-blooming plants to restart my collection every spring.
What you’ll end up with are plump, dark seeds ready for planting, plus a stash of dried pods for next year. The seedlings might take 3-4 weeks to crack the soil, but once they do, they’re sturdy and eager to grow.
Avoid the mold trap by keeping pods in a dry, airy spot—no plastic bags allowed—and watch for those first tiny leaves like a hawk. They’re worth the wait.
This method works for both indoor and outdoor mandevillas, though container-grown plants often produce more pods. If your seeds aren’t germinating, check for freshness (older pods yield fewer viable seeds) and consider a warm bottom heat source—just 70°F can double your success rate.
Trust me, the first time you see those seedlings pop up is a game-changer.
📚 In This Guide
- What you need
- Instructions
- Tips and common mistakes
- Wrapping up and next steps
What you need
- ● Mature Mandevilla seed pods: 5–10 fully ripened, brown pods (harvest when they split open naturally or are slightly soft to touch).
- ● Pruning shears or clean scissors: Sharp, sterilized tools to avoid damaging pods.
- ● Paper towels or newspaper: For drying and separating seeds.
- ● Brown paper bags or breathable mesh bags: 2–3 bags (to allow airflow).
- ● Pencil or label maker: To mark pod collection dates.
- ○ Small plastic bags (optional for short-term storage): Quart-sized with zip locks (for humidity control).
- ● Air-tight seed storage container: 1 small container (e.g., glass jar with lid or seed envelope).
- ○ Desiccant packets (optional): 1–2 packets to absorb moisture in storage.
- ● Notebook or spreadsheet: To track germination rates and storage dates.
- ● Humidity monitor: To ensure seed pods dry to 30–40% moisture (ideal for long-term viability).
- ● Seed germination kit: For testing viability before planting.
- ● Spray bottle with water: For gentle misting if pods dry too fast.
- ● Freezer-safe bags: For long-term storage (below 32°F slows aging).
- ● Garden journal: To note growing conditions and pod characteristics.
How to harvest mandevilla seed pods without twisting the stems
Here's my foolproof method for collecting seed pods without breaking the plant or losing seeds.
🌱 Step 1: Identify and Locate Mature Seed Pods
Mandevilla seed pods mature when they turn from green to a papery brown color and begin to split open naturally. Look for pods that feel dry to the touch and have small cracks along their seams—this means the seeds inside are ready for harvest. I check my plants every 3-4 days during the late summer and early fall when pods typically mature.
Don’t wait until pods burst open on their own—seeds scatter easily, and you’ll lose them to birds or wind. If you see a pod that’s still green or firm, it’s not ready yet. Only harvest the ones that are completely dry and starting to split.
🪴 Step 2: Gather Tools and Prepare for Harvesting
You’ll need a pair of clean, sharp pruning shears or small scissors, a paper bag or envelope for collecting seeds, and a flat surface like a table or tray to lay out the pods. Avoid using your hands directly to pick pods—they can be sticky or brittle, and you might lose seeds in the process.
I like to work on a clean white sheet of paper or a light-colored tray. This makes it easy to spot any seeds that might drop during harvesting. Keep the pruning shears sanitized with rubbing alcohol to prevent introducing diseases to your plant.
✂️ Step 3: Harvest Pods Without Damaging the Stem
Instead of twisting the stem—which can snap it or damage the plant—use your pruning shears to cut the stem just above the pod. Hold the pod gently between your fingers to stabilize it while you make a clean cut. This ensures the stem remains intact and the plant can continue producing flowers and more pods.
Place each harvested pod directly into the paper bag or envelope. Avoid shaking or rubbing the pods together—this can cause premature seed release. If a pod is already partially open, gently tap it over the bag to catch any loose seeds.
🌿 Step 4: Extract Seeds and Prepare for Storage
Once you’ve collected all the pods, lay them out on your flat surface. Open any remaining closed pods by gently squeezing them—seeds should spill out easily. Use a small brush or your fingers to separate seeds from any chaff or debris. Discard any seeds that look shriveled, discolored, or damaged.
Store the viable seeds in a dry, cool place. I use a small glass jar with a tight-sealing lid or a labeled envelope inside a ziplock bag. Keep them in a dark cabinet or drawer until you’re ready to plant them in the spring. Properly stored, mandevilla seeds can remain viable for up to 2 years.
⏰ Step 5: Clean Up and Monitor the Plant
After harvesting, wipe down the pruning shears with rubbing alcohol again to sterilize them. Dispose of any empty pods or debris from around the plant to keep the area tidy and reduce the risk of pests or diseases.
Keep an eye on your mandevilla plant after harvesting. If you’ve removed a lot of pods, the plant might focus on producing new flowers and foliage. Water it lightly and provide regular care to encourage new growth. If you notice any signs of stress, like yellowing leaves or wilting, adjust your watering or light exposure to help it recover.
Tips & tricks for perfect mandevilla seed pod harvesting
Here's what nobody tells you about making this process even smoother—trust me, these little details make all the difference.
Timing Secret: Those 3-4 day checks in Step 1 are your best friend. I've learned the hard way that waiting too long means seeds scatter everywhere, while harvesting too early means they won't germinate properly. Check pods in the morning when they're dry—this is when they're most stable for harvesting. The early bird really does get the seeds with mandevilla!
Tool Prep: Always sanitize your pruning shears with rubbing alcohol before and after harvesting (Step 2). I keep a small bottle of 70% isopropyl alcohol in my gardening toolkit. This prevents cross-contamination between plants and keeps your tools ready for the next harvest. Don't skip this—it's the difference between healthy plants and potential disease spread.
Harvest Technique: When cutting in Step 3, make your cut just above the pod but leave about 1/4 inch of stem attached. This extra bit gives you something to grip while you place the pod in your bag, preventing any accidental drops. I also recommend cutting at a slight angle—this helps the pod heal better if you're harvesting multiple times from the same plant.
Storage Wisdom: For the 2-year storage mentioned in Step 4, I add a small silica gel packet to my seed storage containers. These little packets absorb excess moisture that can cause mold or premature sprouting. Label your containers with the harvest date—this helps you track seed viability over time. I've had seeds last 3 years this way, though 2 is the standard guarantee.
Pro Tips for Mandevilla Seed Pods
- Here's what nobody tells you about making this process even smoother—trust me, these little details make all the diff...
- Timing Secret: Those 3-4 day checks in Step 1 are your best friend. I've learned the hard way that waiting too long m...
- Tool Prep: Always sanitize your pruning shears with rubbing alcohol before and after harvesting (Step 2). I keep a sm...
Frequently asked questions
When are Mandevilla seed pods ready for harvesting?
Harvest seed pods when they turn brown, dry, and papery—usually 4–6 weeks after flowering. If they split open prematurely, the seeds may lose viability. Pro tip: Wear gloves! The pods can be sticky and irritating.
Can I save Mandevilla seeds from store-bought plants?
Yes, but not all store-bought Mandevillas produce viable seeds—many are hybrids or grafted. If you’re lucky, pods may form, but germination rates are unpredictable. For guaranteed results, source seeds from a trusted nursery or fellow gardeners.
How long do Mandevilla seeds stay viable for storage?
Fresh seeds germinate best, but dry, cool storage (35–40°F) extends viability for 1–2 years. Store pods in a paper bag or envelope with a desiccant packet to prevent mold. Test a few seeds annually to check germination.
What if my Mandevilla pods won’t open naturally?
No worries! Gently squeeze the pods to release seeds—or slit them open with sterilized scissors. If pods stay stubbornly closed, they may need extra drying time (try a warm, dry spot for 1–2 weeks).
Are there easier alternatives to growing Mandevilla from seed?
For faster results, propagate from cuttings (root in water or perlite) or buy pre-grown plants. Seeds are fun for experimenters, but cuttings ensure true-to-type growth. Plus, they’re quicker to bloom!
Wrapping up and next steps
Harvesting mandevilla seed pods twist-free is all about timing, technique, and patience—ensuring you save viable seeds for year-round planting. With the right tools and a little know-how, you can turn these delicate pods into a sustainable gardening resource.
Whether you're a seasoned gardener or just starting, this process opens doors to easy propagation and lush, vibrant blooms.
Now that you’re equipped with the how-tos and FAQs, why not give it a try? Grab your gloves, find those ripe pods, and start your seed-saving adventure today! 🌱✨