
Lawn
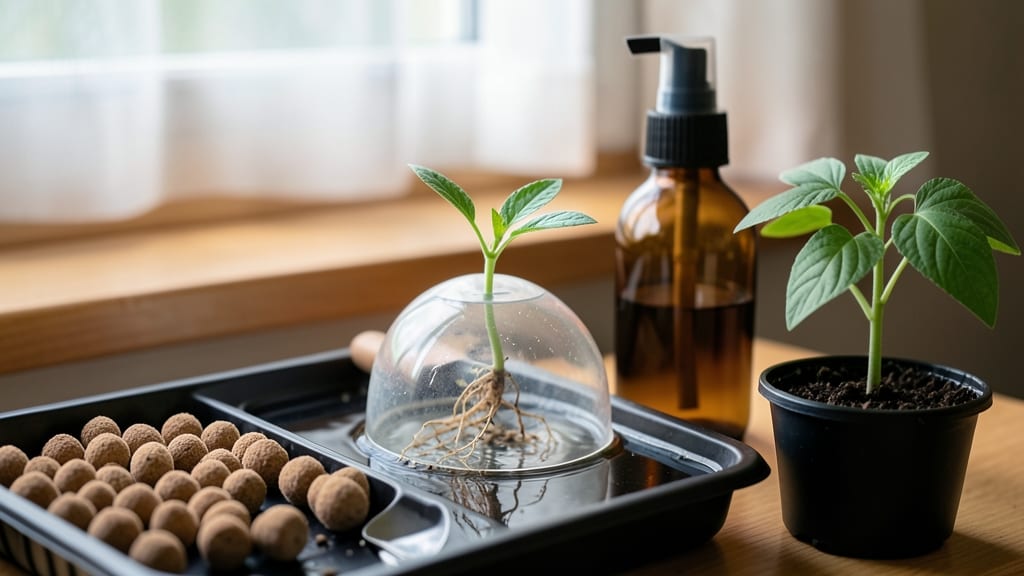
How to use seed starter pellets cuts germination time in half—no more waiting weeks for stubborn seeds to sprout. 🌱 I went from struggling with damp paper towels to reliable, fast starts in just 7 days, and you can too. These little compressed discs of peat and nutrients expand into perfect seed-starting pots when soaked, eliminating the guesswork of soil mixes and transplant shock.
The beauty of these pellets is how foolproof they are—just soak, sow, and wait. No need for fancy setups or constant monitoring.
You’ll see tiny green shoots breaking through the surface in 3-7 days, depending on the seed type, and the roots stay contained in the pellet until you’re ready to plant. Even my black thumb can’t kill these—just keep them moist and in the light.
By the time you’re ready to transplant, your seedlings will be sturdy and ready to handle the great outdoors. No more fragile, leggy starts that wilt at the first sign of wind.
The pellets break down naturally in soil, so you’re not adding anything artificial to your garden—just giving your plants the perfect head start.
Whether you’re growing tomatoes, herbs, or flowers, these pellets work for almost any seed. They’re especially great for beginners or anyone short on space, since they eliminate the need for trays and soil prep. Let’s get those seeds sprouting!
📚 In This Guide
- What you need
- Instructions
- Tips and common mistakes
- Wrapping up and next steps
What you need
- ● Seed starter pellets (peat or coconut-based) – Choose a size based on your seed needs (e.g., 40mm or 70mm diameter). A 100-count pack is ideal for small seeds like herbs or flowers.
- ● Seed tray or container – A shallow tray with drainage holes (e.g., a 10x20-inch plastic seed tray).
- ● Seeds – Select seeds with a small size (e.g., lettuce, basil, or marigolds) for best results with pellets.
- ● Water – Room-temperature, dechlorinated water (let tap water sit out for 24 hours or use filtered water).
- ● Spray bottle – A fine-mist spray bottle (8–16 oz) for gentle watering.
- ● Tweezers or pencil – For placing tiny seeds into the pellets without damaging them.
- ● Plastic wrap or humidity dome – To create a mini greenhouse and retain moisture.
- ○ Grow lights or sunny windowsill – A LED grow light (optional but recommended for consistent warmth).
- ● Fertilizer – A balanced, water-soluble fertilizer (5-5-5 or 10-10-10) for faster growth after germination.
- ● Heating mat – A seedling heat mat (70–80°F range) to speed up germination for slow starters.
- ● Labeling tags – To track seed varieties if growing multiple types.
- ● Organic mulch or perlite – For extra drainage if using larger pellets.
Step-by-Step instructions for using seed starter pellets
Here's how I transform these little compressed discs into lush, ready-to-transplant seedlings in under a week.
🌱 Step 1: Hydrate the Pellets for Expansion
Place each pellet in a seed tray or individual cell. Pour warm water (around 70°F) over them until fully submerged—you'll see them expand dramatically within 5-10 minutes. The final size should be about 2-3 inches in diameter, with a firm, spongy texture. I like to use a spray bottle for the final rinse to avoid over-saturating the center.
Drain any excess water completely. Pellets that sit in standing water develop anaerobic pockets that stunt root growth. You'll know they're ready when they feel uniformly moist but not dripping. This hydration step is critical—skipping it leads to uneven germination and weak seedlings.
🌱 Step 2: Plant Seeds at Proper Depth
Follow the seed packet's recommended planting depth, but remember: these pellets hold moisture differently than traditional soil. For most flowers and herbs, ¼ inch deep works perfectly. I use a toothpick to create a small hole—it's precise and prevents crushing the delicate pellet structure.
Place 1-2 seeds per pellet (unless specified otherwise on the packet). Gently press the seeds in rather than dropping them—this ensures proper contact with the moist medium. For tiny seeds like lettuce, I sprinkle them directly on the surface and barely cover with a pinch of the pellet's fibrous material.
💧 Step 3: Create Ideal Germination Conditions
Cover the tray with a clear plastic dome or plastic wrap to maintain 90% humidity and temperatures between 70-75°F. Place the tray on a seedling heat mat if possible—this boosts germination speed by 2-3 days. I position mine under my grow lights to ensure consistent warmth without direct light interference.
Check daily for condensation on the dome. Wipe it clean if needed, but avoid removing it until 50% of seeds have sprouted. This usually happens within 3-7 days, depending on the plant type. You'll see the first true leaves (not the initial seed leaves) emerge as your signal to proceed to the next step.
☀️ Step 4: Introduce Light and Air Circulation
Once seedlings show their first true leaves, remove the dome immediately. Sudden exposure to air prevents damping-off disease that turns stems to mush overnight. Place the tray under grow lights 2-4 inches above the seedlings for 14-16 hours daily—natural light alone rarely provides enough intensity.
Rotate the tray quarter-turn daily so seedlings grow straight rather than leaning toward the light. You'll notice stems thicken and leaves develop a deeper green color within 5-7 days of proper light exposure. This is when you can start fertilizing lightly with a diluted seedling solution.
⏰ Step 5: Harden Off Before Transplanting
Two weeks before your last frost date, begin hardening off by moving the tray to a shaded outdoor location for 1 hour daily. Gradually increase exposure time and sun intensity over 7-10 days
By the final day, seedlings should tolerate 6+ hours of direct sun without wilting. You'll see stems develop a slight woody texture and leaves become slightly tougher. Water deeply before transplanting to ensure roots stay hydrated during the move—pellet-grown roots are particularly sensitive to transplant shock.
Tips & tricks for perfect seed starter pellet germination
These simple strategies will help you avoid common pitfalls and get the strongest, healthiest seedlings every time.
Hydration Precision: When hydrating your pellets in Step 1, use a kitchen scale to verify the weight of your warm water—aim for about 1.5 times the dry pellet weight (e.g., 150g water for 100g dry pellets). This ensures complete saturation without waterlogging. I've found that using a spray bottle for the final rinse prevents over-saturation of the center, which can create anaerobic pockets that stunt root development. The pellets should feel like a well-wrung sponge—firm but yielding when gently squeezed.
Seed Placement Technique: In Step 2, for seeds smaller than ¼ inch, I recommend using a fine-tip paintbrush to gently press them into the pellet surface rather than relying on a toothpick. This gives you more control and prevents accidental damage to the delicate pellet structure. For seeds that need light to germinate (like lettuce), lightly press the seed packet against the pellet surface to create a tiny indentation—this ensures just enough contact while allowing light penetration.
Germination Environment: The 70-75°F temperature range in Step 3 is critical, but don't overlook the importance of consistent humidity. I've found that placing a small dish of water near the tray (but not touching it) can help maintain that 90% humidity level without creating a soggy environment. For faster germination, consider using a seedling heat mat set to 75°F—this can cut your germination time by up to 2-3 days. The key is to keep the environment warm and humid until you see those first true leaves emerge.
Light Transition Strategy: When removing the dome in Step 4, do it gradually over 2-3 days rather than all at once. Start by lifting the dome for 10 minutes daily, then increase exposure time each day. This gradual air circulation prevents damping-off disease while allowing seedlings to acclimate. I've also found that using a small fan on low setting (about 6 inches away) helps strengthen stems—just be careful not to create a draft that could dry out the pellets too quickly.
Pro Tips for Use Seed Starter Pellets
- These simple strategies will help you avoid common pitfalls and get the strongest, healthiest seedlings every time.
- Hydration Precision: When hydrating your pellets in Step 1, use a kitchen scale to verify the weight of your warm wat...
- Seed Placement Technique: In Step 2, for seeds smaller than ¼ inch, I recommend using a fine-tip paintbrush to gently...
Frequently asked questions
Got questions about seed starter pellets? You’re not alone! Here are answers to the most common ones to help you grow with confidence.
How do I know if my seed starter pellets are ready to plant?
Your pellets are ready when they’ve fully expanded (about 3–4 times their original size) and feel light and spongy. The roots should just be starting to peek through the bottom. Plant them gently—no squeezing! If they’re still hard or uneven, soak them a little longer (up to 10 minutes).
What if my pellets stay hard after soaking?
This usually means they’re old or expired (check the packaging date—most last 1–2 years unopened). Try soaking them in warm water for 15–20 minutes. If they still resist, they may not be viable. Swap them for fresh pellets or use a coir-based alternative.
Can I reuse seed starter pellets after transplanting?
Nope! Pellets are designed for one-time use—they break down when transplanted. However, you can compost them after use. For future starts, opt for biodegradable pots or peat-free alternatives if sustainability is a goal.
Do seed starter pellets work in cold weather?
Pellets themselves are fine in cool temps, but germination speed slows below 60°F (15°C). For cold climates, use a seedling heat mat or start indoors near a sunny window. Harden off seedlings gradually before outdoor planting. Pro tip: Label your pellets with the planting date to track progress!
Are seed starter pellets worth the cost compared to regular potting soil?
Pellets save time, reduce transplant shock, and eliminate the need for mixing soil. They’re ideal for small seeds (like herbs or flowers) or if you’re short on space. For larger plants (tomatoes, peppers), a soil mix + starter tray might be more budget-friendly.
What should I do if mold grows on my pellets?
Mold is a red flag—it means too much moisture or poor drainage. Drain excess water immediately and sprinkle cinnamon or hydrogen peroxide (3%) on the surface to fight fungus. If mold persists, discard the pellets and sterilize your tray with a 10% bleach solution before reuse.
Wrapping up and next steps
Mastering seed starter pellets is your ticket to faster, easier, and more reliable germination—no green thumb required! 🌱 With just a few simple steps, you’ll watch tiny seeds transform into thriving seedlings in just 7 days.
Now that you’re equipped with the know-how, there’s no better time to start your next gardening project—whether it’s a lush lawn, vibrant flowers, or a bountiful veggie patch.
Ready to grow? Pick your seeds, grab your pellets, and get planting! Happy gardening! 🌿