
Propagation
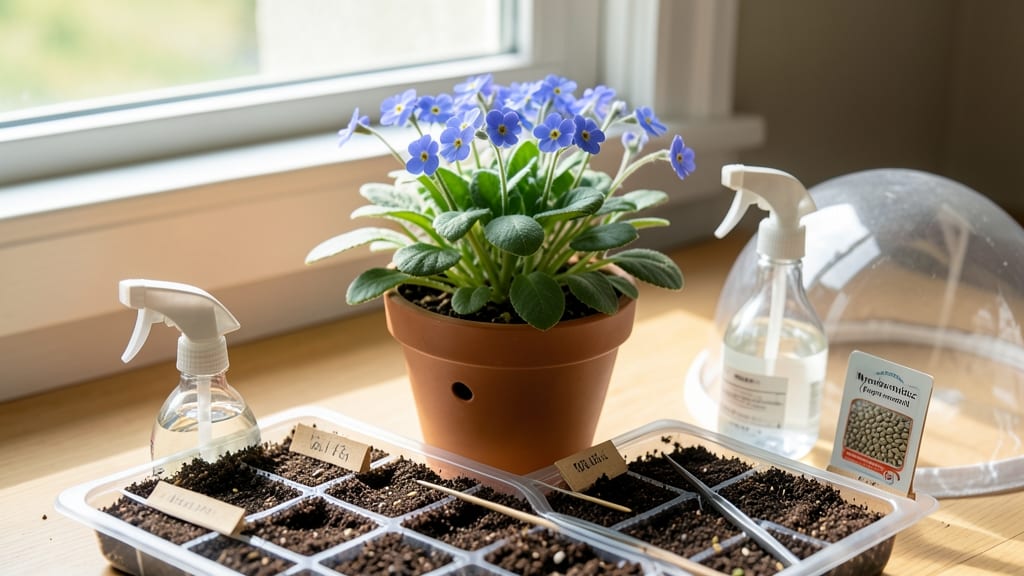
Growing forget-me-nots from seed indoors lets you beat the clock—these delicate blooms need cold stratification to germinate, but with the right setup, you’ll see tiny blue sprouts in just 60 days. 🌱 I’ve struggled with finicky seeds before, but forget-me-nots reward patience with their signature sky-blue flowers and lacy foliage.
The trick? Mimicking winter’s chill indoors so they break dormancy reliably.
You’ll need a shallow tray, damp paper towels, and a zip-top bag to create that cold, moist environment—no fancy equipment required. Forget-me-not seeds are tiny, so scatter them lightly over dampened soil (not buried) and keep them in a 50–60°F spot for 2–3 weeks before moving to brighter light.
The key is consistency: too warm, and they’ll rot; too dry, and they’ll never sprout.
Once those first pale green leaves appear, you’ll be hooked—true leaves mean it’s time to transplant into individual pots. Forget-me-nots thrive in partial shade, so a north-facing window or grow light works best.
Pinch back leggy stems early to encourage bushier growth, and you’ll have blooms ready for late spring transplanting outdoors.
Here’s the secret: forget-me-nots self-seed like crazy once established, so a single indoor start can become a multi-year ground cover in your garden. The only challenge? Keeping slugs off them—cover young plants with row fabric until they’re sturdy enough to fend for themselves.
📚 In This Guide
- What you need
- Instructions
- Tips and common mistakes
- Wrapping up and next steps
What you need
- ● Forget-me-not seeds: Myosotis spp. (1 packet, ~50–100 seeds). Choose heirloom varieties like 'Blue Ball' or 'Opal' for vibrant colors.
- ● Seed-starting mix: 1–2 quarts of sterile, seed-specific potting mix (avoid garden soil—it’s too dense!). Look for labels like "seed starter" or "organic peat-free" blends.
- ● Containers: Small seed trays (3–4" deep) or
- ● Individual pots (2–3" diameter) with drainage holes. Pro tip: 💡 Use recycled containers (yogurt cups, egg cartons) if sterilized!
- ● Plastic wrap or humidity dome: A clear plastic bag, lid, or DIY cover (e.g., cut plastic bottle) to retain moisture.
- ● Spray bottle: 8–16 oz with a fine mist nozzle (for gentle watering).
- ● Grow lights or sunny windowsill: Grow lights: 1 LED bulb (12–16 watts, full-spectrum) + clip-on fixture or
- ● Sunny spot: South-facing window (6+ hours of indirect light daily).
- ● Refrigerator (for stratification): A zip-top bag + damp paper towel to chill seeds for 4–6 weeks.
- ● Misting bottle or watering can: With a soft spray setting (overhead watering is key!).
- ● Fine-tip tweezers: For gently placing tiny seeds (no need to bury them!).
- ○ Heat mat (optional): 1 small mat (70–75°F) to speed germination if your home runs cool.
- ● Fertilizer: Balanced liquid fertilizer (5-5-5 or 10-10-10) diluted to half-strength. Use sparingly—only after sprouts emerge!
- ● Pruning shears: For trimming leggy seedlings later.
- ● Plant labels: Toed labels or toothpicks + masking tape to track varieties.
- ● Humidity tray: A shallow tray + pebbles + water to boost moisture (great for stubborn seeds!).
Step-by-Step instructions for growing forget-me-nots from seed indoors
Here’s how I transform delicate forget-me-not seeds into vibrant blooms—no cold frame needed.
🌱 Step 1: Cold Stratify Seeds for Strong Germination
Forget-me-nots need 6-8 weeks of cold stratification to break dormancy. Place your seeds in a sealed plastic bag with a damp paper towel, then refrigerate at 35-40°F for 6-8 weeks. I like to check them weekly—if the towel dries out, mist it lightly and reseal the bag.
This cold treatment mimics winter conditions, ensuring seeds germinate uniformly. Without it, you’ll wait months for sporadic sprouts. After 6 weeks, remove the bag and let seeds sit at room temperature for 24 hours before sowing. This gradual warming jumpstarts growth.
🪴 Step 2: Sow Seeds in Moistened Starting Mix
Fill 2-3 inch deep pots with a sterile seed-starting mix and moisten until damp but not soggy. Forget-me-nots are tiny, so I use a toothpick to poke ¼ inch deep holes, then place 1-2 seeds per hole. Cover lightly with a sprinkle of mix—don’t bury them deeper than ⅛ inch.
Press the soil gently around the seeds to ensure good contact. Forget-me-nots germinate best in 60-70°F soil, so place pots on a seedling heat mat if your home runs cooler. Mist the surface with water until evenly damp, but avoid soaking—overwatering causes rot before germination.
☀️ Step 3: Provide Humidity and Indirect Light
Cover pots with clear plastic wrap or a humidity dome to retain moisture and warmth. Forget-me-nots germinate in 10-21 days, but they need consistent humidity—check daily and mist if the soil surface dries. Once sprouts appear, remove the cover immediately to prevent damping-off.
Place pots under bright, indirect light (east or west window) until seedlings have 2-3 sets of true leaves. Avoid direct sun—young forget-me-nots scorch easily. If growth looks leggy (stretched stems), your light is too weak. Move closer to the window or add a grow light 2-3 inches above the plants.
✂️ Step 4: Thin and Harden Off Seedlings
When seedlings reach 1 inch tall, thin to the strongest plant per pot using scissors to snip weak stems at soil level. Forget-me-nots resent root disturbance, so avoid pulling. Water gently after thinning to settle the soil around remaining roots.
Start hardening off 2 weeks before transplanting by placing pots outside in partial shade for 1-2 hours daily. Gradually increase exposure to 4-6 hours by the final week. Forget-me-nots thrive in cool weather, so transplant on a cloudy day or evening to reduce shock.
🌿 Step 5: Transplant and Maintain for Blooms
Dig holes twice as wide as the root ball and space plants 6-8 inches apart in partial shade. Forget-me-nots love moist, well-draining soil—amend garden beds with compost if your soil is heavy. Water deeply after transplanting to encourage root establishment.
Keep soil consistently moist but not waterlogged. Forget-me-nots bloom in 60-80 days from sowing, but they reward patience with 3-4 weeks of delicate blue flowers. Deadhead spent blooms to encourage more flowers, and divide clumps every 2-3 years to prevent overcrowding.
Tips & tricks for perfect forget-me-nots indoors
These little-known strategies will help you transform those delicate seeds into thriving blooms with minimal fuss.
Cold Stratification Consistency: Forget-me-nots are finicky about their cold treatment—don't rush the 6-8 weeks. Place your bag of seeds on a shelf in your fridge where the temperature stays steady at 35-40°F. I like to label the bag with the start date so I don't lose track. The key is uniformity: if your fridge has temperature fluctuations, consider using a dedicated seed fridge or a cool basement corner. This consistent cold period is what breaks their dormancy and ensures strong germination.
Seedling Light Strategy: Once those first leaves appear in Step 3, forget-me-nots need bright but indirect light to prevent scorching. I've found that placing pots on a rotating tray near an east-facing window gives them even exposure. If you notice stems stretching toward the light (called etiolation), it's time to move them closer or add a grow light. Remember, these seedlings are delicate—direct sunlight can turn their leaves crispy in minutes. A simple trick is to use sheer white curtains to diffuse harsh afternoon rays while still providing plenty of light.
Transplanting Timing: The 2-week hardening off period in Step 4 is crucial but often overlooked. Start with just 1-2 hours of outdoor exposure and gradually increase by 30 minutes each day. I always do this in the morning when temperatures are cooler, and I avoid days when rain is forecasted. The goal is to let them acclimate to outdoor conditions without shocking their systems. On the final day, I'll even bring them inside for the evening to give them a gentle transition into their new home.
Post-Bloom Care: After those beautiful blue flowers appear, don't let them go to seed too quickly! Deadheading spent blooms every few days encourages more flowers to form. I also make it a habit to divide mature clumps every 2-3 years in early spring. This rejuvenates the plants and prevents them from becoming woody. When dividing, make sure each section has both roots and stems—this gives you instant new plants for your garden or to share with friends.
Pro Tips for Grow Forget Me Nots From Seed Indoors
- These little-known strategies will help you transform those delicate seeds into thriving blooms with minimal fuss.
- Cold Stratification Consistency: Forget-me-nots are finicky about their cold treatment—don't rush the 6-8 weeks.
- Seedling Light Strategy: Once those first leaves appear in Step 3, forget-me-nots need bright but indirect light to prevent scorching.
Frequently asked questions
Got questions about growing forget-me-nots from seed indoors?
You’re not alone! Here are answers to the most common concerns—so you can grow these delicate blooms with confidence.
How long does it take for forget-me-not seeds to germinate?
With cold stratification, germination typically takes 2–4 weeks after the cold treatment. Once sown in warm soil, expect sprouts in 7–14 days. Patience is key—these seeds are slow but steady!
Can I skip cold stratification and still grow forget-me-nots?
Technically yes, but success rates drop dramatically. Skipping stratification may result in spotty germination (10–30%) or slower growth. If you’re impatient, try soaking seeds in warm water for 24 hours before planting—but stratification (4–6 weeks in the fridge) is still best for reliable results.
Why aren’t my forget-me-not seedlings growing after germination?
Common culprits: overwatering (root rot), low light (leggy stems), or crowding. Ensure pots have drainage, place seedlings in bright, indirect light, and thin to 1 inch apart once true leaves appear. Yellow leaves? Check for fungus gnats—use a fan to improve airflow!
When is the best time to start forget-me-not seeds indoors?
For spring blooms, start seeds 8–10 weeks before your last frost date (e.g., late winter for most climates). If you want fall flowers, begin in early summer. Forget-me-nots thrive in cool weather, so avoid starting too early—heat stress stunts growth.
Can I grow forget-me-nots from seed in small pots or containers?
Use 4–6 inch pots or even seed trays with drainage. Forget-me-nots have shallow roots, so they adapt well to containers. Just ensure the soil stays moist but not soggy and upgrade to larger pots (6+ inches) when seedlings are 2–3 inches tall.
Pro Tip:
Need a quick fix for slow germination? Try placing seeds on a damp paper towel in a sealed bag at 60°F for a few days before planting. This mimics natural moisture conditions and can speed up sprouting!
Wrapping up and next steps
Growing forget-me-nots from seed indoors is a rewarding journey that brings delicate, sky-blue blooms into your life—often in just 60 days! With the right cold stratification technique, patience, and a little care, you’ll transform tiny seeds into vibrant plants ready for transplanting.
Whether you’re a beginner or a seasoned gardener, these cheerful flowers prove that big results start small.
Now that you’re armed with the know-how, grab those seeds and give it a try! Once your seedlings sprout, check out our transplanting guide to help them thrive outdoors—or share your progress with fellow plant lovers. Happy growing! 🌱✨