
Lawn
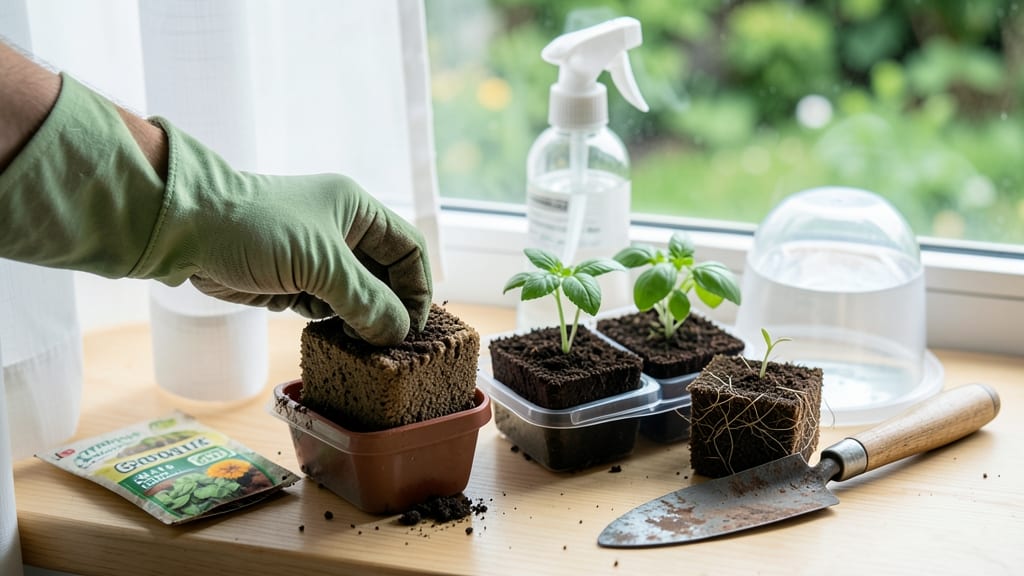
Seed starter cubes let you skip the messy flats and transplant seedlings with their roots intact. 🌱 I’ve used them for three seasons now, and they’ve cut my transplant shock by half—no more wimpy seedlings struggling after moving to the garden.
The cubes hold moisture better than soil blocks and dissolve right into the ground, so roots don’t get disturbed. You’ll need just three things: cubes, a seed-starting tray, and your favorite seeds.
No fancy setups—just fill the tray, plant your seeds, and keep them under a grow light or sunny window. The cubes stay moist longer than traditional soil, so you water less and worry more about growth than maintenance.
By the time you’re ready to transplant, your seedlings will be sturdy and ready to thrive. The cubes break down completely, so there’s no risk of tangling roots or buried plastic. You’ll see stronger plants in the garden within just 10-14 days of transplanting.
Works for veggies, flowers, and herbs—just adjust planting depth and spacing. Here’s how to make the most of them without common pitfalls like mold or leggy seedlings.
📚 In This Guide
- What you need
- Instructions
- Tips and common mistakes
- Wrapping up and next steps
What you need
- ● Seed starter cubes (biodegradable coir or peat-based) – 100+ cubes (quantity depends on your planting goals). Look for 2-inch cubes for optimal seedling growth.
- ● Seeds – Choose fast-growing varieties like basil, lettuce, or marigolds for quick results.
- ● Watering can or spray bottle – A gentle misting function helps avoid displacing seeds.
- ● Tray or container – A shallow, flat-bottomed tray (e.g., 10x20-inch plastic seedling tray) with drainage holes.
- ○ Potting mix (optional but recommended) – A lightweight, seed-starting mix (avoid garden soil—it’s too dense!).
- ● Plant labels or toothpicks – For tracking seed types (write with a waterproof marker!).
- ○ Heat mat (optional) – Speeds up germination for cool-weather crops (e.g., 65°F setting).
- ● Grow lights or sunny windowsill – 12–16 hours of light/day keeps seedlings sturdy.
- ● Tweezers or spoon – For delicate seed placement (especially tiny seeds like carrots or parsley).
- ● Misting bottle with water – Keeps cubes consistently moist without drowning seeds.
Step-by-Step instructions for using seed starter cubes
Here's how to use these handy cubes for strong, ready-to-plant seedlings with minimal fuss.
🌱 Step 1: Prepare the Cubes and Seeds
Fill a shallow tray with about ½ inch of water and place your seed starter cubes in a single layer. Let them soak for 10-15 minutes until fully saturated and heavy. You'll know they're ready when they stand upright on their own—no wobbling.
While they soak, prepare your seeds by gently pressing them into the small indentations on each cube. I like to use a toothpick to create a tiny hole if the indent isn't deep enough. Place just 1 seed per cube—overcrowding leads to weak, tangled seedlings later.
💧 Step 2: Set Up for Germination
Arrange the planted cubes in a seed tray or small container with drainage holes. Keep them in a warm spot—70-75°F works best for most vegetables—like on top of your fridge or near a sunny window. Cover the tray with clear plastic wrap or a humidity dome to trap moisture and warmth.
Check daily for condensation inside the cover. If you see water droplets forming, that's perfect—it means the cubes are holding moisture well. Remove the cover as soon as you see the first green sprouts, usually within 5-14 days, depending on the seed type.
☀️ Step 3: Provide Light and Care
Move the cubes to a bright location with 6-8 hours of indirect light daily. A south-facing window works well, but if your seedlings start stretching toward the light (a sign they're reaching for more), supplement with a grow light kept 2-3 inches above the cubes. You'll notice strong seedlings have thick stems and dark green leaves.
Water gently from the bottom by placing the tray in ½ inch of water for 10 minutes every 2-3 days. The cubes will absorb just what they need—no soggy mess. Avoid watering from above once sprouts appear, as this can dislodge the tiny plants or cause disease.
🌿 Step 4: Harden Off and Transplant
When seedlings have 2-3 true leaves (not just the initial seed leaves), start hardening them off. Place the cubes outside in a sheltered spot for 1-2 hours the first day, gradually increasing time over 5-7 days until they're out all day. This toughens their stems and prepares them for the garden.
Transplant the cubes directly into the ground or larger pots by gently peeling away the outer netting. The cubes dissolve naturally, so no need to remove them—just place the seedling in its new home and cover with soil. Water deeply after transplanting to help the roots settle in.
Tips & tricks for perfect seed starter cubes
Avoid these common pitfalls—and watch your seedlings thrive like a pro. The little details make all the difference with seed starter cubes.
Soaking Secret: Those 10-15 minutes of soaking are crucial—don't rush it! If cubes still feel light or wobble when placed upright, they need more time. I've learned the hard way that under-soaked cubes dry out too fast, which stunts germination. Pro tip: Use room-temperature water, not cold straight from the tap, to speed up absorption without shocking the cubes.
Lighting Strategy: The 6-8 hours of indirect light in Step 3 is non-negotiable for strong seedlings. If your window isn't sunny enough, invest in a basic LED grow light—just keep it 2-3 inches above the cubes. I notice seedlings grown under weak light become leggy and weak, no matter how much you water them. For best results, rotate the tray daily so all sides get even exposure.
Harden Off Gradually: The 1-2 hour to 5-7 day hardening process in Step 4 is where many gardeners fail. I recommend starting with just 30 minutes on the first day if your climate is windy or cold. Watch your seedlings closely—they'll tell you when they're ready for more time outside. You'll know it's working when they develop a deeper green color and stand up straighter.
Watering Wisdom: That ½ inch of water for 10 minutes every 2-3 days is a game-changer. The cubes are designed to absorb exactly what they need, so don't overwater! I've seen beginners drown their seedlings by keeping the tray constantly wet. The bottom-watering method also prevents disease by keeping leaves dry—something top-watering often causes.
Pro Tips for Seed Starter Cubes
- Avoid these common pitfalls—and watch your seedlings thrive like a pro. The little details make all the difference wi...
- Soaking Secret: Those 10-15 minutes of soaking are crucial—don't rush it! If cubes still feel light or wobble when pl...
- Lighting Strategy: The 6-8 hours of indirect light in Step 3 is non-negotiable for strong seedlings. If your window i...
Frequently asked questions
Got questions about seed starter cubes? You’re not alone! Here are answers to the most common ones to help you grow with confidence.
What are seed starter cubes made of?
Seed starter cubes are typically made from a blend of peat moss, coconut coir, and perlite (or similar materials), designed to retain moisture while promoting airflow. They’re biodegradable and break down naturally when planted, so no need to remove them—just pop the cube into the soil!
How long do seed starter cubes take to germinate seeds?
Germination time varies by plant, but most seeds sprout within 5–14 days in starter cubes. Keep them warm (65–75°F) and moist, and check daily for tiny sprouts. Leafy greens and herbs often appear first, while flowers or veggies like tomatoes may take longer.
Do I need to water seed starter cubes daily?
Not quite! Water only when the top layer feels dry—overwatering can drown seeds. Place cubes in a tray with a shallow layer of water for 10–15 minutes, then drain excess. A humidity dome (or plastic wrap) helps retain moisture while preventing rot.
Can I reuse seed starter cubes?
Unfortunately, no—cubes are meant for single-use due to potential mold or disease buildup. However, you can sterilize leftover cubes (if unused) by baking them at 200°F for 30 minutes to kill pathogens, then reuse them for fast-growing seeds like lettuce or herbs.
What’s a good alternative if I don’t have seed starter cubes?
No cubes? No problem! Try these easy swaps:
- Paper towels: Moisten a towel, place seeds inside, and keep it in a sealed bag until sprouts appear (then transplant).
- Egg cartons: Poke drainage holes, fill with soil, and plant seeds directly—biodegradable and budget-friendly!
- Yogurt cups: Cut into sections, add soil, and use like mini pots before transplanting.
Why are my seeds not sprouting in starter cubes?
Check these common culprits:
- Temperature: Too cold? Move to a warmer spot (like a sunny windowsill or heat mat).
- Moisture: Dry cubes = stalled seeds. Keep them damp but not soggy.
- Depth: Seeds buried too deep? Follow packet instructions—most need ¼ inch coverage max.
- Light: No light? Place cubes under grow lights or in bright indirect sunlight.
Wrapping up and next steps
Seed starter cubes are your easy, mess-free gateway to a thriving garden—no soil spills, no transplant shock, and zero excuses for skipping your green thumb goals! Whether you're a beginner or a seasoned gardener, these cubes simplify the process while boosting seedling success.
Now that you’re armed with the know-how, grab your cubes, pick your favorite seeds, and let your garden dreams take root—literally! 🌱✨
Your Next Step:
- Start small: Try a few cubes with easy-to-grow seeds like basil or marigolds to build confidence.
- Experiment: Test different seeds or moisture levels to find your perfect match.
- Share the joy: Gift starter cubes to a friend—it’s the ultimate low-maintenance plant parent present!