
Lawn
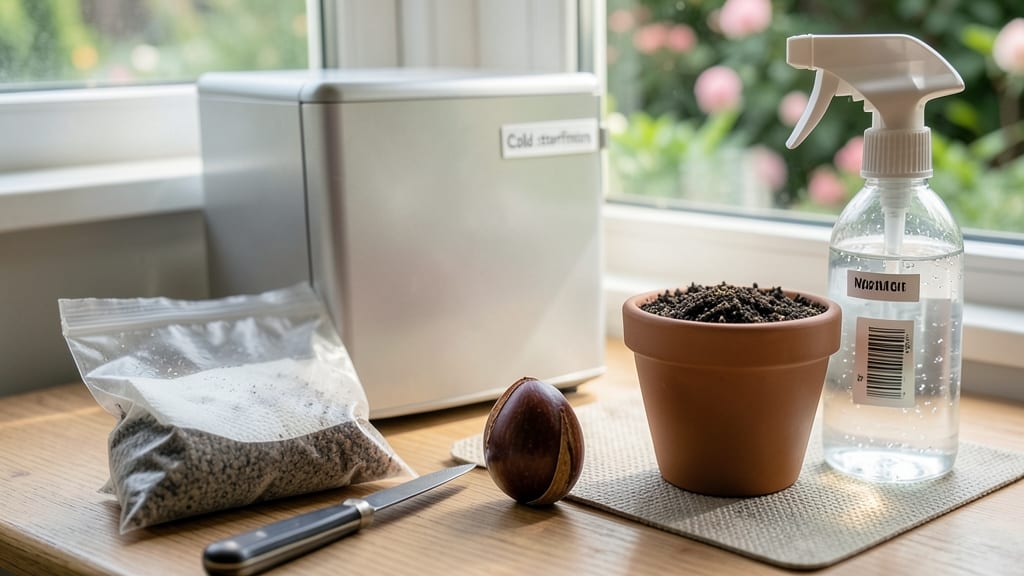
Preparing cherry seeds for planting starts with a cold stratification trick that mimics nature's timing. 🌱 The key is breaking dormancy before germination—without this step, most seeds will sit stubbornly in the soil for months.
I learned this the hard way after planting fresh seeds that never sprouted, only to discover they needed weeks of winter-like conditions first.
You'll need just a few supplies: moist paper towels, a sealed plastic bag, and your freezer. Sweet or sour cherry seeds both work, but expect genetic surprises—your seedling might grow into a completely different variety than the parent tree.
The process takes about 3 months of patience, but it's worth it for the satisfaction of nurturing a tree from scratch.
After stratification, you'll transfer the seeds to a warm, well-draining soil mix where they'll finally push through. The first true leaves appear in 2-4 weeks, though full growth takes longer.
This method works for both backyard gardeners and urban growers with limited space—just use small pots and a sunny windowsill.
The real reward comes years later when your tree produces fruit, though it may not match the parent's flavor or traits. That's part of the adventure! Start now, and in 5-7 years, you could be harvesting your own cherries. Here's how to do it right the first time.
📚 In This Guide
- What you need
- Instructions
- Tips and common mistakes
- Wrapping up and next steps
What you need
- ● Fresh cherry pits: 10–20 pits (harvested from ripe, organic cherries—avoid store-bought if possible!)
- ● Paper towels or coffee filters: 2–3 sheets (for moisture control during stratification)
- ● Plastic bag or airtight container: 1 (quart-sized or larger, with a zip-top seal)
- ● Water: Distilled or tap water (room temperature)
- ● Refrigerator: A standard fridge with a consistent temperature (33–41°F / 0–5°C)
- ● Potting soil: 1 bag (well-draining, sterile mix—look for "seed starting" or "potting" blends)
- ● Small pots or seed trays: 1–2 (3–4 inch diameter or cell trays for individual seeds)
- ● Spray bottle: 1 (for gentle watering)
- ○ Hydrogen peroxide (3% solution): 1 small bottle (for sterilizing pits—optional but recommended for mold prevention)
- ● Grow lights or sunny windowsill: For seedlings after germination
- ● Humidity dome or plastic wrap: To retain moisture during early growth
- ● pH testing kit: To check soil acidity (ideal range: 6.0–7.0 for cherries)
- ● Fertilizer (balanced, low-nitrogen): 1 small container (for post-germination care)
Step-by-step instructions for preparing cherry seeds for planting
Here's the foolproof method I use to break cherry seeds' dormancy—no guesswork, just reliable germination.
🌱 Step 1: Harvest and Extract Seeds Properly
Collect fresh cherries from ripe fruit, then remove the pits carefully. Avoid using store-bought cherries—they're often treated to prevent sprouting. I like to let the pits dry on a paper towel for 3-5 days at room temperature before processing. This prevents mold from forming during stratification.
Use a small hammer or nutcracker to crack open the pits—don't crush them completely. The goal is to expose the seed inside while keeping the protective shell intact. Place the cracked pits in a labeled container and store them in a cool, dark place until stratification begins.
❄️ Step 2: Perform Cold Stratification
Cold stratification mimics winter conditions that nature uses to break dormancy. Mix the cracked cherry pits with a slightly damp sand-peat-perlite mix (equal parts) in a sealed container. I use a plastic bag with a twist tie—just enough moisture so the mix feels like a wrung-out sponge.
Place the container in your refrigerator's crisper drawer (or a dedicated seed stratification box) where temperatures stay between 35-45°F. Keep them there for 90-120 days. Check monthly to ensure the mix hasn't dried out—spritz lightly if it feels dry to the touch. This is where patience pays off; proper stratification ensures strong germination.
🌱 Step 3: Sow Stratified Seeds
After stratification, plant the seeds ½ inch deep in individual pots filled with sterile seed-starting mix. I use 4-inch pots for each seed to prevent overcrowding. Water gently until moisture reaches the bottom of the pot—you'll see water emerge from the drainage hole.
Place the pots in a warm location with indirect light (65-70°F) until germination occurs, which typically takes 2-4 weeks. Don't cover the pots—cherry seeds need air circulation to prevent rot. You'll know it's working when you see the first green shoots pushing through the soil.
☀️ Step 4: Transition to Light and Care
Once seedlings emerge, move them to a bright spot with 6+ hours of filtered sunlight daily. A south-facing window works, but supplement with a grow light if natural light is insufficient. You'll notice the seedlings grow quickly—within 4-6 weeks, they'll develop their first true leaves (not the initial seed leaves).
Water when the top inch of soil feels dry, but avoid soggy conditions. Transplant seedlings to larger containers when they reach 4-6 inches tall, using a well-draining potting mix. This is where many growers fail—cherry seedlings need space to develop strong root systems before outdoor planting.
⏰ Step 5: Prepare for Outdoor Planting
After 6-8 weeks of indoor growth, harden off seedlings by gradually exposing them to outdoor conditions. Start with 1 hour daily in partial shade, then increase exposure over 2 weeks. Watch for signs of stress like wilting or yellowing leaves—these indicate they're not ready yet.
Plant outdoors only after the last frost date, when soil temperatures reach 60°F or warmer. Choose a location with full sun and well-draining soil. Cherry trees are long-term investments—give them room to grow, as they'll need 20+ feet of space at maturity. Mulch around the base to retain moisture and suppress weeds.
Tips & tricks for perfect cherry seed stratification
These pro tips will help you avoid common pitfalls and maximize your cherry seed germination success.
Timing Secret: The 3-5 day drying period in Step 1 is crucial—this prevents mold from developing during the long stratification. I've learned the hard way that skipping this step can lead to rot even before germination begins. Place your pits on a clean paper towel in a single layer, away from direct sunlight, and check daily for any signs of moisture buildup.
Temperature Matters: Maintain that 35-45°F range during stratification like it's your full-time job. I use a dedicated seed stratification box with a built-in thermometer to monitor temperatures continuously. If your fridge fluctuates, consider moving the container to the back where temps are most stable. Remember, this cold period mimics winter conditions that nature uses to break dormancy.
Stratification Mix Tip: The sand-peat-perlite mix should feel like a wrung-out sponge—not soggy, not bone dry. I test this by squeezing a handful—if water drips out, it's too wet. If it crumbles when pressed, add a tiny bit more moisture. Proper moisture balance prevents both mold and dehydration during those critical 90-120 days in the fridge.
Germination Environment: When you're ready to sow in Step 3, place your pots on a heating mat set to 65-70°F for faster germination. This mimics the warmth of spring that triggers seed activation. I've seen germination times cut in half when using this simple setup—just be sure to keep the humidity high with a clear plastic dome or by misting the soil daily.
Pro Tips for How Do You Prepare A Cherry Seed For Planting
- These pro tips will help you avoid common pitfalls and maximize your cherry seed germination success.
- Timing Secret: The 3-5 day drying period in Step 1 is crucial—this prevents mold from developing during the long stra...
- Temperature Matters: Maintain that 35-45°F range during stratification like it's your full-time job. I use a dedicate...
Frequently asked questions
Got questions about germinating cherry seeds? You’re not alone! Here are answers to the most common concerns to help you succeed.
How long does cold stratification take for cherry seeds?
Cold stratification typically requires 60–90 days in the fridge (or outdoors in a cold climate). Some seeds may germinate faster (30–45 days), while others need the full 3 months. Check monthly for signs of sprouting—don’t rush it!
Can I skip cold stratification and plant cherry seeds directly?
While possible, germination rates drop drastically without stratification. If you’re impatient, try scarification (lightly sanding the seed coat) first, then plant in warm, moist soil. Still, expect slower and less reliable results compared to cold treatment.
When is the best time to plant stratified cherry seeds?
Plant after stratification in early spring (March–April) when soil temps hit 60–70°F (15–21°C). Avoid late fall planting—seeds may rot before germinating. If using a greenhouse, start indoors 4–6 weeks before the last frost date.
Why aren’t my cherry seeds sprouting after stratification?
Check these fixes:
- Moisture: Keep soil consistently damp (not soggy). Use a spray bottle if needed.
- Depth: Plant seeds ½ inch deep—too shallow = drying out; too deep = poor emergence.
- Temperature: Seeds need warmth (65–75°F) to germinate after stratification.
- Patience: Some seeds take 2–3 months to sprout.
Will a cherry tree grown from seed taste like store-bought cherries?
Probably not! Seed-grown trees are unpredictable—fruit may differ in size, flavor, or even color. For consistent results, graft a named variety onto your seedling. If you’re experimenting, enjoy the adventure—some heirloom varieties emerge as surprises!
Wrapping up and next steps
Preparing cherry seeds for planting is all about patience and precision—cold stratification unlocks their potential for vibrant growth! 🌱 By following the steps outlined, you’ve set the stage for reliable germination, ensuring those tiny seeds have the best chance to sprout into healthy saplings.
Now, all that’s left is to watch and nurture as nature takes its course.
Ready to take the next step? Once your seeds complete stratification, plant them in well-draining soil and keep an eye out for those first tender shoots. Happy gardening—your cherry tree adventure starts now! 🌿