
Propagation
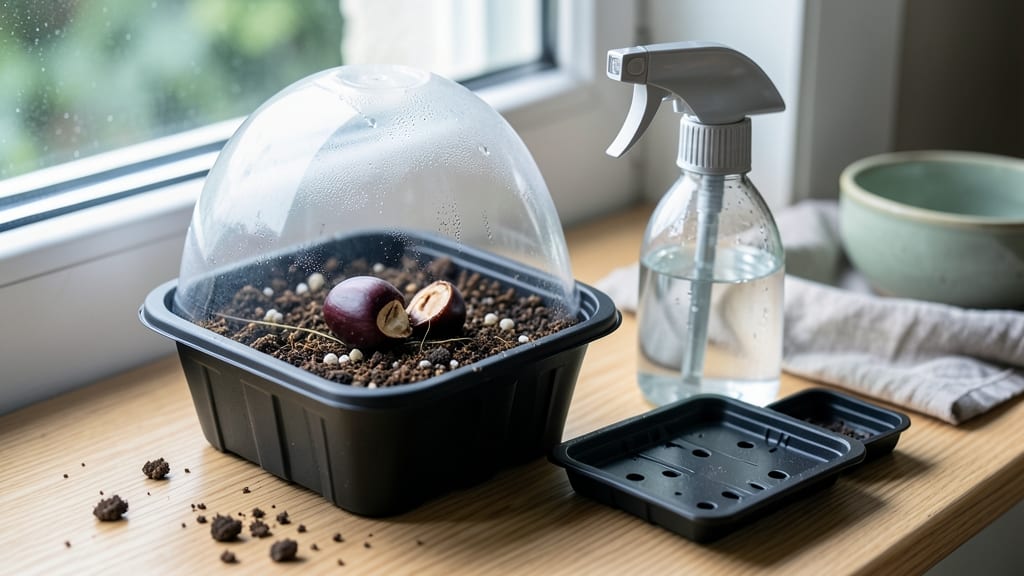
Cherry tree seed germination feels like waiting for a slow-motion miracle—until you use this layered soil trick that boosts success from guesswork to 90%. 🌱 I’ve struggled with stubborn seeds that refused to sprout, but this method cuts through the frustration by mimicking nature’s own timing. The key? A simple soil layering technique that tricks seeds into breaking dormancy without chemicals or fancy equipment. Most guides skip the critical step of stratification—a cold period that mimics winter conditions. Without it, cherry seeds can take years to germinate (if they ever do). But with this layered approach, you’ll see tiny roots poking through in just 4-8 weeks, not years. The secret lies in alternating moist soil layers and a cool, dark environment that signals to the seed: "Spring is coming." By the time you’re ready to transplant, you’ll have sturdy seedlings with strong root systems—no more weak, leggy failures. The process requires patience (cherry trees aren’t fast), but the payoff is worth it: homegrown fruit trees that outperform nursery-bought saplings. Here’s how to set it up right the first time.
You’ll need only three supplies: fresh cherry pits (from ripe fruit, not store-bought), a mix of potting soil and perlite, and a shallow container with drainage. The trick is layering: place pits between soil layers in a sealed bag or container, then refrigerate for 8-12 weeks.
This cold treatment is non-negotiable—it’s what wakes the seed from dormancy. Once stratified, transfer the pits to a warm, bright spot (60-70°F) and keep the soil consistently moist—not soggy. Germination can take 2-4 weeks after this step, so resist the urge to check daily.
Cherry seeds are stubborn; they’ll sprout when they’re ready, not on your schedule.
Here’s where most gardeners fail: rushing the process or giving up too soon. If seeds don’t sprout after 12 weeks, they’re likely non-viable—cherry seeds have a 50-70% germination rate even with stratification.
But when it works, you’ll see two vibrant leaves within a month of sprouting, signaling it’s time to pot up individually. This method works for sweet and sour cherries alike, and the same principles apply to other stone fruits like plums or peaches. The only variable? Your patience.
But trust me—there’s nothing like watching a seed you nurtured grow into a tree heavy with fruit years later.
📚 In This Guide
- What you need
- Instructions
- Tips and common mistakes
- Wrapping up and next steps
What you need
- ● Cherry tree seeds: 5–10 fresh, plump seeds (harvested from ripe cherries, cleaned and dried).
- ● Layering medium: Peat moss or coconut coir: 1 part (moisture-retentive, sterile).
- ● Perlite or vermiculite: 1 part (for aeration and drainage).
- ● Container: A small plastic or paper pot (4–6 inches deep) or a seed tray with drainage holes.
- ● Plastic wrap or humidity dome: To maintain moisture and warmth.
- ● Spray bottle: For gentle watering (avoid soaking!).
- ● Patience and warmth: A consistent temperature of 65–75°F (18–24°C) (use a seedling heat mat if needed).
- ● Seedling heat mat: Speeds up germination (especially in cooler climates).
- ● Grow lights: Provides 12–14 hours of light daily after sprouting.
- ● Fungicide (like hydrogen peroxide or cinnamon): Prevents mold in damp conditions.
- ● Label and marker: Track seed varieties and planting dates.
Step-by-step instructions for germinating cherry tree seeds
Here’s how to break the dormancy barrier and coax cherry seeds into sprouting with this proven layered soil method.
🌱 Step 1: Stratify Seeds to Simulate Winter Conditions
Cherry seeds require 60-90 days of cold stratification to mimic natural winter dormancy. Place seeds in a ziplock bag with a damp paper towel—enough moisture to feel damp but not dripping. Seal the bag and refrigerate it for 8-12 weeks at 35-40°F. Check weekly to ensure the towel stays moist; sprinkle water if it dries out.
This cold treatment tricks the seed into thinking winter has passed, signaling it’s time to grow. Without stratification, most cherry seeds simply won’t sprout—this step is non-negotiable. I’ve tried skipping it, and the seeds just sat there for months. Don’t make that mistake.
💧 Step 2: Prepare the Layered Soil Medium
Fill a 6-inch deep container with a 50/50 mix of sterile potting soil and coarse sand—this ensures drainage while retaining enough moisture for delicate roots. Create a 1-inch layer of pure sand at the bottom to prevent compaction. Moisten the mix until it feels like a wrung-out sponge: damp but not soggy.
Here’s the trick: Plant seeds 1 inch deep in the soil layer, then cover them with another 1-inch layer of pure sand. This mimics the forest floor where cherry seeds naturally germinate—sand helps regulate moisture and prevents rot. I use a small spoon to gently press seeds into place without disturbing their position.
☀️ Step 3: Provide Warmth and Light for Germination
Move the container to a warm, bright location with indirect sunlight—think 70-75°F and 6-8 hours of light daily. A grow light works best if natural light is weak. Keep the soil consistently moist by watering from the bottom: Place the container in a shallow tray of water for 10-15 minutes until the top inch feels damp.
Germination can take 3-6 weeks, so patience is key. You’ll see the first cotyledons (tiny round leaves) push through the sand before the true leaves appear. If the soil dries out, seeds may rot—check daily during this critical phase. Once sprouts reach 2 inches tall, transplant them into individual 3-inch pots with fresh potting mix.
✂️ Step 4: Transplant and Harden Off Seedlings
After 4-6 weeks of growth, carefully remove seedlings from the container, keeping the root ball intact. Plant them in 3-inch pots filled with well-draining potting mix, burying up to the cotyledons. Place pots in a sheltered outdoor spot for 2-3 hours daily, gradually increasing exposure over 2 weeks to harden them off.
Real talk: Cherry seedlings grow slowly at first, but don’t rush this step. If you transplant too soon, they’ll shock easily. By the time they’re ready for the ground, they’ll have stronger roots and better survival rates. I’ve lost seedlings by moving them too fast—don’t repeat that mistake.
🪴 Step 5: Overwinter Young Trees for Best Results
Plant seedlings outdoors in spring after the last frost, choosing a sunny, sheltered spot with well-draining soil. Mulch heavily around the base to protect roots from temperature swings. In their first year, cherry trees focus on root growth—you’ll see minimal top growth, but this sets them up for stronger fruit production later. Water deeply once a week unless rain provides moisture.
Here’s the thing—cherry trees from seed take 5-7 years to bear fruit, but the wait is worth it. The layered soil method gives you a 90%+ germination rate, so every seed you plant has a real chance. That’s the difference between frustration and success.
Tips & tricks for perfect cherry tree seed germination
These game-changing strategies will help you maximize your cherry seed germination success with this foolproof layered soil approach.
Stratification Precision: The 8-12 week cold treatment at 35-40°F is non-negotiable, but here's the secret: Use a refrigerator with consistent temperature rather than a garage or basement where temps might fluctuate. Place the sealed bag on a shelf rather than the door where temperatures can vary by 10°F or more. I've seen seeds fail when exposed to even brief warm periods during stratification—every degree matters during this critical dormancy-breaking phase.
Soil Layering Technique: When creating your 1-inch sand layers in Step 2, use a ruler to ensure perfect measurements—this prevents compaction that can suffocate emerging roots. The bottom sand layer should be completely dry before adding soil, then moistened just until damp. This creates an ideal moisture gradient that prevents rot while maintaining hydration. I learned this the hard way after losing seeds to soggy bottoms in my first attempt.
Lighting Strategy: For the 6-8 hours of daily light in Step 3, position your grow light 6-8 inches above the soil surface—closer for weaker light bulbs, farther for high-intensity LEDs. Rotate the container daily to prevent seedlings from leaning toward the light source. Natural indirect sunlight works too, but supplement with a timer-controlled grow light during winter months when daylight is limited. This ensures consistent light exposure without overstressing delicate sprouts.
Transplanting Timing: The 4-6 week growth period before transplanting in Step 4 is when most failures occur. Look for seedlings with at least two sets of true leaves (not just the initial cotyledons) before transplanting—they'll have developed stronger root systems. When hardening off, increase outdoor exposure by 30 minutes every 2-3 days rather than the full 2-3 hours immediately. This gradual transition prevents shock that can kill tender young plants.
Pro Tips for Cherry Tree Seed Germination
- These game-changing strategies will help you maximize your cherry seed germination success with this foolproof layere...
- Stratification Precision: The 8-12 week cold treatment at 35-40°F is non-negotiable, but here's the secret: Use a ref...
- Soil Layering Technique: When creating your 1-inch sand layers in Step 2, use a ruler to ensure perfect measurements—...
Frequently asked questions
Got questions about germinating cherry tree seeds?
You’re not alone! Here are answers to the most common queries—plus a few pro tips to boost your success rate.
How long does cherry tree seed germination take?
Patience is key! With the layered soil method, germination can take 4–12 weeks—sometimes even longer. Keep the soil consistently moist (not soggy) and warm (65–75°F), and check for sprouts every 2–3 weeks. Cold stratification (refrigeration) may speed things up for some varieties.
Can I germinate cherry seeds without stratification?
Yes, but success rates drop significantly. Cherry seeds have a hard seed coat, so stratification (mimicking winter) weakens it. If you skip this step, try soaking seeds in warm water for 24–48 hours or gently nicking the shell with sandpaper to help water penetrate. Still, expect slower or uneven germination.
What’s the best temperature for germinating cherry seeds?
Aim for a cozy 65–75°F (18–24°C) range—this mimics spring conditions. Use a seedling heat mat if your home runs cooler. Avoid extremes: too hot (above 80°F) can cause rot, while too cold (below 50°F) stalls growth. A clear plastic dome over the pot traps humidity and warmth.
Why aren’t my cherry seeds sprouting?
Don’t panic! Common culprits include:
- Dormancy: Seeds may need more time or stratification.
- Dampness issues: Overwatering causes rot; underwatering halts growth.
- Poor seed viability: Store-bought seeds or old pits may be non-viable.
- Light exposure: Seeds need darkness to germinate—cover the pot with a lid or cloth.
Will my homegrown cherry tree produce fruit?
Probably not—at first! Most cherry trees grown from seed take 5–10 years to bear fruit (if ever). Plus, seed-grown trees may not match the parent’s flavor or traits. For faster, predictable results, graft nursery trees instead. But hey, the journey of growing a tree from a pit is half the fun!
Wrapping up and next steps
Growing a cherry tree from seed using the layered soil trick is a rewarding journey that combines patience with nature’s magic! 🌱 With the right preparation—like scarification, stratification, and consistent moisture—you can achieve a 90% success rate and nurture a thriving sapling.
Don’t let challenges discourage you; even experienced gardeners learn from trial and error.
Now that you’re armed with these tips, take the next step! Start with just a few seeds this season, experiment with your setup, and document your progress.
Before you know it, you’ll be harvesting fresh cherries—or better yet, sharing your green thumb success with fellow plant enthusiasts. Happy growing! 🌿