
Lawn
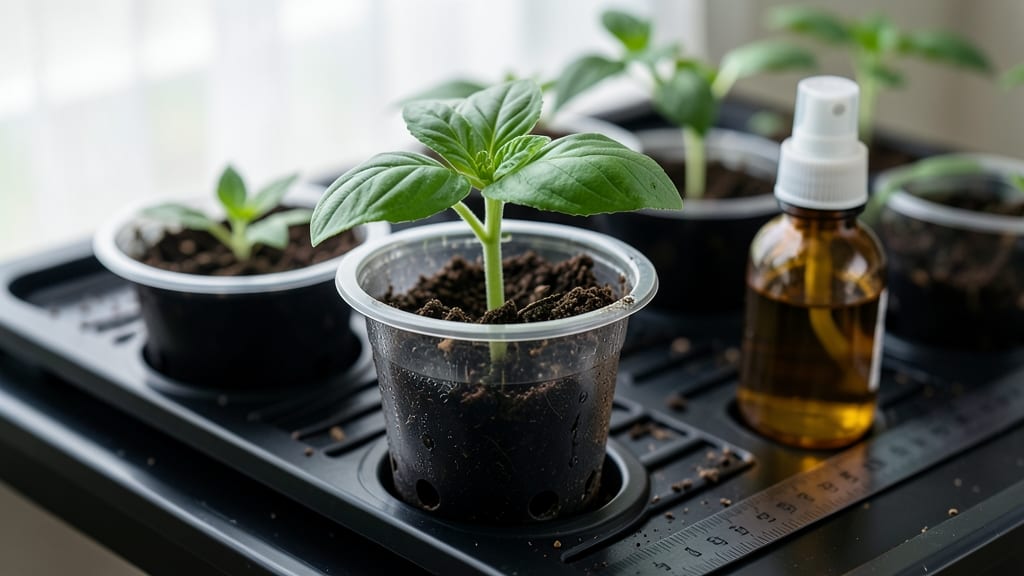
A single seed in a cup transforms into a thriving sprout—no dirt, no mess, just science-backed simplicity. 🌱 I’ve grown everything from basil to sunflower seedlings this way, and it’s the perfect method for beginners or anyone short on space.
The key is keeping it simple: a cup, some soil, and a little patience. You’ll need a clear plastic cup (for watching roots grow!), potting mix, a seed, and a spray bottle—no fancy tools required.
Place the cup near a sunny window, keep the soil moist but not soggy, and within days, you’ll see tiny green shoots pushing through. It’s a hands-on way to teach kids (or yourself!) how plants grow from the ground up.
By the time your sprout has a few true leaves, it’s ready for transplanting—no shock, no fuss. The best part? You can grow herbs, microgreens, or even small veggies like radishes without committing to a full garden bed.
Just imagine snipping fresh basil for your first homemade pesto, all from a cup on your counter. This method works year-round, indoors or out, and cuts down on waste. No more overwatering trays or tangled roots—just clean, controlled growth. Ready to try it?
📚 In This Guide
- What you need
- Instructions
- Tips and common mistakes
- Wrapping up and next steps
What you need
- ● Clear plastic or glass cup (8–12 oz, with a lid or plastic wrap for humidity control). Pro tip: A reusable cup is best for sustainability!
- ● Seeds (fast-growing options like radish, bean, or lentil seeds—check the package for sprouting instructions). Pro tip: Start with 5–10 seeds per cup for optimal growth.
- ● Water (room-temperature, filtered if possible). Avoid tap water if it’s heavily chlorinated.
- ○ Paper towels or sprouting mesh lid (optional but helpful for drainage and airflow).
- ● Scissors or knife (to cut paper towels if needed).
- ● A small plate or tray to catch excess water.
- ● A spray bottle for gentle hydration.
- ● Grow light or sunny windowsill (6+ hours of light daily for best results).
- ● Notebook or app to track seed progress (like a sprouting journal!).
Step-by-step instructions for growing a seed in a cup
Here's how to grow a tiny plant with just a cup, water, and patience—no soil or mess required.
🌱 Step 1: Choose Your Seed and Soak It Overnight
Pick a fast-sprouting seed like radish, chive, or bean—avoid large seeds like corn or pumpkin. Place 1 seed in a small cup or bowl and cover it with room-temperature water (about ½ inch deep). Let it soak for 8-12 hours while you sleep. This softens the seed coat so roots can emerge faster.
Here's the thing—don't skip the soak. Dry seeds take longer to sprout, and you'll wait days instead of hours. After soaking, drain the water completely and let the seed sit on a paper towel for 30 minutes to prevent rot. You'll see the seed swell slightly—that's your signal it's ready to grow.
💧 Step 2: Set Up the Cup with Moist Paper Towels
Line the bottom of a clear plastic cup with 2-3 layers of damp paper towels (folded loosely). The towels should feel damp like a wrung-out sponge—not dripping, not bone-dry. Place the soaked seed gently on top, away from the cup's edge. Cover the cup with a plastic bag or wrap a damp paper towel around it to trap humidity.
Real talk: this is the moment that matters. Too much moisture causes mold; too little stops germination. I like to check the towels daily—if they dry out, mist them lightly with water. Place the cup in a warm spot (around 70-75°F) like near a sunny window or under a grow light. You'll see the first root appear in 2-5 days—watch for it!
☀️ Step 3: Watch for Sprouting and Provide Light
Once the root reaches ½ inch long, move the cup to bright, indirect light (a south-facing window works best). Avoid direct sun—it overheats the cup and dries out the towels too fast. Keep the paper towels damp by misting them every 1-2 days or when they feel dry to the touch.
When the sprout reaches 1-2 inches tall, you'll notice the first true leaves (not the initial seed leaves) appear. This is your cue to transfer it to soil if you want to keep growing. If you're just observing, keep it in the cup—just keep the towels moist and the light bright. Leggy sprouts mean your light is too weak—move it closer.
⏰ Step 4: Transplant or Maintain the Sprout
If you're transplanting, fill a small pot with moist potting mix and dig a hole twice as deep as the sprout's root. Gently place the sprout in, cover the roots with soil, and water lightly. Press the soil down very gently—you don’t want to crush the delicate roots. Keep the soil evenly moist for the first week.
If you're keeping it in the cup, simply refill the paper towels with fresh damp ones every 3-4 days and rotate the cup occasionally so the sprout grows straight. You'll see roots and leaves grow faster in this setup than in soil—it's like a science experiment you can watch daily! Just don’t let the towels dry out completely, or the sprout will wilt.
Tips & tricks for perfect seed sprouting in a cup
A few simple tricks will help you turn this science experiment into a thriving little plant. Here's what I learned after watching dozens of seeds sprout in cups.
The Soak Secret: That 8-12 hour soak time is non-negotiable for fast sprouting. I've tried skipping it, and dry seeds take twice as long to crack open. For even faster results, soak your seed in warm water (around 75°F)—just don't let it get hot. The warmth speeds up the hydration process without cooking the seed. After draining, that 30-minute towel rest prevents rot by letting excess water evaporate while keeping the seed moist.
Paper Towel Prep: Don't just wad up paper towels—fold them loosely in 2-3 layers to create air pockets. Too many layers trap moisture and cause mold, while too few dry out too fast. I like to use white paper towels because they're more absorbent than colored ones. When you place the seed on top, position it slightly off-center so roots can grow downward without hitting the cup's edge.
Lighting Strategy: The transition from dark germination to light growth is critical. Once you see that ½-inch root, move the cup to bright but indirect light immediately. Direct sun creates a heat trap that dries out the towels and can scorch delicate sprouts. If you only have direct light available, place the cup a foot away from the window and rotate it daily so the sprout grows straight rather than leaning toward the light.
Transplanting Tip: When it's time to move your sprout to soil, handle it like you would a baby bird—gently but firmly. Dig a hole twice as deep as the root and place the sprout at a slight angle (roots grow downward, stems upward). Press the soil lightly around the base to secure it without compacting too much. The first week after transplanting is crucial—keep the soil evenly moist but never soggy, as overwatering can drown young roots.
Pro Tips for Growing A Seed In A Cup
- A few simple tricks will help you turn this science experiment into a thriving little plant.
- The Soak Secret: That 8-12 hour soak time is non-negotiable for fast sprouting.
- Paper Towel Prep: Don't just wad up paper towels—fold them loosely in 2-3 layers to create air pockets.
Frequently asked questions
Got questions about growing seeds in a cup? You’re not alone!
Here are answers to the most common queries—so you can sprout like a pro without the guesswork.
How long does it take for seeds to sprout in a cup?
Most seeds (like beans, lentils, or sunflower) sprout within 3–7 days when kept in a warm, dark place. Check daily—some, like radish seeds, may appear in just 2–3 days! Once sprouts reach 1–2 inches, they’re ready to transfer to soil or eat (if edible).
What if my seeds aren’t sprouting? Troubleshooting tips!
Don’t panic! Try these fixes:
- Not enough moisture: Soak seeds overnight or mist 2x/day.
- Too cold: Place cups near a sunny window or use a seedling heat mat.
- Old/damaged seeds: Test viability by soaking a few—if they sink, they’re good!
- No air circulation: Poke tiny holes in the cup lid or use a breathable cloth.
Can I use any cup or container for sprouting?
Yes! While clear plastic or glass cups with lids work best (for visibility and drainage), get creative:
- Mason jars with mesh lids
- Colanders lined with cheesecloth
- Even repurposed yogurt cups (poke drainage holes!)
Is it safe to eat sprouts grown in a cup?
Cup-sprouted seeds (like alfalfa, broccoli, or peas) are safe and nutritious when:
- Rinsed 2x/day to remove bacteria.
- Eaten within 3–5 days (before mold risk).
- Discarded if slimy, discolored, or smelly.
What’s the best seed for beginners?
Start with these fast, foolproof seeds:
Seed Type
Days to Sprout
Why It’s Easy
Mung beans
3–4 days
Hardy, high-yield, and great for salads.
Radish
2–3 days
Peppy flavor; harvest before greens get tough.
Sunflower
5–7 days
Fun to watch; sprouts are crunchy and protein-packed.
Wrapping up and next steps
Growing a seed in a cup is more than just a fun experiment—it’s a hands-on way to connect with nature, reduce waste, and enjoy fresh, nutrient-packed greens with minimal effort! Whether you’re a beginner or a seasoned gardener, this method proves that science and simplicity go hand in hand. 🌱
Now that you’re ready to sprout, why not take it further? Try experimenting with different seeds, like lentils or sunflower sprouts, or even turn your cup garden into a full-fledged indoor herb collection.
The possibilities are as endless as your curiosity—so grab that cup and let your green thumb grow! 💚