
Size
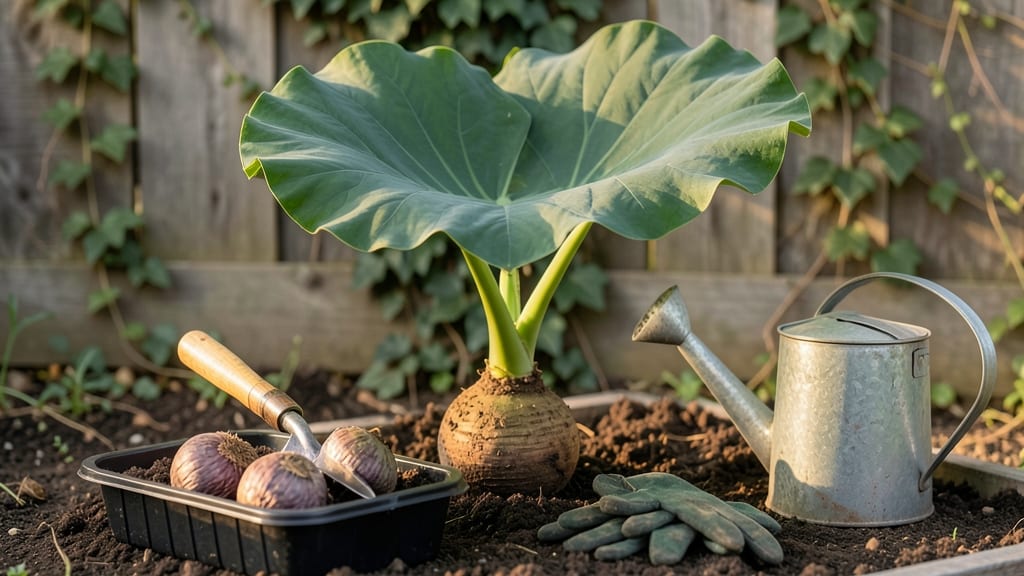
Growing elephant ear seed in a garden is your ticket to lush, tropical foliage—no expensive tubers needed. 🌿 I’ve wrestled with these finicky plants for years, and I finally cracked the code on reliable germination that actually thrives.
The secret? Mimicking their natural swampy habitat from day one, even before the first leaf appears.
You’ll need a warm spot, moist seed-starting mix, and patience—these seeds take 3-6 weeks to sprout, but once they do, the broad, velvety leaves grow fast. The key is keeping the soil consistently damp (not soggy) and providing bright, indirect light until you’re ready to transplant.
Too much direct sun at this stage? You’ll get leggy, weak seedlings that struggle to recover.
By summer, your plants will reach 3-5 feet tall with leaves big enough to cast shade. The real magic happens when you move them outdoors after the last frost, where they’ll explode into dramatic foliage that turns every garden corner into a jungle retreat.
Just be ready to stake them—they get heavy!
Works for both Colocasia (the classic elephant ear) and Alocasia (the more intricate varieties). Here’s how to avoid the most common pitfalls and get those seeds growing strong.
📚 In This Guide
- What you need
- Instructions
- Tips and common mistakes
- Wrapping up and next steps
What you need
- ● Elephant ear seeds: Choose heirloom or hybrid varieties (e.g., 'Black Magic,' 'Pink Frost,' or 'Mojave'). Buy from a reputable seed supplier—10-20 seeds per batch is ideal for testing.
- ● Growing containers: Use 6-inch pots with drainage holes (or a seed tray with individual cells). 2-4 containers per seed batch.
- ● Seed-starting mix: A lightweight, sterile mix (e.g., 50% peat moss + 50% perlite or coconut coir). 1 bag (1-2 cubic feet) covers multiple starts.
- ● Plastic wrap or humidity dome: Keeps moisture in while seeds germinate. A clear plastic bag or humidity lid works.
- ● Grow lights or sunny windowsill: Elephant ears need bright, indirect light (12+ hours/day). A LED grow light (12-18 inches above seedlings) is ideal.
- ● Watering can with a fine rose: Gentle watering prevents seed displacement. 1 can with a 0.1-inch rose is perfect.
- ● Fertilizer: A balanced liquid fertilizer (10-10-10 or 20-20-20) for seedlings. 1 small bottle (8 oz) is enough to start.
- ● Heat mat: Speeds up germination (70-80°F). 1 small mat (10x20 inches) works for 2-4 pots.
- ● pH test kit: Ensures soil pH is 6.0-7.0 (elephant ears prefer slightly acidic to neutral).
- ● Pruning shears: For trimming leggy seedlings or harvesting leaves later.
- ● Garden twine or stakes: Supports tall varieties (e.g., 'Mojave') as they grow. 2-3 stakes per plant.
- ● Mulch (straw or shredded leaves): Retains moisture in outdoor beds once transplanted.
- ● Spray bottle: For misting seedlings on dry days (especially in low-humidity climates).
How to grow elephant ear plants from seed in your garden
Giant, dramatic foliage is just a few seasons away—here's how to grow elephant ears from seed the easy way.
🌱 Step 1: Start Seeds Indoors in Warmth
Elephant ears need warmth to germinate, so begin seeds indoors 8-10 weeks before your last frost date. Fill a seed tray with sterile seed-starting mix and press it down gently—you want it firm but not compacted. Scatter seeds on the surface since they need light to germinate (they won't sprout if buried).
Cover the tray with plastic wrap to create a greenhouse effect, then place it in a warm spot (75-85°F). A seedling heat mat helps if your home runs cooler. Keep the mix moist but never soggy—mist lightly every other day until you see sprouts in 10-20 days. Real talk: These seeds can be slow to start, so patience is key.
☀️ Step 2: Provide Bright, Indirect Light
Once seedlings emerge, remove the plastic wrap and move them to a bright spot with indirect light—direct sun can scorch tender new leaves. A south-facing window works, but if growth looks leggy (stretched and weak), supplement with a grow light for 12-14 hours daily.
You'll know light is right when seedlings grow thick stems and dark green leaves. If they lean toward the light, rotate the tray a quarter turn daily so they grow straight. Avoid cold drafts—elephant ears hate temperature drops below 60°F.
🪴 Step 3: Transplant Seedlings Outdoors After Frost
Wait until nighttime temperatures stay above 55°F before moving seedlings outside. Harden them off by placing them in a sheltered spot for 1-2 hours the first day, then gradually increase exposure over 7-10 days. Choose a location with partial shade—morning sun and afternoon shade protect leaves from scorching.
Dig holes twice as wide as the root ball but no deeper. Space plants 3-4 feet apart (they grow large!). Mix compost into the soil—elephant ears love rich, well-draining soil. Water deeply after planting to settle roots, then keep soil consistently moist but not waterlogged.
🌿 Step 4: Mulch and Fertilize for Big Leaves
Spread 2-3 inches of mulch around each plant to retain moisture and regulate soil temperature. Elephant ears are heavy feeders, so side-dress with balanced fertilizer (10-10-10) every 4-6 weeks during the growing season. You'll see dramatic growth when leaves reach 12+ inches wide—that's when you know you're on the right track.
Watch for yellowing leaves, which signal overwatering or nutrient deficiency. If stems flop under leaf weight, stake them with bamboo stakes tied loosely to avoid damage. These plants thrive in humidity, so mist leaves occasionally in dry climates to keep them lush.
⏰ Step 5: Overwinter or Dig Tubers for Next Year
In colder zones, elephant ears die back in fall. Cut back foliage to 2 inches above ground, then mound 6 inches of mulch over the crown. In mild climates, they may regrow from tubers—just reduce watering in winter. If you want to propagate, dig up tubers after frost, store them in sphagnum moss in a cool, dry place, and replant in spring.
Here's the thing—growing elephant ears from seed takes time, but the payoff is worth it. With patience and the right conditions, you'll have showstopping foliage that turns heads in your garden. Don't skip the mulch or fertilizer, and you'll avoid the common struggle of weak growth.
Tips & tricks for growing elephant ear plants from seed
Growing these tropical beauties from seed is easier than you think—here's how to avoid the most common pitfalls and get those giant leaves thriving.
Seed Starting Wisdom: Don't be tempted to bury elephant ear seeds—they need light to germinate, so simply scatter them on top of your sterile seed-starting mix. I learned this the hard way after burying seeds twice and waiting for sprouts that never came. The greenhouse effect from plastic wrap works wonders, but remove it immediately when you see those first tiny sprouts—too much humidity can cause mold.
Lighting Strategy: Those 12-14 hours of grow light are non-negotiable if you want strong seedlings. I place my tray under LED grow lights about 6 inches above the plants. Watch for leggy growth (long, weak stems) as your first warning sign—this means they're stretching toward light. Rotating the tray daily keeps them growing straight and stocky, which translates to healthier plants later.
Transplanting Transition: The 7-10 day hardening-off period is where most beginners rush and regret it. Start with just 1-2 hours outside on day one, then gradually increase exposure. I like to move them to a sheltered spot like under a patio cover where they get morning sun but afternoon shade. This mimics their natural tropical habitat and prevents sunburn on those tender leaves.
Soil Secrets: Elephant ears love rich, well-draining soil—think of it as the difference between mud pies and gourmet chocolate. Mixing in compost at planting gives them a nutrient boost right away. For the 2-3 inches of mulch, I use shredded bark mulch because it breaks down slowly and keeps the soil temperature just right. The key is to keep that mulch 2-3 inches away from the stem to prevent rot.
Pro Tips for Elephant Ear Seed Grow A Garden
- Growing these tropical beauties from seed is easier than you think—here's how to avoid the most common pitfalls and g...
- Seed Starting Wisdom: Don't be tempted to bury elephant ear seeds—they need light to germinate, so simply scatter the...
- Lighting Strategy: Those 12-14 hours of grow light are non-negotiable if you want strong seedlings. I place my tray u...
Frequently asked questions
Got questions about growing elephant ear seeds?
You’re not alone—these tropical beauties can be tricky! Here are answers to the most common queries to help you grow giant, show-stopping blooms with confidence.
How long does it take for elephant ear seeds to germinate?
Elephant ear seeds (like Colocasia or Alocasia) can take anywhere from 2 to 6 weeks to sprout, depending on warmth and moisture. Keep soil consistently damp and maintain temperatures above 70°F (21°C). Patience is key—some varieties are slower starters!
When is the best time to plant elephant ear seeds indoors vs. outdoors?
Start seeds indoors 8–12 weeks before your last frost (spring) in warm, humid conditions. Transplant outdoors only after soil temperatures reach 70°F+ (21°C+) and nighttime temps stay above 55°F (13°C). In warmer climates, direct-sow in late spring to avoid frost damage.
Why aren’t my elephant ear seeds sprouting? Troubleshooting tips.
If seeds refuse to germinate, check these fixes:
Cold soil? Use a heat mat (75–85°F / 24–29°C) to speed things up.
Too dry? Mist seeds daily or cover with plastic wrap to trap humidity.
Old seeds? Elephant ear seeds lose viability after 1–2 years—test freshness!
Light needs? Some varieties need indirect light; avoid harsh sun until sprouts emerge.
Still stuck? Try soaking seeds in warm water for 24 hours before planting.
Can I grow elephant ear seeds in containers? What’s the best pot size?
Yes! Use at least 12-inch-wide pots (deeper for Alocasia varieties) with drainage holes. Opt for fabric grow bags or ceramic pots to prevent root circling. Ensure pots stay moist but not soggy—these tropical plants hate dry roots.
Are there easier alternatives to growing from seed? What about tubers?
If seeds feel too finicky, try tubers (rhizomes) for faster, more reliable growth! Buy dormant tubers in spring, soak them in warm water for 24 hours, then plant 2 inches deep in well-draining soil. Tubers sprout in 2–4 weeks and produce dramatic foliage without the seed gamble.
How do I overwinter elephant ear plants in cold climates?
Most elephant ears are tender perennials—dig up tubers before first frost, trim foliage, and store in dry peat moss or coconut coir at 40–50°F (4–10°C). Replant in spring. For Alocasia, bring pots indoors to a bright, humid spot (like a greenhouse) and reduce watering.
Wrapping up and next steps
Growing elephant ear plants from seed is a rewarding journey that brings bold, tropical beauty to your garden—no fuss, no frustration! With the right soil, sunlight, and patience, you’ll soon be enjoying stunning giant blooms that turn heads.
Whether you’re a seasoned gardener or a beginner, this guide makes it simple to cultivate these showstoppers with confidence.
Ready to transform your garden? Start by gathering your supplies and planting those seeds today—your future lush, leafy masterpiece awaits! 🌱✨