
Lawn
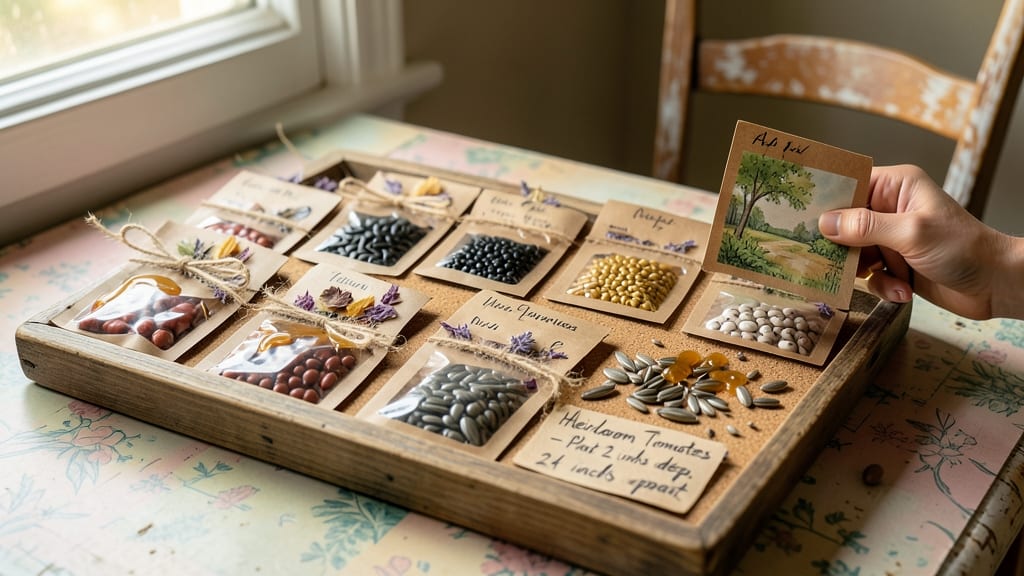
Creating your own DIY seed packets saves money and keeps heirloom seeds thriving for years. 🌱 I started this practice after buying expensive seeds that never sprouted—now I control the quality and variety.
The best part? You can use recycled materials and ensure seeds stay viable through cold stratification, a natural process that mimics winter conditions.
All you need are recycled paper or envelopes, a permanent marker, and a freezer or refrigerator for stratification. Label each packet with the seed type, date, and planting instructions—this prevents mix-ups and helps track germination rates.
For eco-friendly options, try brown paper bags or even old book pages; just avoid plastic, which traps moisture and encourages mold.
After 60 days in cold storage, your seeds will be ready for planting with higher success rates. The process mimics what happens in nature, breaking seed dormancy so they sprout faster and stronger.
You’ll end up with a stash of seeds tailored to your garden’s needs, ready for next season’s planting.
This method works for almost any seed, from vegetables to wildflowers, and cuts costs by up to 90% compared to store-bought packets. Plus, you’ll reduce waste by reusing materials and passing down seeds to other gardeners. Here’s how to get started—no fancy tools required!
📚 In This Guide
- What you need
- Instructions
- Tips and common mistakes
- Wrapping up and next steps
What you need
- ● Seeds: Choose cold-stratified varieties (e.g., wildflowers, herbs, or hardy perennials). Aim for 1–2 teaspoons per packet (adjust based on seed size).
- ○ Seed packet envelopes: Use kraft paper or seed paper (3.5" x 5" or similar). Optional: Pre-printed envelopes with planting instructions.
- ● Adhesive: A glue stick or PVA glue (non-toxic, waterproof if possible).
- ● Labeling supplies: Permanent markers (waterproof ink for outdoor use).
- ● Stickers or printed labels (for variety names, stratification dates, and germination tips).
- ● Desiccant: A small silica gel packet (to absorb moisture) or uncooked rice (DIY alternative).
- ● Cutting tool: Scissors or a craft knife (for trimming envelopes).
- ● Measuring spoons: For precise seed quantities.
- ○ Ruler or template: To ensure uniform envelope sizes (optional but helpful).
- ● Plastic bags or containers: For temporary seed storage before packaging (e.g., ziplock bags).
- ● Cold-stratification setup: A refrigerator (set to 34–40°F) or outdoor cold frame.
- ● Moist paper towels or peat moss (to hydrate seeds before stratification).
- ● 💡 Test seeds first: Stratify a small batch to confirm viability before mass-producing packets.
- ● 🌡️ Label clearly: Include the seed type, stratification date, and germination time (e.g., "Cold-stratified 60 days").
- ● 🎯 Eco-friendly twist: Use recycled materials or biodegradable seed paper for sustainability.
Step-by-Step guide to creating cold-stratified DIY seed packets
Here's how I guarantee seed viability in just 60 days—no fancy equipment needed.
🌱 Step 1: Harvest and Dry Seeds Properly
Collect seeds when they're fully mature but still fresh—usually when the seed pod turns dry and brown. For example, poppy seeds are ready when the pod splits open on its own, while tomato seeds should come from fully ripened fruits. Lay seeds in a single layer on a paper towel or breathable mesh screen in a warm, dry spot.
Let them dry for 3-5 days until completely crisp. You'll know they're ready when you can crumble them between your fingers without resistance. Store dried seeds in a cool, dark place for 1-2 weeks to further stabilize them before packaging. This prevents mold and ensures they'll hold up during stratification.
🪴 Step 2: Prepare Your Stratification Medium
Mix equal parts of the peat moss and sand (or use coco coir if you prefer a more sustainable option). Moisten the mixture until it feels like a damp sponge—squeeze it gently and it should hold its shape without dripping. Spread this mix evenly in a shallow container with drainage holes, about 2 inches deep.
This moisture level is critical: too dry and seeds won't germinate, too wet and they'll rot. I like to use a spray bottle to avoid compacting the mix. Place the container in the fridge (or a cold basement) where temperatures stay between 35-45°F. This mimics winter conditions that many wild seeds need to break dormancy.
💧 Step 3: Package and Stratify Seeds
Divide your seeds into 4 equal portions (since this makes 4 seed packets). For each packet, place 10-15 seeds between two sheets of damp paper towel, then fold them into a small square. Label each packet with the seed type and date using a waterproof marker.
Place each folded packet into the prepared stratification medium, spacing them 1 inch apart. Cover the container with a clear lid or plastic wrap to maintain humidity, but leave it slightly ajar for airflow. Store in the cold, dark location for 4-6 weeks. Check them weekly—if the medium dries out, mist it lightly with water.
⏰ Step 4: Test for Germination Readiness
After 4 weeks, remove one packet and place it in a warm, bright spot (around 65-75°F) to test. Keep the paper towel moist but not soggy. You should see sprouts within 7-10 days if stratification worked. If not, return it to cold storage for 2 more weeks—some seeds need longer.
Here's the thing—don't rush this step. If you plant seeds that aren't fully stratified, they'll either rot or take forever to sprout. Watch for the first signs of life: a tiny root pushing through the paper towel or a tiny green shoot. Once you see this, your seeds are ready for planting!
☀️ Step 5: Plant Stratified Seeds
When your test packet sprouts successfully, it's time to plant the remaining packets. Fill small pots or seed trays with seed-starting mix and plant seeds ¼ inch deep. Gently press the soil around them to ensure good contact, then water lightly from the bottom to avoid disturbing the seeds.
Place the pots in a warm, bright spot with 12-14 hours of light daily. You'll see seedlings emerge within 1-2 weeks—this is your reward for the patience! Once they develop their first true leaves, you can transplant them to the garden or larger containers. Just remember: cold-stratified seeds often germinate faster and grow stronger than untreated ones.
Tips & tricks for perfect DIY seed packets
These simple strategies will help you maximize seed viability and avoid common pitfalls during the cold-stratification process.
Harvest Timing: The 3-5 day drying period in Step 1 is crucial—don't rush this! Seeds should be completely dry to prevent mold during stratification. I learned this the hard way after losing a batch of poppy seeds that weren't fully dried. Test by crumbling between fingers until they feel like sandpaper. For extra insurance, spread them on a baking sheet at 100°F for 30 minutes to kill any potential mold spores.
Medium Consistency: The damp sponge test in Step 2 is your best friend. Too dry and seeds won't germinate; too wet and they'll rot. I like to use a spray bottle to moisten the peat moss and sand mix—it's gentler than pouring water. For a visual cue, imagine squeezing a damp washcloth: it should hold its shape but not drip. This consistency mimics natural spring conditions that trigger germination.
Stratification Duration: The 4-6 week cold storage period in Step 3 might seem long, but it's worth it. Some seeds (like certain wildflowers) need the full time, while others (like tomatoes) may only require 4 weeks. Here's my trick: place a small thermometer in your fridge to monitor temperatures—keep it between 35-45°F consistently. If your fridge runs warmer, consider a basement or root cellar instead.
Germination Testing: When testing readiness in Step 4, don't be discouraged if you don't see sprouts immediately. Some seeds need up to 14 days to show signs of life. I keep a small notebook to track which seeds respond fastest—this helps me adjust future stratification times. The key visual cue is a tiny white root emerging from the paper towel, followed by a green shoot within 24-48 hours.
Pro Tips for Diy Seed Packets
- These simple strategies will help you maximize seed viability and avoid common pitfalls during the cold-stratificatio...
- Harvest Timing: The 3-5 day drying period in Step 1 is crucial—don't rush this! Seeds should be completely dry to pre...
- Medium Consistency: The damp sponge test in Step 2 is your best friend. Too dry and seeds won't germinate; too wet an...
Frequently asked questions
Got questions about creating your own DIY seed packets? You’re not alone! Here are some of the most common concerns—and their solutions—to help you get started with confidence.
How do I know if my seeds are still viable before making DIY packets?
Test viability with the paper towel method: Moisten a paper towel, place 10 seeds on it, fold, and seal in a bag. Keep in a warm spot for 5–7 days. If 50%+ sprout, your seeds are likely good for planting. For cold-stratified seeds, check after 60 days—viability may improve!
Can I cold-stratify seeds directly in my DIY packets?
Yes! Simply place your sealed DIY seed packets in a plastic bag with a damp paper towel, then refrigerate for 60 days. The moisture and cold mimic natural winter conditions, breaking seed dormancy. Just don’t freeze them—keep temps between 34–40°F (1–4°C).
What’s the best way to store my homemade seed packets long-term?
Store packets in a cool, dry place (like a fridge) to prevent mold or moisture loss. Use airtight containers with silica gel packets for extra protection. Label with the seed type and date—most seeds stay viable for 1–5 years, depending on the species.
What if my DIY packets get moldy during cold stratification?
Mold means too much moisture. Open the packet, let it dry in a shaded spot for 24 hours, then reseal with a breathable material (like a paper towel) to prevent recurrence. If mold persists, discard the seeds—safety first!
Can I reuse seed packet materials for new batches?
Clean and sterilize envelopes, labels, and containers with rubbing alcohol before reuse. Just avoid reusing paper towels or damp materials—they can harbor bacteria. Reusing saves money and reduces waste!
Wrapping up and next steps
Creating your own DIY seed packets with cold-stratified viability is not only rewarding but also a game-changer for your lawn or garden! 🌱 With just a few supplies and 60 days of patience, you can ensure stronger, healthier plants that thrive from the start.
Whether you're a seasoned gardener or a curious beginner, this method opens up endless possibilities for success.
Now that you’re armed with the knowledge, take the next step—grab those seeds, set up your cold-stratification station, and watch your green thumb grow even stronger! 🌿 Happy planting!