
Lawn
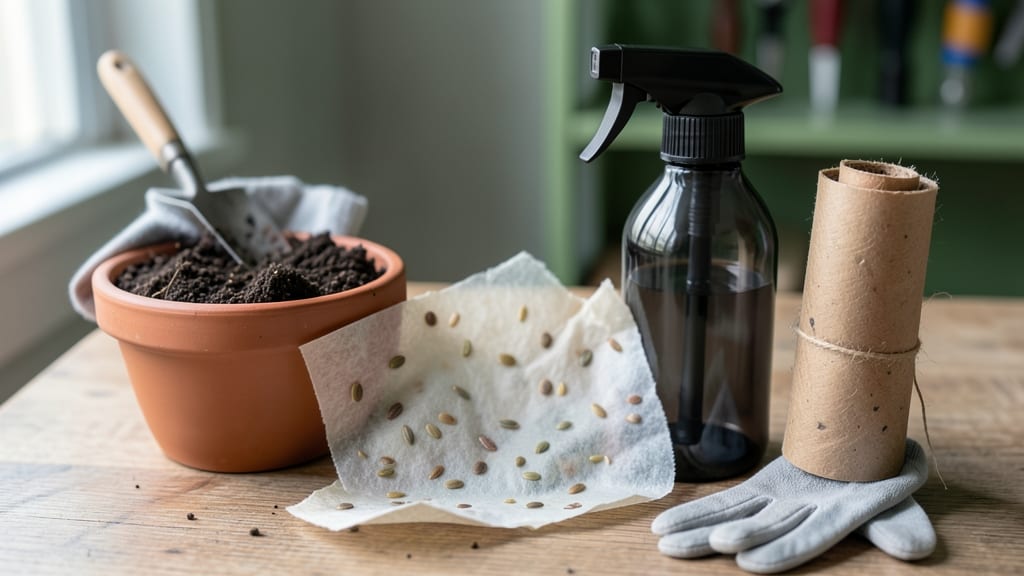
Making plantable seed paper turns old newspapers into blooming gifts. 🌸 I first tried this after reading about wildflower meadows and thought, "Why not grow them from paper?" The process is simple, eco-friendly, and lets you give living gifts that keep on giving.
You'll need recycled paper, wildflower seeds, water, and a blender—no fancy equipment. Mix the paper into pulp, blend in seeds, press into molds, and let dry. The result? Paper that dissolves in soil to grow vibrant flowers in just weeks.
Imagine sending wedding confetti that becomes a garden or gifting birthday cards that sprout into wildflowers. The best part? You're reducing waste while creating beauty. Perfect for gardeners who love creative, sustainable projects. Works with any wildflower mix, from sun-loving cosmos to shade-tolerant violets. Here's how to make yours bloom!
📚 In This Guide
- What you need
- Instructions
- Tips and common mistakes
- Wrapping up and next steps
What you need
- ● Seeds: Choose fast-growing, easy-to-germinate varieties like wildflowers (e.g., sunflower, marigold, or basil). Use 1–2 tsp per sheet (adjust based on seed size).
- ● Paper pulp: Unbleached, recycled paper (e.g., printer paper, egg cartons, or newspaper). 1–2 sheets per batch (soaked and blended).
- ● Water: Enough to soak paper and create a thick slurry.
- ● Mold & screen: A shallow tray (or plastic container) with a fine mesh screen or window screen (for drying).
- ● Blender or food processor: To break down paper into pulp.
- ○ Optional binders: A splash of flour paste (1 tbsp flour + ½ cup water) or gelatin (for extra durability).
- ● Rolling pin or smooth object: To press out air bubbles and even out the mixture.
- ● Spray bottle: For misting while drying (keeps paper from cracking).
- ● Decorative add-ins: Dried flowers, glitter, or biodegradable ink for flair!
- ● 🌡️ Seed prep: Soak seeds overnight for faster germination.
- ● ✨ Pulp consistency: Aim for a thick paint-like texture—not too runny!
- ● 🔥 Drying hack: Flip paper halfway to prevent warping.
Step-by-step instructions for creating plantable seed paper
This eco-friendly craft turns reading into growing—let’s make paper that blooms when planted.
🌱 Step 1: Blend Paper Fibers and Water
Tear 4-5 sheets of recycled paper (like printer paper or egg cartons) into small pieces. Place them in a blender with 1 cup of water and blend until smooth. You’ll want a thick, creamy pulp—like applesauce consistency. If it’s too watery, add another sheet of paper and blend again.
Here’s the thing—don’t over-blend. You want fibers, not mush. Test by scooping a spoonful onto a plate. If it holds shape when pressed, it’s ready. If it drips, blend longer. This ensures your paper stays sturdy enough to handle but still breaks down when planted.
💧 Step 2: Mix in Seeds and Mold Release
While the pulp is still warm, stir in 1 teaspoon of wildflower seeds (or your chosen variety) and ½ teaspoon of cornstarch. The cornstarch acts as a natural binder and helps the seeds stick to the fibers. Mix thoroughly—you want even distribution so every sheet has growing potential.
Real talk: If your seeds are tiny (like poppies or cosmos), sprinkle them over the pulp in the mold later. Larger seeds (like sunflower) can go in now. Spread the mixture onto a flat, non-stick surface or a seed paper mold (or even a shallow tray lined with parchment paper). Smooth it evenly with a spoon or your hands—aim for ¼-inch thickness.
☀️ Step 3: Press and Dry the Paper
Cover the pulp with a clean cloth or paper towel, then press firmly to remove excess moisture. Place a heavy book or weights on top for 10-15 minutes to flatten the sheet. This step is crucial—uneven drying causes warping or cracking later.
Let the paper dry completely, which takes 24-48 hours depending on humidity. I like to prop it up against a wall or lay it flat under a fan to speed things along. Once fully dry, it should peel away easily from the surface and feel stiff but flexible—like thick origami paper.
⏰ Step 4: Plant and Water for Germination
When ready to plant, soak the paper in warm water for 10-15 minutes to soften it. Press it gently into prepared soil, seeds-side down, in a sunny spot. Water lightly to keep the soil moist but not soggy—damp like a wrung-out sponge. Most wildflower seeds germinate in 7-21 days, depending on the variety and weather.
Don’t bury it! The paper will decompose naturally, releasing seeds into the soil. Watch for the first green shoots—this is your signal that the magic is working. Keep the area consistently moist until seedlings are 2-3 inches tall, then water as needed for your climate.
Tips & tricks for perfect plantable seed paper
Here's what nobody tells you about making seed paper that actually grows—and stays sturdy enough to handle.
Pulp Consistency is Everything: Your pulp should be like thick applesauce—not too stiff, but not drippy either. If it's too watery after blending 4-5 sheets with 1 cup of water, add one more sheet and blend again. Too thick? Add just 1 tablespoon of water at a time. The right consistency means it holds shape when pressed but still breaks down easily when planted.
Seed Distribution Matters: When mixing in your 1 teaspoon of wildflower seeds (or your chosen variety), don't just dump them in all at once. Sprinkle them gradually while stirring to ensure even distribution. For tiny seeds like poppies, I recommend sprinkling them directly onto the mold surface after spreading the pulp—this prevents clumping and guarantees every square inch has growing potential.
Drying Secrets: The 24-48 hour drying time can be tricky depending on humidity. If your kitchen is dry, prop the paper up against a wall with a small fan on low speed to create gentle airflow. In humid conditions, place it flat under direct sunlight for faster drying. The key is complete dryness—if it peels away easily and feels stiff but flexible, you're golden. If it cracks or warps, you'll need to start over.
Planting Pro Tip: Before soaking your seed paper for 10-15 minutes, score it lightly with a fork or knife in a grid pattern. This creates tiny channels that help water penetrate faster and gives your seeds better access to moisture. The scores will disappear as the paper decomposes, but they'll give your seedlings a head start.
Pro Tips for Make Plantable Seed Paper
- Here's what nobody tells you about making seed paper that actually grows—and stays sturdy enough to handle.
- Pulp Consistency is Everything: Your pulp should be like thick applesauce—not too stiff, but not drippy either. If it...
- Seed Distribution Matters: When mixing in your 1 teaspoon of wildflower seeds (or your chosen variety), don't just du...
Frequently asked questions
about making plantable seed paper—because every eco-friendly project deserves a little extra clarity!Can I use any type of paper for seed paper?
Not all paper works! Opt for uncoated, acid-free paper (like watercolor or cardstock) to avoid chemicals that may inhibit seed germination. Thicker paper holds seeds better, but thinner sheets work too—just adjust glue ratios. Avoid glossy or recycled paper with plastic coatings.
How long does it take for seeds to sprout in seed paper?
Germination time varies by seed type. Fast growers like sunflower or marigold may sprout in 7–14 days, while slower ones (e.g., lavender or basil) can take 3–6 weeks. Keep the paper moist and in indirect sunlight until sprouts appear!
What’s the best glue for seed paper?
Use non-toxic, water-soluble glue like white school glue (PVA) or a flour-and-water paste (1:1 ratio). Avoid super glues or adhesives with solvents—they can harm seeds. For extra strength, add a pinch of seaweed extract to boost seed viability!
Can I plant seed paper in winter?
Yes, but with caution! Seeds need warmth to germinate—wait until soil temps reach 60°F+ (15°C+). Plant in spring or summer, or start indoors under grow lights. If planting early, use a clear plastic wrap to trap heat until sprouts emerge.
What if my seed paper doesn’t sprout?
Troubleshoot with these steps:
- Check moisture: Keep the paper damp (not soggy) until germination.
- Verify seeds: Test a few seeds separately to confirm viability.
- Light exposure: Seeds need indirect light—direct sun can dry them out.
- Glue test: Too much glue can suffocate seeds; use sparingly.
Wrapping up and next steps
Creating your own plantable seed paper is a rewarding way to blend creativity with eco-friendly gardening—turning art into life! 🌱 Whether you’re crafting gifts, decorating, or simply reducing waste, this project lets you grow flowers while you share the joy.
Start small, experiment with designs, and watch your seeds bloom into something beautiful.
Ready to take the next step? Try making a few sheets this weekend and gift them to friends or plant them in your garden. The possibilities are as endless as your imagination—and the earth will thank you for it! 🌸