
Planting
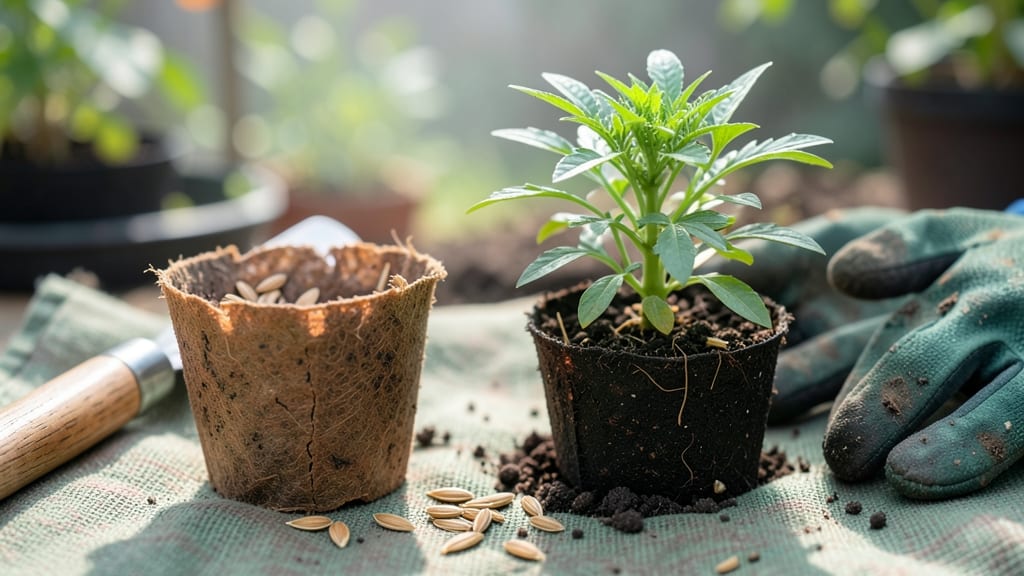
A little seed for me to sow is all it takes to transform a patch of soil into a riot of color. 🌱 I remember my first time—tiny marigold seeds in damp paper towels, watching them crack open like nature's own magic trick.
The real secret isn't fancy equipment, but knowing exactly when, where, and how to plant them for success every time.
Start with seeds that suit your climate and space—annuals like zinnias or sunflowers are perfect for beginners. You'll need a sunny spot, some basic soil mix, and containers or a seed-starting tray.
The key is keeping things simple: most seeds need light to germinate, not darkness, and gentle watering that keeps soil moist but never soggy. I've learned that patience is your best tool—some seeds pop up in days, others take weeks.
What you'll end up with is confidence that grows alongside your plants. Those first green shoots breaking through the soil are proof you're doing it right. Within weeks, you'll be pinching back seedlings, transplanting with care, and watching your garden take shape.
The best part? Every seed you plant is a chance to create something beautiful from nothing.
This method works for any seed—flowers, herbs, or vegetables—no matter your space. Whether you're on a windowsill or a backyard plot, the same principles apply. Let's get those seeds growing!
📚 In This Guide
- What you need
- Instructions
- Tips and common mistakes
- Wrapping up and next steps
What you need
- ● Seeds: 1–5 seeds (choose fast-growing varieties like basil, marigold, or sunflower for quick results)
- ● Seed-starting tray or small pots: 2–4 (3–4" diameter, with drainage holes)
- ● High-quality seed-starting mix: 1 small bag (sterilized, peat-based or coconut coir blend)
- ● Watering can or spray bottle: 1 (with a fine mist nozzle for gentle hydration)
- ○ Clear plastic dome or plastic wrap: 1 (to create humidity—optional but helpful for slow germinators)
- ● Grow lights or sunny windowsill: 1 (12–16 hours of light daily; LED grow lights are ideal)
- ● Labels & markers: 1 set (to track seed varieties and planting dates)
- ● Tweezers or pencil: 1 (for gently placing seeds in soil)
- ○ Fertilizer (optional): 1 small bottle (balanced liquid fertilizer like 5-5-5, diluted to half-strength)
- ○ Heating mat (optional): 1 (for seeds needing warmth, like peppers or tomatoes)
- ○ Humidity tray (optional): 1 (a shallow tray with pebbles and water to boost moisture)
Instructions: stress-free germination blueprint for reliable blooms
Here's how to turn tiny seeds into thriving plants with minimal fuss.
🌱 Step 1: Prep Your Seeds for Maximum Germination Potential
Start by selecting healthy seeds from a reputable source. I like to soak them for 12-24 hours in lukewarm water before planting—this softens the seed coat and speeds up germination. Place them in a small bowl or jar, cover with water, and let them sit. You'll know they're ready when they swell slightly and feel heavier.
After soaking, drain the seeds and let them sit for 30 minutes to dry slightly. This prevents them from rotting in damp soil. I always use a paper towel to gently blot them dry—just enough so they don't stick together. This step is especially important for seeds with hard outer shells like poppies or morning glories.
💧 Step 2: Create the Perfect Planting Environment
Fill your seed-starting containers with moistened, sterile seed-starting mix—never garden soil. Press it down lightly so it's firm but still loose enough for roots to push through. The goal is to create a cozy, well-draining bed where seeds can snuggle in without drowning. I like to use a spray bottle to mist the soil until it's damp but not soggy.
Plant your seeds at the correct depth—usually twice the diameter of the seed—and cover lightly with a thin layer of soil. For tiny seeds like snapdragons, I barely cover them, just enough to shield them from harsh light. Water gently from below if possible, or use a fine mist from above. You want the soil to stay consistently moist but never waterlogged.
☀️ Step 3: Provide Warmth and Humidity for Germination
Seeds germinate best in warm conditions, ideally between 65-75°F. I use a seedling heat mat under my trays to maintain consistent warmth. If you don't have one, place your containers on top of your refrigerator or in a sunny windowsill. You'll see the first signs of life in 5-14 days, depending on the seed type—just keep the soil moist and the environment warm.
Cover the tray with a clear plastic dome or plastic wrap to retain humidity. This creates a mini greenhouse effect that encourages faster germination. Check daily for condensation on the lid—if it's dripping, remove the lid for 10-15 minutes to let excess moisture escape. Once you see the first sprouts, remove the cover completely to prevent damping-off disease, which can kill seedlings overnight.
🌿 Step 4: Introduce Light and Monitor Growth
As soon as those first true leaves appear—those are the second set of leaves, not the initial seed leaves—move your seedlings to a bright location. A south-facing window is ideal, but if your space is dim, supplement with a grow light placed 2-4 inches above the plants. You'll know they're getting enough light when the leaves are dark green and compact, not stretched out and pale.
Water from the bottom when possible to encourage strong root development. I like to place trays in a shallow dish of water for 10-15 minutes, then let them drain completely. This method prevents overwatering and keeps the soil evenly moist. Watch for signs of overwatering—yellowing leaves or wilting stems—and adjust your watering schedule accordingly.
⏰ Step 5: Thin and Transplant for Stronger Plants
When seedlings are about 2 inches tall and have 3-4 true leaves, it's time to thin them. Use small scissors or your fingers to snip or gently pull the weaker seedlings, leaving the strongest one in each pot. This might seem cruel, but it ensures the remaining plants have enough space and nutrients to grow strong. I always save the thinned seedlings to transplant elsewhere or share with friends.
Once seedlings have 4-6 true leaves, they're ready to move into their own containers or the garden. Harden them off by placing them outside for 1-2 hours the first day, gradually increasing their time outdoors over 7-10 days. You'll know they're ready for transplanting when they look vibrant and healthy, with no signs of stress. Plant them in well-draining soil and keep them consistently moist as they establish their new roots.
Tips & tricks for perfect seed germination
Here's what nobody tells you about turning those tiny seeds into lush, thriving plants.
Soaking Secret: That 12-24 hour soak time is your secret weapon for hard-coated seeds like poppies or morning glories. I've found that adding a pinch of horticultural chalk to the soaking water can help break down tough seed coats even faster. After soaking, don't skip the 30-minute drying period—this prevents mold and gives you that perfect balance of moisture without turning your seeds into soggy messes.
Planting Depth Insight: The "twice the diameter" rule is perfect for most seeds, but there's a trick for tiny seeds like snapdragons: press them gently into the soil surface rather than covering them. Think of it like tucking them in with just a whisper of soil—this ensures light can still reach them while protecting them from harsh conditions. I use a toothpick to create tiny dimples if my finger isn't steady enough!
Warmth Hack: Maintaining that 65-75°F range is crucial, but here's a pro move: place your seed trays on top of your refrigerator rather than inside. The top provides consistent warmth without the risk of over-heating that can come from inside the fridge. For extra warmth, I've even used a heating pad set to low—just make sure it's designed for plants and has a thermostat!
Light Transition Strategy: When those first true leaves appear, don't rush to move them to full sun immediately. Gradually increase their light exposure over 2-3 days to avoid shock. I start with morning sun only, then slowly add afternoon exposure. This mimics natural conditions and prevents the leggy growth that happens when seedlings get too much light too soon.
Pro Tips for A Little Seed For Me To Sow
- Here's what nobody tells you about turning those tiny seeds into lush, thriving plants.
- Soaking Secret: That 12-24 hour soak time is your secret weapon for hard-coated seeds like poppies or morning glories...
- Planting Depth Insight: The "twice the diameter" rule is perfect for most seeds, but there's a trick for tiny seeds l...
Frequently asked questions
Got questions about germinating seeds with ease?
You’re not alone! Here are answers to the most common queries to help you grow confidently—no stress, just success.
How long does it take for seeds to sprout?
Germination time varies by plant type. Fast growers like radishes or beans sprout in 3–7 days, while slower ones (e.g., tomatoes or roses) may take 10–21 days. Check your seed packet for specifics—patience is key!
What if my seeds won’t germinate?
Don’t panic! First, ensure proper moisture (keep soil damp, not soggy). Check temperature—most seeds need warmth (70–85°F). If using old seeds, they may have lost viability. Try a fresh batch or test viability with a paper towel method.
Can I use regular potting soil for germination?
Yes, but opt for a light, sterile seed-starting mix to avoid damping-off disease. Regular potting soil can be too dense or nutrient-heavy, slowing sprouts. Mix in perlite or vermiculite for better drainage. Pro tip: Avoid compost-heavy mixes!
Should I use grow lights or natural sunlight?
Natural sunlight is ideal once sprouts emerge, but seedlings need 12–16 hours of light daily. If sunlight is limited, use a grow light (LED or fluorescent) 2–3 inches above seedlings. Avoid placing them in direct sun too soon—delicate leaves can scorch!
What’s the best container for germinating seeds?
Small, shallow containers work best—think egg cartons, seed trays, or even recycled plastic cups. Ensure they have drainage holes to prevent root rot. Avoid large pots; they retain too much moisture. Label containers to track seed types!
Can I reuse containers for multiple seed batches?
Yes! Clean containers with soapy water and disinfect with a 10% bleach solution (1 part bleach to 9 parts water) to kill fungi/bacteria. Rinse thoroughly before reuse. Sterilization prevents disease and keeps your seedlings healthy.
Wrapping up and next steps
A little seed for me to sow isn’t just a phrase—it’s a promise of growth, patience, and trust in the process. 🌱 You’ve learned how to create the perfect conditions for reliable blooms, from soil prep to troubleshooting common hiccups. Now, it’s time to act: grab those seeds, tend to them with confidence, and watch your green thumb flourish.
Your next step? Start small. Pick one seed variety, follow your blueprint, and celebrate every tiny sprout. Before you know it, you’ll be harvesting confidence—and maybe even sharing your success with fellow plant lovers! 🌿