
Lawn
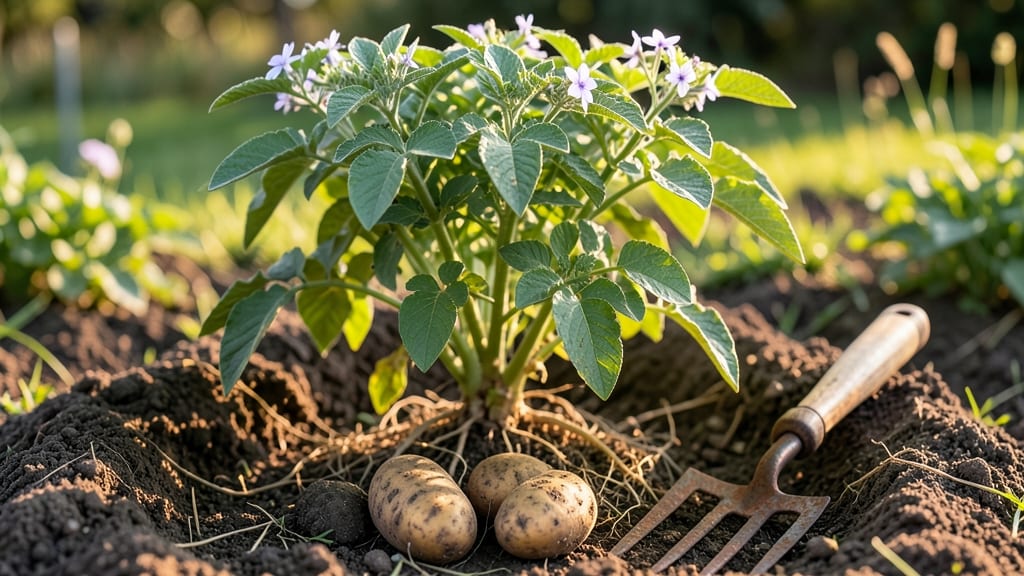
Growing potatoes from seed potatoes means digging into a harvest that keeps giving—twist-free tubers that produce for years if you save the best ones. 🌱 I’ve grown them in everything from raised beds to containers, and the secret isn’t fancy soil or perfect timing—it’s knowing how to handle those little eyes before they hit the dirt.
Most beginners overlook the pre-sprouting step, which makes all the difference in avoiding rot and boosting yields.
The right setup starts with chosen seed potatoes (never grocery store spuds—they’re treated to prevent sprouting), a sunny spot with at least 6 hours of light daily, and loose, well-draining soil. Plant them 4 inches deep, spacing rows 3 feet apart to give vines room to sprawl.
Water consistently—1 inch per week—but avoid soggy soil, which turns tubers mushy. The first harvest comes in 90-120 days, but the real magic happens when you save the best potatoes to replant next season.
What you’ll end up with is a steady supply of crisp, flavorful potatoes—no more digging through bags at the store. The plants stay productive for years if you rotate crops and avoid disease buildup.
Plus, you’ll save money and enjoy varieties you’ll never find in stores, like fingerlings or purple Perus. The key is patience: let foliage yellow before harvesting, and always cure new potatoes in a dark, humid spot for 1-2 weeks to toughen their skins.
This method works in containers, raised beds, or in-ground plots, even in cooler climates if you start indoors. The only real mistake is rushing—whether it’s planting too early (risking frost) or harvesting too soon (small, starchy tubers).
Stick with the basics, and you’ll have a year-round potato supply that outperforms anything you’ve grown before.
📚 In This Guide
- What you need
- Instructions
- Tips and common mistakes
- Wrapping up and next steps
What you need
- ● Potato seeds: Choose certified disease-free seed potatoes (not grocery store potatoes!). Aim for 2–3 lbs (about 10–15 small tubers) per 100 sq ft of garden space.
- ● Growing containers or garden bed: Containers: 5–10 gallon pots (with drainage holes) or grow bags (at least 12" deep). Use 3–4 containers per 1 lb of seed potatoes.
- ● Garden bed: Loose, well-draining soil with a pH of 5.0–6.5. Till or loosen the top 12–18 inches.
- ● High-quality potting soil or compost: Mix with garden soil (if planting in-ground) for nutrient-rich growth. Aim for 50% soil, 50% compost.
- ● Garden trowel or hand fork (for planting and hilling).
- ● Measuring tape or ruler (to track planting depth and spacing).
- ● Garden gloves (to protect hands from soil and sharp edges).
- ● Watering can or hose with a gentle spray nozzle (avoid soaking the soil).
- ○ Mulch (straw or grass clippings) (optional but recommended to retain moisture and suppress weeds).
- ● Potato growing bags with built-in legs (elevates plants for easier harvesting).
- ● Plant markers (to track varieties if growing multiple types).
- ● Organic fertilizer (low-nitrogen, like 5-10-10, applied mid-season).
- ● Row covers or frost cloth (to protect early sprouts from cold snaps).
Step-by-step guide to growing potatoes from seed: twist-free harvesting
Here’s how to grow vigorous potato plants from seed—no twisting, no stress, just steady, reliable harvests.
🌱 Step 1: Select and Prepare Certified Seed Potatoes
Start with certified seed potatoes (not grocery store spuds—they’re treated to prevent sprouting). Choose varieties suited to your climate, like Yukon Gold for buttery texture or Red Pontiac for storage. Cut larger seed potatoes into 2-ounce chunks, ensuring each piece has at least two eyes (the little dimples where sprouts emerge). Let the cut pieces dry for 24 hours—this prevents rot when planted.
This drying step is critical. If you skip it, the exposed flesh stays too moist and invites fungal infections. Place the pieces on a paper towel in a cool, dark spot. You’ll see tiny white sprouts (called "chits") emerge after a few days—that’s your signal they’re ready for planting.
🌿 Step 2: Plant in Well-Draining Soil With Ample Space
Potatoes need loose, fertile soil with a pH between 5.0 and 6.5. Work in 2-3 inches of compost before planting to provide nutrients without overfeeding (too much nitrogen makes leaves overgrow at the expense of tubers). Dig trenches 12 inches deep and space them 3 feet apart for single plants or 18 inches apart for rows.
Place the seed pieces 4 inches deep, eyes facing up. Cover lightly with soil and water gently to settle it around the pieces. Avoid compacting the soil—potatoes hate dense roots. If planting in containers, use 5-gallon buckets with drainage holes and fill with a mix of 50% potting soil and 50% compost.
☀️ Step 3: Provide Consistent Moisture and Gradual Sun Exposure
Keep the soil evenly moist but never soggy—potatoes are drought-sensitive but also hate waterlogged roots. Water 1-2 inches per week, adjusting for rain. Mulch with 2-3 inches of straw to retain moisture and suppress weeds. As the plants grow, hill the soil around the stems in 6-inch increments every 2-3 weeks—this encourages more tuber formation and prevents greening (toxic solanine buildup).
Young plants need full sun (6-8 hours daily) but avoid sudden exposure. If starting indoors, harden off seedlings by moving them outside for 1-2 hours daily before transplanting. You’ll know they’re ready when the foliage looks lush and the stems are ½-inch thick—about 4-6 weeks after planting.
✂️ Step 4: Harvest at Peak Maturity for Maximum Yield
For new potatoes, dig carefully when the plants flower and the tops start to yellow. Use a fork to loosen the soil around the base, then gently lift the plant. Shake off excess dirt and store in a cool, dark place for up to 2 weeks. For storage potatoes, wait until the foliage fully dies back (about 90-120 days after planting). Dig the entire plant, brush off soil, and cure in a warm (60-65°F), humid environment for 1-2 weeks to thicken the skins.
Never twist or yank potatoes from the soil—this damages the tubers and invites rot. Instead, use a fork to lift the plant in one piece, then separate the tubers by hand. Store in a ventilated container with high humidity (like a cardboard box with straw) to prevent shriveling. Check weekly for soft spots or mold—discard any affected tubers immediately.
🌱 Step 5: Save Seed Potatoes for Next Year’s Planting
If you want to replant, select the largest, healthiest tubers from your harvest. Store them in a cool (40-45°F), dark place with good airflow (like a mesh bag in the fridge). In early spring, chit the potatoes again by placing them in a bright, cool spot (50-60°F) for 4-6 weeks until sprouts appear. This jumpstarts growth and ensures a head start on the season.
Here’s the thing—never replant grocery store potatoes. They’re bred for table use, not propagation, and may carry diseases that persist in the soil. Certified seed potatoes are tested for viruses and pests, giving your next harvest the best possible start. Label your saved seed potatoes clearly to track varieties and avoid confusion.
Tips & tricks for growing potatoes from seed without the twist
Growing potatoes from seed is one of those rewarding projects where small details make all the difference between a decent harvest and a bountiful one. Here's what I've learned after years of trial and error to help you avoid common pitfalls.
Certified Seed Selection: While grocery store potatoes might seem convenient, they're treated to prevent sprouting and often carry diseases that can devastate your crop. Certified seed potatoes are specifically bred for propagation and tested for viruses. If you're working with limited space, consider fingerling varieties—they mature faster (around 90 days) and produce more tubers per plant than larger varieties. Look for organic seed potatoes when possible, as they're less likely to have been treated with sprout inhibitors.
Chitting Made Simple: The 24-hour drying period before planting is non-negotiable, but here's what nobody tells you—place your cut seed pieces on a paper towel in a single layer, not stacked. Stacking can trap moisture and create anaerobic conditions that promote rot. Once you see those little white chits (sprouts) emerge, that's your perfect planting signal. For faster chitting, move your seed potatoes to a bright spot (but not direct sun) a week before planting—they'll develop more vigorous sprouts that establish quicker in the ground.
Soil Prep Secrets: That 2-3 inches of compost recommendation is a baseline, but here's the pro move: mix in a handful of wood ash (from untreated wood) for every 5-gallon bucket of soil. The potassium boost encourages tuber formation, and the slightly alkaline nature helps balance pH. For containers, use a mix of 50% potting soil and 50% compost, but add perlite or vermiculite (20% of the mix) to improve drainage. Potatoes hate soggy roots, and this adjustment can double your yield in small spaces.
Harvest Timing Visual Cues: When harvesting new potatoes, look for these signs beyond just flowering: gently brush away soil from the base of the plant. If you see small tubers (about the size of golf balls) forming, that's your cue. For storage potatoes, wait until the foliage turns completely brown and crispy—it should crumble easily when touched. The 90-120 day range accounts for climate variations, but in cooler zones, you might need the full 120 days while warmer climates can harvest at 90 days. Always harvest on a dry day to prevent soil from sticking to the tubers.
Pro Tips for Seed Of Potatoes
- Growing potatoes from seed is one of those rewarding projects where small details make all the difference between a d...
- Certified Seed Selection: While grocery store potatoes might seem convenient, they're treated to prevent sprouting an...
- Chitting Made Simple: The 24-hour drying period before planting is non-negotiable, but here's what nobody tells you—p...
Frequently asked questions
Got questions about growing potatoes from seed? You’re not alone! Here are some of the most common queries—and their straightforward answers—to help you grow like a pro.
Can I grow potatoes from grocery store potatoes?
Yes, but only if they’re organic or untreated with sprout inhibitors. Look for small, firm potatoes with visible "eyes" (buds). Avoid seed potatoes sold for planting—they’re bred for disease resistance and higher yields. If you’re unsure, opt for certified seed potatoes from a nursery.
How long does it take for potato seeds to sprout?
Sprouts typically appear within 2–4 weeks after planting, depending on soil temperature (ideal: 50–60°F). Keep the soil moist but not soggy, and place containers in a warm, bright spot (like a sunny windowsill) until sprouts emerge. Patience pays off—rush won’t speed up germination!
What’s the best way to plant potato seeds for maximum yield?
Start indoors 4–6 weeks before the last frost, planting seeds 2–3 inches deep in pots with well-draining soil. Once sprouts are 4–6 inches tall, transplant them outdoors 12 inches apart, burying the stems halfway. As they grow, hill soil around the stems every 2–3 weeks to encourage more tuber formation.
Why aren’t my potato seeds sprouting?
Common culprits include:
- Cold soil: Potatoes need warmth to germinate. Use a heat mat or wait for soil temps to rise above 40°F.
- Too much moisture: Overwatering can rot seeds. Aim for consistently moist (not soggy) soil.
- Old or diseased potatoes: Use fresh, firm seed potatoes (or certified ones) to avoid pathogens.
Can I grow potatoes year-round, or is there a best season?
Potatoes thrive in cool weather and can be grown in spring and fall in most climates. In warm regions, plant in late summer for a fall harvest. Avoid planting when daytime temps exceed 85°F—heat stress stunts growth. For year-round success, use containers and grow lights indoors during off-seasons!
Wrapping up and next steps
Growing potatoes from seed is a rewarding journey that brings fresh, homegrown harvests to your table! By selecting viable seed potatoes, preparing them properly, and nurturing them with care, you’ll enjoy a bountiful yield—twist-free and full of potential.
Whether you’re a beginner or a seasoned gardener, this guide equips you with the confidence to grow year-round and sustain your garden’s success.
Ready to dig in? 🌱 Start small with a few seed potatoes, experiment with your growing conditions, and watch your garden thrive. Happy planting—and may your harvest be plentiful! 🥔✨