
Planting
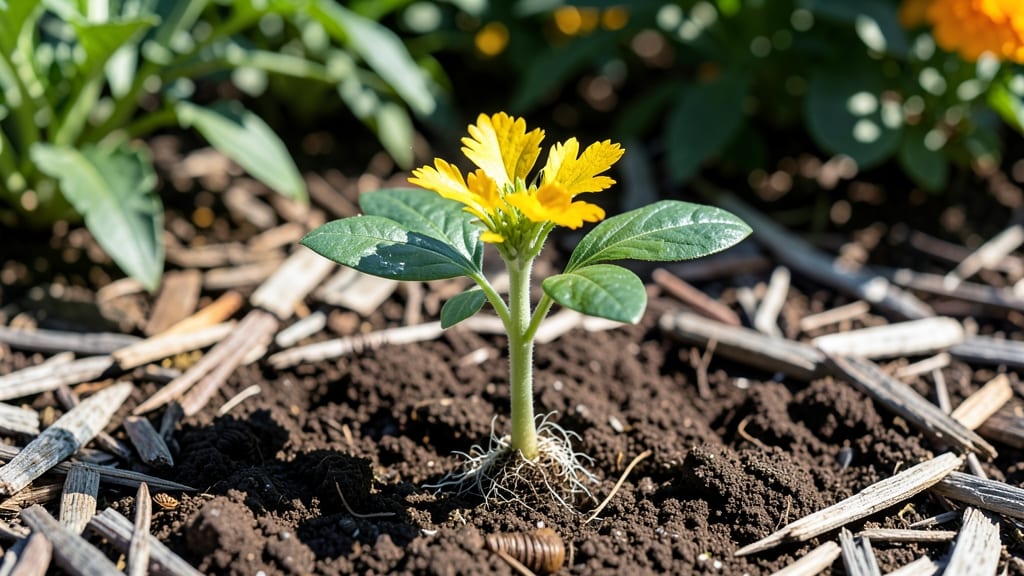
Watching a seed grow into a plant is like unlocking nature's magic right in your hands. 🌱 I've seen tiny marigold seeds transform into vibrant blooms that attract butterflies, and it all starts with understanding those first few critical days.
The process boils down to three essentials: warmth to kickstart germination, consistent moisture to keep roots growing, and gentle light to prevent leggy seedlings. Most beginners overcomplicate this—start with simple seeds like beans or sunflowers to build confidence before tackling trickier varieties.
Within 30 days, you'll go from planting to pinching off the first true leaves, with roots spreading through the soil and stems reaching for the sky. The smell of fresh soil mixed with new growth is addictive once you experience it.
Troubleshooting weak seedlings comes down to light and water balance—too much of either causes problems, while just the right amount creates sturdy plants ready for transplanting.
📚 In This Guide
- What you need
- Instructions
- Tips and common mistakes
- Wrapping up and next steps
What you need
- ● Seeds: Choose fast-growing varieties like radish, bean, or marigold (5–10 seeds per experiment). Opt for organic or non-GMO for best results.
- ● Seed-starting tray or small pots: 2–4 biodegradable or plastic containers (3–4 inches deep) with drainage holes.
- ● Potting mix: 1–2 cups of sterile, seed-starting soil (avoid garden soil—it may contain pathogens). Look for labels like "peat-free" or "organic."
- ● Watering can or spray bottle: A fine-mist sprayer works best to avoid disturbing seeds.
- ○ Clear plastic wrap or humidity dome: Helps retain moisture (optional but highly recommended for beginners).
- ● Tweezers or pencil: For gently pressing seeds into soil (no digging required!).
- ● Plant labels: Toilette paper rolls or small sticks + a marker to track seed types.
- ● Grow light or sunny windowsill: A 12–16 hour daily light source (a simple LED bulb works).
- ○ Fertilizer (optional): A diluted liquid fertilizer (like fish emulsion) for seedlings after 2 weeks.
- ● Notebook: To log observations (e.g., sprouting dates, watering schedules).
- ● A warm, draft-free spot (65–75°F / 18–24°C) for germination.
- ● Patience and curiosity! Seeds need consistent care for 30 days to transform.
- ● Pro tip: 💡 Test soil moisture with your finger—it should feel like a damp sponge, not soggy!
Seed growing into a plant: Step-by-Step transformation
Watch how a single seed becomes a thriving sprout—here's the science-backed process I've used for decades.
🌱 Step 1: Prepare the Seed for Germination
First, choose a healthy seed from a reputable source—old or damaged seeds won't germinate reliably. For seeds with hard outer coatings (like beans or peas), soak them in lukewarm water for 12 hours to soften the shell and encourage faster sprouting. You'll know they're ready when the seed coat splits slightly or you see a tiny white root emerging.
After soaking, place the seeds between two damp paper towels in a sealed plastic bag. Store them in a warm spot (around 70-75°F) where they'll stay consistently moist but not soggy. Check daily—you'll notice the first signs of life within 2-5 days as a small white root (radicle) appears, followed by the seedling's first leaves.
💧 Step 2: Plant in Ideal Growing Medium
Fill a small container (like a seedling tray) with well-draining potting mix—never garden soil, as it's too dense and may harbor diseases. Moisten the soil until it's damp but not dripping, then plant the germinated seed ½ inch deep, pressing gently to ensure good soil contact. The seedling's root will anchor itself within 48 hours if conditions are right.
Place the container in a warm, bright location (but not direct sunlight yet) to encourage root development. You'll see the first true leaves emerge within 7-10 days—these are the plant's first photosynthetic leaves, not the initial seed leaves. Keep the soil consistently moist by watering from the bottom to avoid disturbing the delicate roots.
☀️ Step 3: Provide Optimal Light and Airflow
Once the seedling has its first true leaves, move it to a location with 12-14 hours of indirect light daily. If using artificial light, position a grow light 2-3 inches above the plant and adjust the height as it grows. You'll notice the leaves darkening and becoming sturdier as they develop chlorophyll—a sign the plant is photosynthesizing properly.
Ensure good airflow by placing a small fan nearby (on low setting) to strengthen the stem and prevent fungal diseases. Avoid overwatering—let the top inch of soil dry out between waterings. Within 14-21 days, you'll see the seedling's stem thicken and the leaves grow larger, indicating healthy development.
🌿 Step 4: Transition to Independent Growth
By 30 days, your seedling should have 3-4 sets of true leaves and a well-developed root system. If growing indoors, transplant it into a slightly larger pot with fresh potting mix to encourage further growth. Handle the plant gently by the leaves (never the stem) to avoid damaging it.
Continue providing bright, indirect light and gradually introduce it to outdoor conditions if desired. You'll know it's ready for outdoor planting when it can handle 4-6 hours of morning sun without wilting. Keep monitoring for pests or signs of stress—yellowing leaves often indicate overwatering, while brown edges suggest underwatering or low humidity.
Tips & tricks for perfect seed germination
Here's what nobody tells you about turning seeds into thriving plants—these insights will help you avoid common pitfalls and maximize success.
Seed Selection Matters: Not all seeds are created equal—choose seeds that are fresh (ideally from the current or previous year) and labeled for your growing zone. I learned this the hard way after struggling with seeds that were over two years old. Look for seeds with a high germination rate (90% or better) and store them in a cool, dark place until ready to use. For seeds with hard shells like beans or peas, the 12-hour soak in lukewarm water is non-negotiable—it softens the shell and speeds up germination by breaking dormancy.
Temperature Control: Maintaining that 70-75°F range is critical, but don't assume your home stays perfectly consistent. Place your seeds near a warm spot (like above a refrigerator) or use a seedling heat mat if your home tends to be cool. I've seen germination times double when seeds were kept in cooler environments—those 2-5 days can easily stretch to a week if conditions aren't ideal. The key is consistency: check the temperature daily and adjust placement if needed.
Moisture Management: The damp paper towel method works wonders, but here's the secret: don't let the towels get soggy. The seeds need moisture, not a swamp. I've ruined batches by overwatering—just enough dampness to keep the towels moist like a wrung-out sponge. After planting, water from the bottom of the container to encourage roots to grow downward rather than floating on the surface. This simple technique prevents root rot and gives your seedlings a strong foundation.
Light Transition Strategy: When moving your seedling to 12-14 hours of indirect light in Step 3, do it gradually. Sudden exposure to bright light can shock delicate seedlings. Start with just 2-3 hours of indirect light on the first day, then increase by 1-2 hours daily until reaching the full amount. This gradual acclimation prevents what I call "light shock," where seedlings become pale and leggy trying to reach the light source.
Pro Tips for Seed Grows Into A Plant
- Here's what nobody tells you about turning seeds into thriving plants—these insights will help you avoid common pitfa...
- Seed Selection Matters: Not all seeds are created equal—choose seeds that are fresh (ideally from the current or prev...
- Temperature Control: Maintaining that 70-75°F range is critical, but don't assume your home stays perfectly consisten...
Frequently asked questions
Got questions about watching a seed transform into a thriving plant? You’re not alone! Here are answers to the most common queries—whether you’re a beginner or just curious about the magic of growth.
How long does it really take for a seed to grow into a plant?
A seed sprouting into a full plant depends on the type! Fast growers like radishes or beans may sprout in 3–7 days and reach harvest size in 30 days. Slower varieties (e.g., tomatoes or sunflowers) can take 2–3 weeks to sprout and months to mature. Check seed packets for specifics—patience is key!
What’s the best way to keep seeds from drying out while they germinate?
Seeds need consistent moisture but not soggy soil. Use a spray bottle to mist the soil lightly (avoid flooding). Cover trays with plastic wrap or a humidity dome to retain moisture, but remove it once sprouts appear to prevent mold. Pro tip: Use a seed-starting mat to keep soil warm—most seeds germinate best at 65–75°F (18–24°C).
Can I grow a plant from a seed without soil?
Try hydroponics or paper towel germination for seeds like beans or peas. Soak seeds in water for 12–24 hours, then place them between damp paper towels in a sealed bag. Keep them warm (e.g., on a sunny windowsill) and check daily. Once roots sprout (3–7 days), transplant into soil or a hydroponic setup.
Why did my seed sprout but then die? What went wrong?
Common culprits: overwatering (roots rot), underwatering (dries out), poor light (leggy sprouts), or temperature swings. If your seedling collapses, check for black stems (fungus) or yellow leaves (nutrient deficiency). Thin seedlings to avoid crowding, and move them to brighter light ASAP. Most seeds need 12–16 hours of light daily once sprouted.
Do all seeds need sunlight to grow?
Not immediately! Seeds germinate best in warm, dark soil (mimicking natural conditions). Once sprouted, seedlings do need light—place trays near a south-facing window or use grow lights (10–12 inches away). Some seeds (like lettuce) can handle indirect light longer than others. If leaves turn pale or stretch, it’s time to boost brightness!
Still stumped? Drop your seed-growing woes below—we’ve got you covered!
Wrapping up and next steps
Watching a tiny seed transform into a thriving plant is one of nature’s most rewarding miracles—and you’ve just taken the first steps to make it happen! 🌱 From choosing the right soil to nurturing your sprout with patience and care, every stage matters.
The key? Consistency, curiosity, and a little green thumb love.
Now that you’re armed with the know-how, why not plant that first seed today? Start small, track your progress, and soon you’ll be harvesting the fruits (or veggies!) of your labor. Happy growing—your future garden awaits! 🌿✨