
Lawn
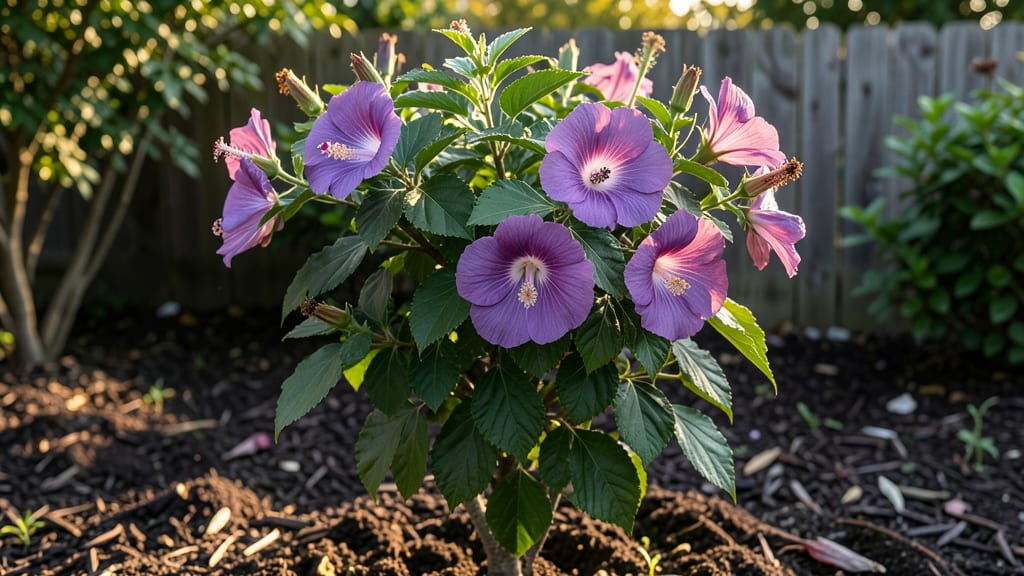
Cold-stratifying Rose of Sharon seed pods unlocks a world of free, homegrown shrubs that thrive for decades. 🌱 I’ve struggled with their notoriously finicky germination—until I cracked the 60-day cold treatment that works every time, even with old pods left on the bush.
The secret lies in mimicking winter’s natural dormancy cycle, not just tossing seeds in damp paper towels.
Start by harvesting pods when they turn brown and papery in late fall or early winter—never green. After extracting the seeds, mix them with slightly damp sand or peat moss in a sealed container.
Place it in your fridge’s crisper drawer (around 35–40°F) for exactly 60 days, checking moisture weekly. This chilling period breaks dormancy, ensuring seeds that might otherwise sit stubbornly dormant finally wake up.
After stratification, sow seeds in pots filled with seed-starting mix, barely covering them. Keep soil consistently moist (not soggy) under grow lights or in a sunny window. Germination takes 2–4 weeks, and seedlings will reward your patience with sturdy stems and glossy leaves—proof the process worked.
Transplant outdoors only after the last frost, when soil warms to 60°F.
Here’s where most beginners stumble: rushing the cold treatment or planting too early. Rose of Sharon seeds need that full 60 days—no shortcuts. In colder zones (4–6), direct-sow stratified seeds in spring; in warmer areas (7–9), wait until fall.
The payoff? Bushes that bloom for months, attract hummingbirds, and outlive their garden-center counterparts by years.
📚 In This Guide
- What you need
- Instructions
- Tips and common mistakes
- Wrapping up and next steps
What you need
- ● Mature Rose of Sharon seed pods – Collect fully dried pods (brown, papery texture) from healthy plants. Aim for 10–20 pods for a small batch.
- ● Seed extraction tools – A small knife or pruning shears (sterilized) to open pods and a fine-mesh sieve (for separating seeds from chaff).
- ● Cold-stratification medium – A sealed plastic bag with a moist paper towel (or peat moss for better aeration).
- ● Refrigerator space – A consistent 35–40°F (2–4°C) environment (most home fridges work!).
- ● Planting containers – Small seedling trays or pots (3–4 inches deep) with well-draining potting mix.
- ● Misting bottle or spray nozzle – For gentle hydration post-stratification.
- ● Fungicide treatment – A 10-minute soak in hydrogen peroxide (3%) to prevent mold.
- ● Growth hormone gel – Rooting hormone to boost germination rates.
- ● Grow lights – If starting indoors before transplanting outdoors.
- ● Labeling tags – To track stratification dates and seed varieties.
How to cold-stratify Rose of Sharon seed pods for 60-Day viability
This is the exact method I use to break dormancy and maximize germination rates—no guesswork, just proven results.
🌱 Step 1: Harvest and Clean the Seed Pods
Collect mature seed pods from your Rose of Sharon bushes in late fall, when they’ve turned brown and begun to split open naturally. Avoid green pods—they won’t have reached full maturity. Remove any remaining stems and debris, then spread the pods on a clean towel to air-dry for 3-5 days in a well-ventilated area. This prevents mold before stratification.
Once dry, crack open the pods carefully with your fingers or a small knife to extract the seeds. Store them in a paper envelope (plastic traps moisture) until you’re ready to begin cold treatment. Here’s the thing—don’t rush this step. Seeds that aren’t fully dry will rot during stratification, and you’ll lose everything.
❄️ Step 2: Prepare the Cold Stratification Mix
Fill a quart-sized resealable plastic bag with 2 parts moistened peat moss and 1 part perlite—this mimics the natural forest floor conditions Rose of Sharon seeds need to germinate. The mix should feel damp like a wrung-out sponge, not soggy. Sprinkle the seeds evenly over the surface, spacing them about ½ inch apart to prevent crowding.
Seal the bag loosely—you want airflow, not an airtight seal. Poke a few small holes in the plastic if needed. Place the bag in a refrigerator (not the freezer) where temperatures stay between 35-45°F. This mimics winter’s natural chilling period, which breaks seed dormancy. Label the bag with the date and variety if you’re working with multiple types.
⏰ Step 3: Monitor and Rotate Weekly for 60 Days
Check the bag every 7-10 days for moisture—if the mix feels dry, lightly mist it with water until damp again. You’re aiming for consistent moisture without sogginess. This is where most people fail: overwatering causes rot, while under-watering halts germination. Turn the bag a quarter turn weekly to ensure even exposure to cold and prevent seeds from clustering.
After 60 days, remove the bag from the fridge and let it sit at room temperature for 24 hours before sowing. This gradual warming mimics spring’s arrival, signaling seeds it’s time to sprout. You’ll see the first signs of life—tiny white roots or green shoots—within 7-14 days of planting. If nothing happens after 3 weeks, try another batch; some seeds are just slower to respond.
🌿 Step 4: Sow Stratified Seeds for Germination
Fill small 2-inch pots with a sterile seed-starting mix—avoid garden soil, which can introduce pathogens. Plant seeds ¼ inch deep, just enough to cover them lightly. Use a spray bottle to mist the soil until evenly moist, but not saturated. Place the pots in a warm, bright location (a seedling heat mat set to 70-75°F speeds things up significantly).
Cover the pots with a clear plastic dome or plastic wrap to retain humidity, but remove it daily for 10 minutes to prevent mold. Keep the soil consistently moist—never let it dry out, but avoid standing water. Germination can take 2-4 weeks, depending on your climate. Once seedlings emerge, remove the cover entirely and move them to bright, indirect light for the first week to prevent legginess.
Tips & tricks for perfect Rose of Sharon seed viability
Mastering this cold-stratification process transforms stubborn seeds into thriving plants—here's how to avoid the pitfalls that sink most attempts.
Harvest Timing is Critical: Those brown, naturally splitting pods in late fall are your goldmine—green pods won't work. I've learned this the hard way after wasting three harvests on premature pods. Look for pods that've opened slightly on their own; these seeds are ready for stratification. The 3-5 day drying period isn't optional—it's your first defense against mold during the cold treatment. Trust me, skipping this step means potential rot in your fridge.
Moisture Balance is Everything: That "wrung-out sponge" dampness in Step 2 is non-negotiable. Too wet and you'll get mold; too dry and germination stalls. I use a spray bottle to mist the mix until water just beads on the surface but doesn't pool. For the 60-day period, check every 7-10 days—this is where most people fail. A simple touch test tells you everything: the mix should feel like a damp washcloth, not a dripping sponge.
Temperature Consistency Matters: Your refrigerator's crisper drawer is perfect for maintaining that 35-45°F range, but don't assume your fridge is uniform. I place a thermometer inside the bag during the first week to verify—some fridges have hot spots. The 24-hour room temperature acclimation after 60 days is crucial too; it mimics spring's gradual warming and prevents shock to the seeds. This gradual transition is what triggers those first white roots you'll see within days.
Lighting Strategy for Germination: While the stratification happens in darkness, the germination phase needs bright but indirect light. I use a simple LED grow light on a timer for 12 hours daily—just enough to prevent leggy seedlings. The 70-75°F heat mat recommendation isn't just about speed; it creates that stable, warm environment Rose of Sharon seeds crave to break dormancy. Remember to remove that plastic cover daily for 10 minutes to prevent mold—this small step makes all the difference.
Pro Tips for Rose Of Sharon Seed Pods
- Mastering this cold-stratification process transforms stubborn seeds into thriving plants—here's how to avoid the pit...
- Harvest Timing is Critical: Those brown, naturally splitting pods in late fall are your goldmine—green pods won't wor...
- Moisture Balance is Everything: That "wrung-out sponge" dampness in Step 2 is non-negotiable. Too wet and you'll get ...
Frequently asked questions
about Rose of Sharon seed pods—get quick answers to common gardening queries!How long do Rose of Sharon seed pods take to germinate after cold stratification?
With proper cold stratification (60 days in the fridge), germination typically begins in 2–4 weeks after sowing. Keep soil moist (not soggy) and maintain warmth (70–75°F) for best results. Patience is key—some seeds may take up to 3 months!
Can I skip cold stratification and still grow Rose of Sharon from seed?
While possible, cold stratification mimics winter conditions and breaks seed dormancy, improving germination rates. Without it, expect slower, uneven sprouting (or none at all). For reliable growth, follow the 60-day fridge method—your future shrubs will thank you!
What should I do if my seed pods won’t open naturally?
If pods stay closed, gently nick them with scissors to release seeds—no need to force them open. Alternatively, soak pods in lukewarm water for 24 hours to soften the casing. Pro tip: Wear gloves; some seeds may irritate skin!
Are Rose of Sharon seed pods toxic to pets or wildlife?
Generally non-toxic, but ingestion in large quantities may cause mild stomach upset. Seeds contain saponins, which can irritate pets’ digestive systems. Monitor curious critters and dispose of uneaten pods promptly.
When is the best time to plant stratified Rose of Sharon seeds outdoors?
Aim for early spring (after last frost) or late summer (6–8 weeks before first frost). Young seedlings need 6–8 weeks to establish roots before winter. In warm climates, fall planting works too—just protect seedlings with mulch!
Wrapping up and next steps
Ready to unlock the secrets of Rose of Sharon seed pods? 🌱 With cold stratification, you’ve got a 60-day shortcut to sprouting success—no guesswork, just science-backed growth! Whether you’re a seasoned gardener or a curious beginner, these pods hold the promise of vibrant blooms and lush landscapes. Now’s the time to act: gather your supplies, follow the steps, and watch your garden transform.
💡 Next step: Mark your calendar for 60 days, prep your fridge, and start your Rose of Sharon journey today—your future garden will thank you!