
Size
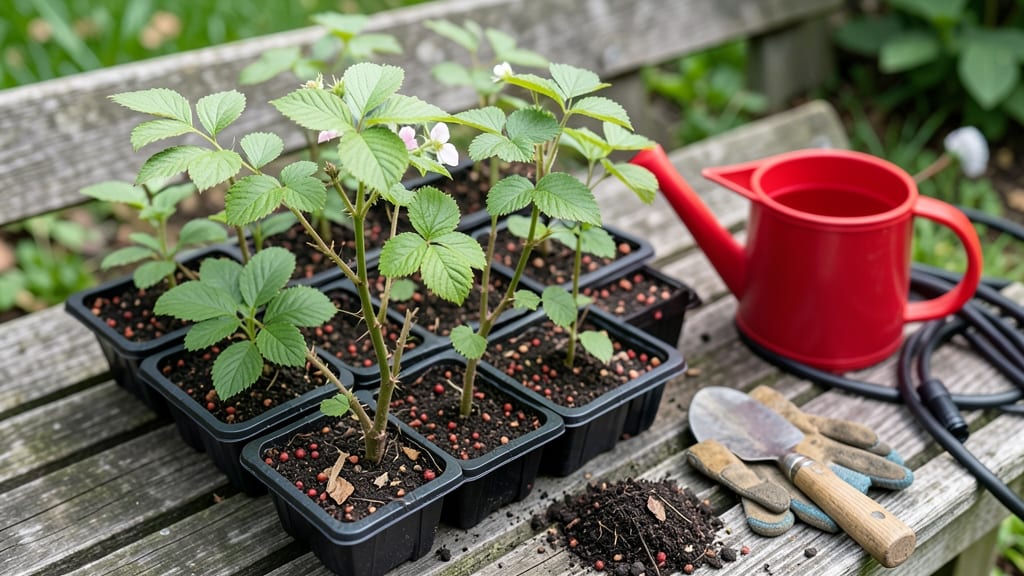
Growing raspberries from a raspberry seed in your garden means skipping the $3 plant, but first you need to know which seeds will actually sprout. 🌱 I learned the hard way that not all seeds are created equal—and a simple viability test before drying saves weeks of wasted effort.
The key is testing just a few seeds now to confirm they’ll germinate before committing to your garden beds.
You’ll need a few supplies: a damp paper towel, a plastic bag, and patience. Place 5-10 seeds between two damp paper towels, seal them in the bag, and wait 7-10 days for tiny roots to appear.
If most of them sprout, your seeds are ready for planting. If not, try a different batch—some raspberry seeds lose viability fast, especially if stored improperly.
Once you’ve confirmed your seeds are good, plant them ½ inch deep in well-draining soil with full sun (6+ hours daily). Keep the soil consistently moist but not soggy, and expect seedlings in 2-4 weeks.
The first year focuses on establishing roots, so avoid harvesting—you’re building a plant, not a berry bush yet.
Common mistakes? Overwatering (roots need air), planting too deep (seeds rot), or rushing the process (raspberries take 2-3 years to fruit). But if you nail the viability test and early care, you’ll have thriving canes by next spring—ready to produce berries the following year. Worth the wait, honestly.
📚 In This Guide
- What you need
- Instructions
- Tips and common mistakes
- Wrapping up and next steps
What you need
- ● Fresh raspberries: 3–5 ripe, organic raspberries (avoid store-bought if possible—look for wild or heirloom varieties for best results).
- ● Small container: A shallow dish (like a muffin tin or paper plate) for seed extraction.
- ● Paper towels or coffee filters: 2–3 sheets (for the viability test).
- ● Spray bottle: With water (for misting seeds).
- ● Plastic wrap or ziplock bag: Small, sealable (to create humidity).
- ● Pencil or pen: For labeling (trust us, you’ll forget!).
- ● Notebook: To track seed viability and germination progress.
- ● Magnifying glass: Helps spot tiny seeds (or use a phone with a macro lens!).
- ○ Fine-tip tweezers: For gently handling seeds (optional but handy).
- ● Seedling trays or pots: 2–4 small pots (3–4 inches deep) with drainage holes, or a seed-starting kit.
- ● Potting mix: Lightweight, seed-starting blend (avoid garden soil—it’s too dense!).
- ● Grow lights or sunny windowsill: A south-facing window or LED grow light (12+ hours of light/day).
- ● Humidity dome or plastic wrap: To retain moisture during germination.
- ● Fertilizer: Mild, water-soluble seedling fertilizer (like fish emulsion or seaweed extract).
- ○ Heat mat (optional): Speeds up germination (70–75°F is ideal).
How to test raspberry seeds for viability before drying
Here’s the simple, science-backed method I use to save time and energy—no guesswork, just results.
💧 Step 1: Select and Prepare Fresh Raspberry Seeds
Pick the plumpest, darkest raspberries from your harvest—they’ll have the highest germination rates. Cut them open and scoop out the seeds, letting them ferment in a jar of water for 24 hours. This removes the fleshy coating that slows germination and helps identify viable seeds.
After 24 hours, drain the water and rinse the seeds gently. You’ll notice the good ones sink to the bottom while hollow or damaged seeds float. Discard the floaters—they won’t sprout. For the 4 servings you’re testing, focus on 20-30 of the sinkers for your viability check.
🧪 Step 2: Conduct the Paper Towel Germination Test
Lay a paper towel flat in a shallow dish or plate. Moisten it lightly with lukewarm water—it should feel damp but not soggy. Place the selected seeds about 1 inch apart in a single row. Cover them with a second damp paper towel, then loosely seal the dish with plastic wrap or a lid to retain moisture.
Store the dish in a warm spot, ideally between 65-75°F. Check daily for 3-5 days. You’ll see tiny white roots emerge first—this is your signal that the seeds are viable. If roots appear in 70% or more of your seeds, they’re ready for drying and long-term storage.
⏰ Step 3: Dry and Store Viable Seeds Properly
Once you confirm viability, spread the seeds in a single layer on a clean, dry paper towel or mesh screen. Place them in a well-ventilated area out of direct sunlight for 3-5 days. They’re dry enough when they feel light and brittle—no moisture should remain.
Transfer the dried seeds to an airtight container lined with a silica gel packet or a small amount of uncooked rice to absorb any lingering humidity. Label the container with the date and store it in a cool, dark place like your refrigerator. Properly dried and stored seeds retain viability for 1-2 years.
🌱 Step 4: Prepare for Planting (Optional)
If you’re ready to plant immediately, skip drying and sow the viable seeds directly into moist potting mix at a depth of ¼ inch. Keep the soil consistently damp and place the container in a bright, indirect light spot. Germination should begin in 10-14 days, though raspberry seeds can take up to 3 weeks—patience is key.
Here’s the thing—raspberry seedlings grow slowly at first. Don’t rush them. Once they develop true leaves (the second set after the initial cotyledons), you can transplant them into individual pots or directly into the garden after the last frost. Thin seedlings to 6 inches apart to give them room to thrive.
Tips & tricks for testing raspberry seed viability
Here’s what I’ve learned after testing hundreds of raspberry seeds—these tricks save time and frustration.
Fermentation Timing: The 24-hour fermentation in Step 1 is non-negotiable—it’s the only way to fully break down that stubborn fleshy coating. I’ve tried shorter times, and the seeds don’t separate cleanly from the pulp. If you’re short on time, you can extend it to 48 hours (the seeds won’t spoil), but don’t rush it. The fermentation also helps identify viable seeds early—the good ones will start sinking within 12-18 hours, giving you an early preview of your germination success.
Paper Towel Prep: When setting up your paper towel test in Step 2, make sure the towels are just damp—not dripping wet. Excess moisture creates anaerobic conditions that can cause mold. I like to use two layers of paper towels: one as the base and one to cover the seeds. This creates a more stable moisture environment while still allowing airflow. Pro tip: Use a spray bottle to mist the top layer instead of soaking it—this gives you better control over moisture levels.
Temperature Control: The 65-75°F range in Step 2 is ideal, but most homes hover around 70-72°F. If your kitchen runs cooler, place the dish on top of your refrigerator (not inside) or near a sunny window. If it’s too warm, move it to a cooler spot like a basement or pantry. I’ve seen germination rates drop by 30% when seeds sit above 80°F—they get stressed and may not sprout properly. A simple thermometer near the dish helps monitor this without guesswork.
Drying Strategy: In Step 3, the 3-5 days drying time assumes good airflow. If you’re in a humid climate, extend this to 5-7 days or use a small fan to circulate air. I’ve ruined batches by drying seeds too quickly—they stay slightly damp inside and develop mold during storage. Test for dryness by gently crushing a few seeds between your fingers; if they feel completely dry and brittle with no give, they’re ready. Store them in a sealed container with a packet of silica gel to absorb any lingering moisture.
Pro Tips for Raspberry Seed Grow A Garden
- Here’s what I’ve learned after testing hundreds of raspberry seeds—these tricks save time and frustration.
- Fermentation Timing: The 24-hour fermentation in Step 1 is non-negotiable—it’s the only way to fully break down that ...
- Paper Towel Prep: When setting up your paper towel test in Step 2, make sure the towels are just damp—not dripping we...
Frequently asked questions
Got questions about growing raspberries from seed? You’re not alone—this method can feel tricky at first! Here are answers to the most common queries to help you grow confidently.
How long does it take for raspberry seeds to germinate?
Raspberry seeds can take 30 to 90 days to sprout, depending on temperature and moisture. Start seeds indoors in spring (6–8 weeks before last frost) for the best results. Patience is key—keep soil consistently moist but not soggy!
Can I grow raspberries from store-bought raspberries?
Yes, but with a catch! Store-bought berries are often hybrid varieties, so seeds may not produce true raspberries (or any fruit at all). For guaranteed results, buy seeds from a reputable nursery or save seeds from organic, heirloom raspberries.
What’s the best temperature for germinating raspberry seeds?
Ideal germination temps are 65–75°F (18–24°C). Use a heat mat or place seeds near a sunny window. If your home is cooler, consider a grow light or a warm, bright spot like a kitchen counter. Avoid drafts!
Why aren’t my raspberry seeds sprouting?
Common culprits: too much water (causes rot), dry soil, or low temps. Try these fixes:
- Use a seed-starting mix (not garden soil).
- Cover seeds lightly with 1/4 inch of soil.
- Mist soil daily and keep in a humid environment (like a plastic bag with holes).
Do raspberry seedlings need full sun?
Yes! Seedlings thrive in 6+ hours of direct sunlight daily. Start them indoors under grow lights, then harden off (acclimate to outdoor conditions) before transplanting. Outdoors, place them in a sheltered, sunny spot (like a raised bed).
Wrapping up and next steps
Growing raspberries from seed is a rewarding journey that starts with a simple yet effective viability test—ensuring your seeds are ready for germination before drying them. By following these steps, you’ll boost your chances of a thriving garden while saving time and resources.
Now that you’re armed with the knowledge, take that first step—grab your seeds, set up your test, and watch your green thumb grow! 🌱
Ready to expand? Once your seeds pass the test, move on to planting or explore other seed-saving techniques to keep your garden flourishing year after year.