
Planting
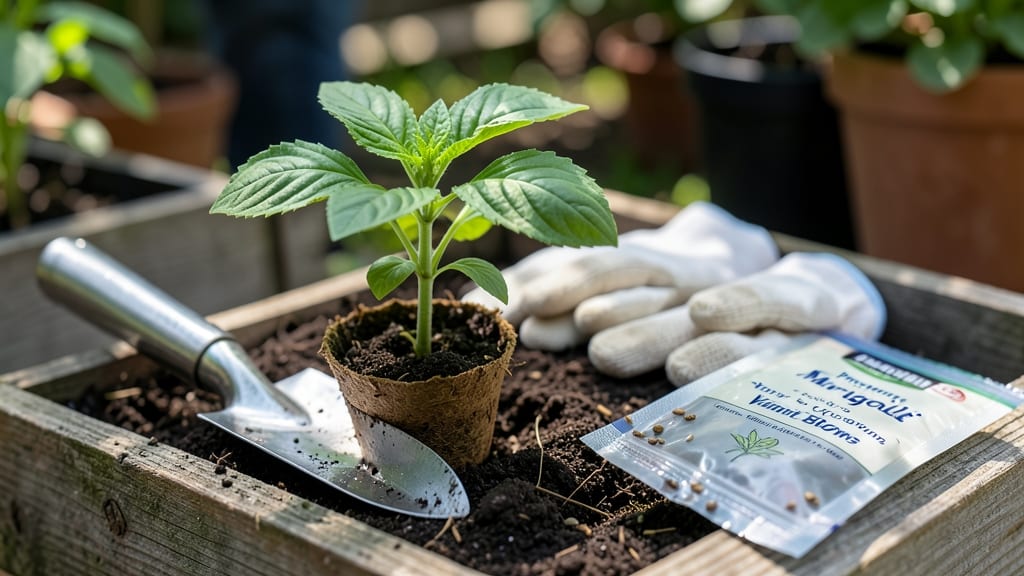
Put the seed in the soil properly, and you’ll transform a patch of dirt into a thriving garden instead of a row of sad sticks. 🌱 I’ve watched tiny seeds turn into lush plants by following just a few simple rules—starting with the right soil prep and seed placement.
The key? Loose, moist soil and the perfect depth for each seed type, so roots can stretch without fighting for space.
Most beginners overthink it, but you only need three things: well-draining soil, a small trowel or pencil for precision, and a spray bottle for gentle watering. I use a flat-bottomed container to mark depth—just press it into the soil and fill to the rim.
For tiny seeds, a toothpick works just as well. The goal? Plant seeds at twice their width deep, unless the packet says otherwise.
Once planted, keep the soil consistently moist (not soggy) and watch for sprouts in 5-14 days, depending on the plant. The first true leaves signal success—now you’re ready to thin seedlings or move them to larger pots.
Avoid common mistakes like burying seeds too deep (they’ll rot) or crowding them (they’ll compete for light).
This method works for veggies, flowers, and herbs—indoor starts or direct sowing. The secret? Patience and precision. With these steps, you’ll see stronger, healthier plants that outperform store-bought seedlings. Ready to dig in?
📚 In This Guide
- What you need
- Instructions
- Tips and common mistakes
- Wrapping up and next steps
What you need
- ● Seeds: Choose fresh, high-quality seeds (organic or heirloom if preferred). Quantity depends on your garden size—start with 50–100 seeds for small plots.
- ● Potting soil or garden soil: Well-draining, nutrient-rich mix (e.g., Miracle-Gro All Purpose Soil or compost-amended soil). 1–2 bags (5–10 lbs each) for small gardens.
- ● Containers or garden bed: Containers: Pots (5–6" deep), seed trays, or biodegradable peat pots.
- ● Garden bed: Loose, weed-free soil (amend with compost if needed).
- ● Watering can or spray bottle: For gentle hydration (avoid over-saturating seeds!).
- ● Trowel or planting stick: For digging small holes (2–3x seed depth).
- ○ Plant labels (optional but helpful): Wooden or biodegradable tags to track varieties.
- ● Seedling heat mat: For faster germination in cooler climates.
- ● Clear plastic domes or plastic wrap: To retain moisture during germination.
- ● Fertilizer (balanced or organic): Lightly mix into soil before planting (e.g., Fish emulsion or worm castings).
- ● Mulch: Straw or shredded leaves to retain soil moisture.
- ● Garden journal: To log planting dates, varieties, and progress!
Stress-free seed planting: how to put seeds in soil for healthy growth
Here's how I've learned to plant seeds like a pro—every sprout gets the perfect start.
🌱 Step 1: Prepare the Soil for Optimal Germination
The right soil makes all the difference. Loosen the top 2-3 inches of soil with a fork or trowel, breaking up any clumps. I like to add a handful of compost to the planting hole—this gives seeds the nutrients they need right from the start without overwhelming them. The soil should be crumbly and moist, like a well-wrung sponge. If it's too dry, water it thoroughly before planting.
For container planting, fill pots with fresh potting mix and press it down gently to remove air pockets. You want the soil to be firm enough to hold seeds in place but loose enough for roots to push through easily. A good test: squeeze a handful—it should hold its shape but not be rock-hard.
🌱 Step 2: Plant Seeds at the Correct Depth and Spacing
Most seed packets recommend planting depth as twice the seed's diameter. For tiny seeds like lettuce, that's just a sprinkle on top, while larger seeds like beans need to go 1 inch deep. I use my finger to make small holes—just enough to hold the seed without crushing it. Place one seed per hole unless the packet says otherwise (some seeds, like peas, can handle two).
Spacing matters too. Crowded seedlings compete for light and nutrients, leading to weak plants. Check the seed packet for spacing guidelines, but generally, 1-2 inches apart for small seeds and 3-4 inches apart for larger ones works well. If you're planting in rows, use a ruler or stick to keep things even.
💧 Step 3: Cover and Water Gently for Even Moisture
After planting, cover seeds lightly with soil—just enough to hold them in place. For tiny seeds, a light dusting is all you need. Press down gently with your fingers to ensure good soil-to-seed contact. This step is critical: seeds need consistent moisture to germinate, but too much water can wash them away or create a crust that blocks sprouts.
Water gently using a spray bottle or a fine-mist setting on your hose. The goal is to moisten the soil evenly without disturbing the seeds. You'll know it's right when the soil looks damp but not soggy. Avoid soaking the area—you want the top layer to stay moist, not waterlogged. A good rule: water until moisture reaches 1 inch deep.
☀️ Step 4: Provide the Right Conditions for Germination
Most seeds need warmth and moisture to sprout. Place your planted seeds in a location that stays between 65-75°F—a sunny windowsill or under a grow light works well. If you're planting outdoors, choose a spot that gets indirect light until sprouts appear. Too much direct sun can dry out the soil too quickly, while too little light slows germination.
Keep the soil consistently moist but not wet. Check daily and water lightly if the top inch feels dry. You'll see the first signs of life in 3-14 days, depending on the seed type. Once sprouts emerge, thin them if necessary—leave the strongest seedling in each spot and snip the others at soil level with scissors. This prevents overcrowding and gives plants room to grow.
⏰ Step 5: Monitor and Adjust for Strong Seedlings
Watch for signs of stress, like yellowing leaves or wilting. These usually mean the soil is too dry or too wet. If seedlings look leggy (stretched out with weak stems), they need more light. Move them closer to a window or under a grow light, but keep the light source 4-6 inches away to avoid scorching.
Thin again if needed when seedlings have 2-3 true leaves (the first set of leaves after the initial sprouts). Strong seedlings will have sturdy stems and vibrant color. If you notice pests like aphids, spray with water or use an organic insecticidal soap. With the right care, your seeds will grow into healthy plants ready for transplanting or long-term growth.
Tips & tricks for perfect seed planting
These little details make all the difference between healthy seedlings and wasted effort—trust me, I've learned this the hard way.
Soil Preparation Secret: When loosening the top 2-3 inches of soil in Step 1, focus on breaking up just the surface layer without disturbing deeper roots. I like to use a garden fork to create a fine, crumbly texture—almost like aerating soil for golf greens. This creates the perfect environment for roots to establish quickly while preventing compaction that can strangle new growth. For containers, press the potting mix firmly enough to eliminate air pockets but gently enough to avoid creating a dense barrier.
Depth and Spacing Precision: The twice the seed's diameter rule in Step 2 is your golden standard, but here's what nobody tells you—use a toothpick or small skewer to create planting holes. This gives you perfect depth control without crushing seeds. For spacing, I mark my rows with a stick or ruler, but I always err on the side of slightly wider spacing (up to 2-3 inches more than recommended) for seeds that tend to sprawl like cucumbers or squash. This prevents future transplanting headaches.
Watering Wisdom: That 1-inch deep moisture target in Step 3 is crucial, but don't rely on guesswork. I use a moisture meter or simply stick my finger in—if the top inch feels dry, it's time to water. For containers, I water until I see moisture emerge from the drainage holes. Pro tip: Water in the morning so excess moisture evaporates during the day, preventing fungal issues that can rot seeds before they sprout.
Germination Conditions: Maintaining that 65-75°F range in Step 4 is easier said than done in many homes. If your space runs cooler, place a heating pad (on low) under containers or use a clear plastic dome to trap warmth. For warm climates, move seedlings to partial shade until they develop their first true leaves. I've found that seeds planted in late afternoon often germinate faster because the soil retains more warmth overnight from daytime sun exposure.
Pro Tips for Put The Seed In The Soil
- These little details make all the difference between healthy seedlings and wasted effort—trust me, I've learned this the hard way.
- Soil Preparation Secret: When loosening the top 2-3 inches of soil in Step 1, focus on breaking up just the surface layer without disturbing deeper roots.
- Depth and Spacing Precision: The twice the seed's diameter rule in Step 2 is your golden standard, but here's what nobody tells you—use a toothpick or small skewer to create planting holes.
Frequently asked questions
Got questions about planting seeds? You’re not alone!
Here are answers to the most common concerns—from timing to troubleshooting—to help you grow with confidence.
When is the best time to put seeds in the soil?
The ideal time depends on your climate and plant type! For most vegetables and flowers, aim for spring after the last frost (check your local frost dates). Cool-season crops like lettuce can even go in early spring or fall. Always read seed packets—they’re your best guide!
Can I plant seeds in cold or rainy weather?
Not ideal! Seeds need warm soil (60–70°F for most) and consistent moisture to germinate. If rain is forecast, wait until it passes. Use a clear plastic dome or row cover to protect seedlings from chilly temps. Overwatering can also drown seeds—soak the soil, then let it dry slightly between waterings.
What if my seeds won’t sprout? Troubleshooting tips?
Don’t panic! First, check if seeds are fresh (old seeds may fail). Ensure they’re planted at the correct depth (usually 2x their width). Poor soil? Amend with compost or use a seed-starting mix. Lack of light? Move trays to a sunny spot or use grow lights. If still no luck, test a few seeds in a damp paper towel—if they don’t sprout, they’re likely nonviable.
How deep should I plant seeds?
Rule of thumb: Plant seeds 2–3 times as deep as their diameter. Tiny seeds (like lettuce) go in ¼ inch deep, while larger ones (like beans) can be 1 inch deep. Press gently to ensure soil contact—this helps roots anchor. Over-deep planting can delay germination, while shallow planting risks drying out.
Are there alternatives to planting seeds directly in the soil?
Start seeds indoors 4–6 weeks before the last frost using trays or biodegradable pots. You can also sprout seeds in a damp paper towel (for fast greens like radishes) or try transplanting seedlings from nurseries. For herbs, many prefer container growing—just ensure pots have drainage!
How do I protect seeds from pests or animals?
Use row covers, chicken wire, or mesh to block insects and critters. For slugs/snails, set out beer traps or diatomaceous earth. Scare off birds with reflective tape or old CDs. If planting outdoors, choose less appealing spots (like near fences or under trees) where pests linger less.
Wrapping up and next steps
You’ve got everything you need to plant seeds with confidence—whether you’re a seasoned gardener or just starting out! 🌱 The key is patience, preparation, and a little love for the earth.
Remember, every tiny seed holds the potential for something beautiful, and with the right soil, water, and care, you’ll watch those sprouts emerge like magic.
Ready to take the next step? Start small—pick one seed type, gather your supplies, and plant today! Your garden (and future harvests) will thank you. Happy planting! 🌿