
Lawn
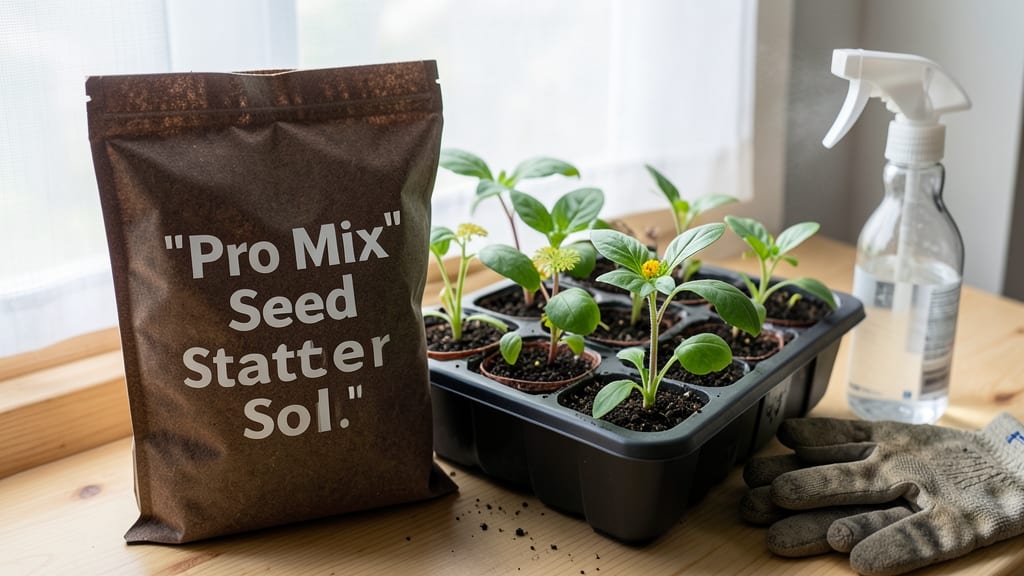
My Pro Mix seed starter saved my first batch of seedlings from the dreaded "damping off" last spring. 🌱 The cold-resistant loam holds moisture just right—no soggy bottoms, no crusty tops—while giving tender roots the perfect air-to-water balance for foolproof germination.
I swear by the simple setup: Pro Mix, a clean container, and a heat mat for cool starts. The mix stays sterile longer than generic potting soil, and the fine texture lets seeds make contact without burying them too deep.
Even my finicky tomatoes and peppers pop up reliably in 5-10 days when conditions are right. By the time you're hardening off seedlings, they'll be sturdy enough to handle transplant shock. The dark green leaves stay crisp, and roots develop a strong network that outpaces anything from store-bought flats.
No more leggy, weak seedlings struggling in the garden. Works for everything from delicate herbs to hearty vegetables. Here's how to use it without wasting a single seedling.
📚 In This Guide
- What you need
- Instructions
- Tips and common mistakes
- Wrapping up and next steps
What you need
- ● Pro Mix Seed Starter Soil (50 lbs bag) – The base for your cold-resistant blend.
- ● Peat moss (20 lbs bag) – Improves moisture retention and aeration.
- ● Perlite (10 lbs bag) – Ensures proper drainage (critical for seedling roots!).
- ● Vermiculite (10 lbs bag) – Holds moisture while keeping roots cozy.
- ● Compost (10 lbs, well-aged) – Adds nutrients for strong starts.
- ● Garden trowel or shovel – For mixing and transferring soil.
- ● Large mixing container or wheelbarrow – A 5-gallon bucket or larger works great.
- ○ Gloves (optional but recommended) – Protects hands from soil and sharp perlite.
- ● Seedling trays or pots (biodegradable preferred) – For transplanting sprouts.
- ○ Heat mat (optional for cold climates) – Keeps soil warm if temps dip below 50°F.
- ● Misting bottle – For gentle watering without disturbing seeds.
- ● pH testing kit – Ensures your mix is in the ideal 5.8–6.5 range.
Step-by-Step instructions for using Pro Mix seed starter
This cold-resistant loam makes starting seeds foolproof—even in chilly conditions.
🌱 Step 1: Prepare Your Containers for Planting
Start with clean, sterile containers—anything from seedling trays to small pots will work. I like to use 4-inch pots for most seeds, as they give roots plenty of room to establish without overcrowding. If using trays, make sure each cell has drainage holes to prevent soggy roots. Pro Mix Seed Starter drains well, but even the best mix can't save seeds from waterlogged soil.
Fill each container about ¾ full with Pro Mix Seed Starter. Tap the container gently on the table to settle the mix, then use your finger to create small planting holes—about ¼ inch deep for most seeds. This ensures seeds won’t be buried too deep, which can delay germination. If you're sowing tiny seeds like lettuce or carrots, sprinkle them directly onto the surface and press lightly so they make contact with the soil.
💧 Step 2: Moisten the Mix and Sow Seeds
Before planting, lightly mist the Pro Mix with lukewarm water until the surface is damp but not saturated. You’ll know it’s right when the top layer looks dark and moist but doesn’t pool. Overwatering now can wash seeds away or create a crust that blocks sprouts from emerging. I use a spray bottle for precision—just enough to keep the mix consistently moist without soaking it.
Place 1-2 seeds per hole (or follow packet instructions) and cover lightly with a thin layer of Pro Mix. Press gently to ensure good seed-to-soil contact, which is critical for cold-resistant germination. If you’re planting larger seeds like beans or peas, press them ½ inch deep to keep them from drying out. Pro Mix’s cold-resistant properties help seeds germinate even when soil temps dip to 45°F, but consistent moisture is still key.
☀️ Step 3: Provide Warmth and Light for Germination
Cover the containers with a clear plastic dome or plastic wrap to trap warmth and humidity. Place them in a spot with consistent warmth—ideally 70-75°F—to speed up germination. A seedling heat mat works wonders if your home runs cooler. Pro Mix’s cold resistance means seeds can still sprout at 50°F, but warmth accelerates the process. Check daily for condensation on the dome—if it’s foggy, you’ve got the right humidity; if it’s dry, mist lightly again.
Once seeds sprout, remove the dome immediately to prevent damping-off disease, which thrives in overly humid conditions. Move containers to a bright, indirect light source (like a south-facing window) or under grow lights for 14-16 hours daily. You’ll notice seedlings reaching for light within 5-10 days—this is your cue to adjust their position so they don’t grow leggy. Pro Mix’s balanced nutrients keep young roots strong, even if light isn’t perfect.
🌿 Step 4: Thin and Care for Seedlings
When seedlings develop 2-3 true leaves (the second set after the initial cotyledons), thin them to the strongest one per container. Use small scissors to snip weak seedlings at soil level—this avoids disturbing the roots of the remaining plant. Pro Mix’s loose texture makes thinning easier, as it won’t compact when you handle it. Water gently from the bottom now to encourage deep root growth, and avoid wetting the leaves to prevent fungal issues.
Keep seedlings in Pro Mix until they’re 3-4 inches tall and have developed a sturdy root system. You’ll know they’re ready for transplanting when you can see roots growing through the drainage holes. Harden them off by gradually exposing them to outdoor conditions over 7-10 days—start with 1-2 hours daily in a sheltered spot. Pro Mix’s cold resistance means seedlings handle cooler temps better than those grown in standard potting soil, giving you a head start even in early spring.
Tips & tricks for perfect seed starter results
Here's what I've learned to make sure your seeds thrive in Pro Mix—especially when conditions aren't ideal.
Container Selection Matters: While 4-inch pots work great, consider using biodegradable pots made from peat or coconut coir if you plan to transplant directly into the garden. They'll break down naturally, eliminating transplant shock. For larger seeds like beans or peas, use slightly deeper containers (5-6 inches) since their roots grow deeper early on. The key is ensuring proper drainage—no matter what container you choose, those drainage holes are non-negotiable.
Moisture Balance is Everything: When misting your Pro Mix in Step 2, aim for the consistency of a damp sponge—not wet like a wrung-out dishrag. I've found that using a spray bottle with a fine mist setting gives me the most control. Too much water creates a crust that blocks oxygen, while too little prevents proper seed activation. The cold-resistant properties of Pro Mix help maintain this balance even in cooler temperatures down to 45°F, but you still need to monitor moisture closely during germination.
Light Positioning Strategy: For those critical 14-16 hours of light in Step 3, position your seedlings about 2-3 inches below your grow lights. This distance prevents leaf burn while still providing optimal light exposure. I rotate my trays 180 degrees daily to ensure even growth—you'll notice seedlings leaning toward the light if they're not getting consistent exposure from all sides. The balanced nutrients in Pro Mix help compensate for less-than-perfect light conditions, but proper positioning gives you the best results.
Pro Tips for Pro Mix Seed Starter
- Here's what I've learned to make sure your seeds thrive in Pro Mix—especially when conditions aren't ideal.
- Container Selection Matters: While 4-inch pots work great, consider using biodegradable pots made from peat or coconu...
- Moisture Balance is Everything: When misting your Pro Mix in Step 2, aim for the consistency of a damp sponge—not wet...
Frequently asked questions
What makes Pro Mix Seed Starter different from regular potting soil?
Pro Mix Seed Starter is specially formulated for germination, packed with cold-resistant loam, enhanced drainage, and a balanced nutrient blend to support tender seedlings. Regular potting soil often lacks the fine texture and moisture-retention properties needed for seeds to sprout consistently. Think of it as a premium nursery bed in a bag!
How soon will seeds germinate in Pro Mix Seed Starter?
Germination time varies by seed type, but Pro Mix’s ideal moisture and temperature control speeds up the process. Most grass seeds sprout in 7–14 days, while veggies or flowers may take 5–21 days. Check your seed packet for specifics—Pro Mix just gives them the best shot to thrive!
Do I need to fertilize seeds planted in Pro Mix Seed Starter?
Pro Mix includes a gentle starter fertilizer (about 1–2 months’ worth of nutrients), so you typically don’t need extra fertilizer right away. However, if you’re growing heavy feeders (like tomatoes), consider a light liquid feed after the first true leaves appear. Always follow seed packet guidelines!
Can I use Pro Mix Seed Starter in cold climates or early spring?
Pro Mix is cold-resistant and designed to prevent damping-off (a fungal issue in cold/wet conditions). For extra protection, use a seedling heat mat or place trays in a sunny, warm spot (like a greenhouse or windowsill). Avoid planting outdoors until soil temps hit 50°F+ for most grass seeds.
What can I do if my seeds aren’t germinating in Pro Mix?
First, check for consistent moisture (keep soil damp, not soggy) and proper light (seeds need warmth, not direct sun). If seeds are old, try fresh ones. For stubborn cases, scratch the soil surface lightly to expose seeds to light or consider a soaking treatment (soak seeds overnight before planting).
Is Pro Mix Seed Starter reusable after germination?
While you can transplant seedlings into Pro Mix, it’s not ideal for long-term growth. The mix is lightweight and nutrient-dense for early stages but lacks the structure for mature plants. Repurpose leftover Pro Mix by amending garden soil or using it as a top layer in containers for extra moisture retention.
Wrapping up and next steps
Growing a thriving lawn starts with the right foundation—and Pro Mix Seed Starter gives you that perfect head start! 🌱 This cold-resistant loam ensures your seeds germinate quickly, even in cooler weather, so you can enjoy a lush, vibrant yard without the guesswork.
Whether you're a seasoned gardener or just starting out, this mix simplifies the process and boosts your confidence.
Ready to take the next step? Grab your Pro Mix Seed Starter today and watch your lawn dreams take root—literally! 🌿 For extra tips, check out our FAQ section or dive into our materials guide to prep like a pro.