
Lawn
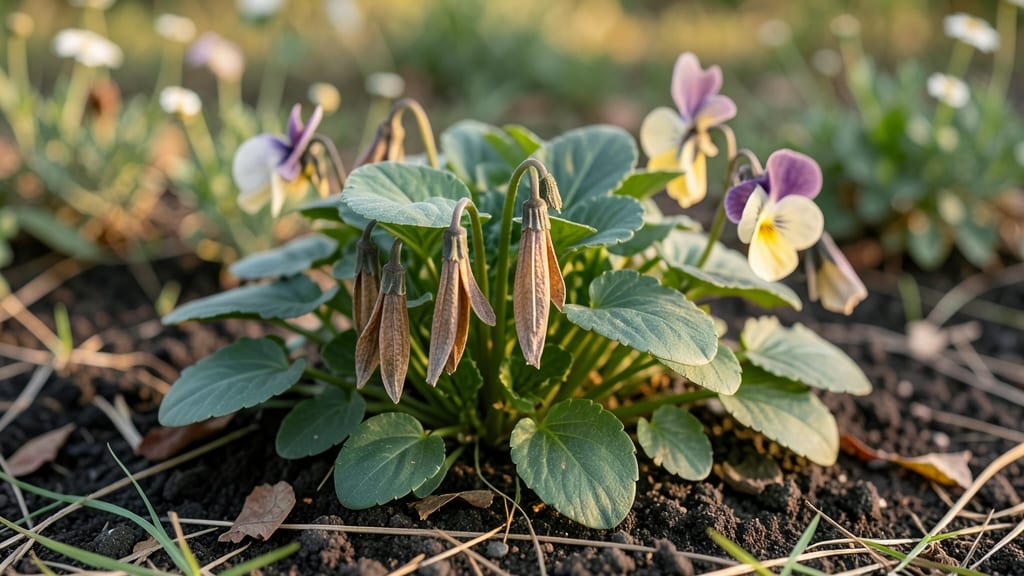
Collecting pansy seed pods saves money and keeps heirloom varieties alive—no twisty frustration here. 🌸 I’ve harvested enough to fill jars for next year’s garden, and the secret is patience: let pods turn brown and papery before touching them. One wrong tug, and you’re left with empty husks.
You’ll need scissors or pruners, brown paper bags for drying, and a cool, dark spot to store seeds. The pods themselves are the tricky part—some varieties resist opening, so I’ve learned to crack them open with a spoon instead of forcing them.
A single plant can yield 50-100 seeds, enough for a full border.
Once dried, gently squeeze pods to release seeds into a jar. Label everything with the variety and date—viability drops after 2 years. For germination, sprinkle seeds on damp soil, barely covering them, and keep them in 60°F conditions until sprouts appear in 2-4 weeks.
Challenges? Overly dry pods or moldy seeds can ruin batches. If germination stalls, try a cold stratification trick: refrigerate seeds for 2 weeks before replanting. The payoff? Pansies that thrive exactly like their parents, year after year.
📚 In This Guide
- What you need
- Instructions
- Tips and common mistakes
- Wrapping up and next steps
What you need
- ● Mature pansy plants – Choose healthy, fully bloomed plants with seed pods forming (typically after flowers fade). Aim for at least 3-5 plants for a decent yield.
- ● Pruning shears or small scissors – Sharp, clean tools to snip seed pods without damaging the stems. Sterilize with rubbing alcohol before use.
- ● Paper bags or breathable mesh bags – 2-3 medium-sized bags (8x10 inches) to collect pods. Avoid plastic to prevent moisture buildup.
- ● Twist ties or rubber bands – To secure bag openings and prevent seed loss during transport.
- ○ Labeling tags & marker – Optional but helpful! Label bags with the pansy variety (e.g., "Heart’s Delight") and harvest date.
- ● Drying tray or screen – A flat, elevated surface (like a wire rack) to air-dry pods for 1-2 weeks in a cool, dry spot (60–70°F).
- ○ Small fan (optional) – Speeds up drying by 20-30% if humidity is high.
- ● Seed envelope or glass jar – For long-term storage. Use paper envelopes for breathability or airtight jars with silica packets to prevent mold.
- ● ✅ Patience – Seed pods take 4-6 weeks to mature post-bloom. Harvest only when pods turn brown and papery.
- ● ✅ Dry weather – Collect pods on a sunny, dry day to avoid mold. Early morning is ideal!
- ○ ✅ Garden gloves (optional) – Protects hands from prickly stems or sap if you’re sensitive.
How to harvest and save pansy seed pods without twisting
Here's my foolproof method for collecting pansy seed pods—no stubborn stems or wasted flowers.
🌿 Step 1: Identify and Select Mature Seed Pods
Watch for pods that turn from green to a papery brown when fully mature. These are ready for harvest, usually 6-8 weeks after flowering. I always check in the morning when dew has evaporated—the pods feel dry and crispy to the touch, unlike the soft, green ones that aren't ready.
Gently squeeze a pod between your fingers. If it opens easily and releases seeds, it's perfect. If it resists or feels too firm, wait another 2-3 days. Overripe pods may split open naturally, scattering seeds on the ground, so timing matters.
✂️ Step 2: Harvest Pods Without Damaging the Stem
Use sharp, clean scissors or pruners to snip the stem ½ inch below the pod. Avoid twisting—the stems are delicate and often snap cleanly, leaving the pod intact. I like to hold the pod between my thumb and forefinger while cutting to prevent accidental crushing.
Place harvested pods in a paper bag or envelope immediately. This prevents seeds from spilling while you work. Label each bag with the pansy variety and harvest date—mixing varieties can lead to unpredictable offspring in next year's garden.
🪴 Step 3: Dry and Store Seed Pods Properly
Spread the pods on a clean, dry paper towel in a single layer. Place them in a warm, dry spot with good airflow—65-75°F and 40-50% humidity is ideal. Check daily for 7-10 days until the pods feel completely dry and brittle. You'll know they're ready when a gentle tap releases seeds easily.
Once fully dry, transfer the pods to an airtight container like a glass jar or resealable bag. Store in a cool, dark place—below 70°F prevents premature germination. I add a small packet of silica gel to absorb any lingering moisture and keep pods viable for 2-3 years.
💧 Step 4: Extract Seeds and Prepare for Next Season
When ready to plant, gently crush each pod between your fingers over a clean sheet of paper. The seeds will fall out cleanly, while the chaff can be discarded. I use a fine-mesh strainer to separate seeds from debris if needed—this ensures only the best seeds make it to your seed-starting mix.
Sow seeds immediately in moist potting mix at a depth of ¼ inch, pressing lightly to ensure good soil contact. Keep the mix consistently moist but not soggy until germination, which typically occurs in 10-21 days at 60-70°F. Pansy seeds thrive in cool conditions, so don't rush the process with heat.
Tips & tricks for perfect pansy seed pod collection
Real talk: The difference between saving viable pansy seeds and ending up with a pile of chaff is all in the details. Here's what nobody tells you about handling these delicate pods.
Timing is Everything: In Step 1, when checking for maturity, look for pods that feel crispy to the touch—not just brown, but actually brittle. I've learned the hard way that pods that look dry but still feel slightly pliable won't release seeds cleanly. The 6-8 week window is your sweet spot, but don't rush—those 2-3 extra days can mean the difference between perfect pods and scattered seeds. Check in morning light when dew has evaporated, as moisture can mask true dryness.
Harvest Technique That Changed Everything: For Step 2, here's my game-changer: After snipping the stem, immediately place the pod in a paper bag and gently press the cut end against the bag's opening. This creates a seal that prevents seeds from escaping while you work. I also keep a small bowl nearby to catch any seeds that might fall during the transfer—you'd be surprised how many end up on the ground otherwise. And never, ever twist the stem—it snaps cleanly when cut properly, leaving the pod intact.
Drying Conditions Matter: During Step 3, I've found that placing pods on a screen or mesh tray instead of a paper towel creates better airflow around each pod. This cuts drying time from 7-10 days to as little as 5-7 days in ideal conditions. Monitor humidity closely—anything above 50% can cause mold. I keep a small hygrometer nearby during drying season to track conditions precisely. Once pods feel brittle, they're ready, but don't rush—they need that full drying time to prevent premature germination.
Storage Wisdom: The below 70°F storage rule is non-negotiable, but I've added silica gel packets to my storage containers as an extra precaution. These little packets absorb any lingering moisture that might cause seeds to sprout prematurely. I also date each container and write the pansy variety—next year's garden will thank you when you remember which purple pansies produced the most vibrant blooms. For long-term storage beyond 2-3 years, consider vacuum-sealing pods to extend viability even further.
Pro Tips for Pansy Seed Pods
- Real talk: The difference between saving viable pansy seeds and ending up with a pile of chaff is all in the details....
- Timing is Everything: In Step 1, when checking for maturity, look for pods that feel crispy to the touch—not just bro...
- Harvest Technique That Changed Everything: For Step 2, here's my game-changer: After snipping the stem, immediately p...
Frequently asked questions
Got questions about harvesting and saving pansy seed pods? You’re in the right place! Here are answers to the most common queries—from timing to troubleshooting—so you can master zero-waste seed collection like a pro.
When are pansy seed pods ready to harvest?
Harvest pansy seed pods when they turn brown and papery, typically 4–6 weeks after flowering. Avoid collecting green pods—they won’t store well. If pods split open prematurely, cover plants with fine mesh to protect seeds from scattering.
Why won’t my pansy seed pods stay closed?
Pansies naturally release seeds when pods dry, but if they’re too moist or overripe, they’ll twist open. Try harvesting pods when partially dry (light brown) and store them in a paper bag to slow moisture loss. For stubborn pods, gently twist them off by hand—no tools needed!
Can I save pansy seeds from store-bought flowers?
Yes! Many grocery-store pansies (like Viola × wittrockiana) produce viable seeds. Just ensure they’re organic or pesticide-free—chemicals can harm seed germination. For best results, grow from saved seeds for next year’s blooms, as store-bought plants may be hybrids with inconsistent traits.
How do I store pansy seed pods for next season?
Keep pods in a cool, dry place (like a paper envelope or mesh bag) for up to 6 months. Avoid plastic—it traps moisture and causes mold. Label pods with the variety and harvest date for easy tracking. For extra longevity, refrigerate seeds in a ziplock with silica gel.
What if my pansy seeds won’t germinate?
Pansy seeds need light and warmth to sprout—try sowing in spring or fall (avoid winter’s cold). If germination is slow, stratify seeds (mix with damp sand, refrigerate for 2 weeks). Overcrowding or old seeds (2+ years) may also be the issue. Test viability by soaking a few seeds in water—floating seeds are likely dead.
Wrapping up and next steps
Saving pansy seed pods is a simple yet rewarding way to embrace zero-waste gardening while ensuring a fresh supply of vibrant blooms year after year! 🌱 With just a few tools and a little patience, you can collect, dry, and store these pods effortlessly—turning gardening chores into a sustainable habit.
Whether you're a seasoned gardener or just starting out, every seed saved is a step toward a greener, more self-sufficient space.
Ready to grow your skills? Start by experimenting with just a few pods this season, then expand your collection as you gain confidence. Happy harvesting—and may your garden bloom brighter than ever! 🌸