
Lawn
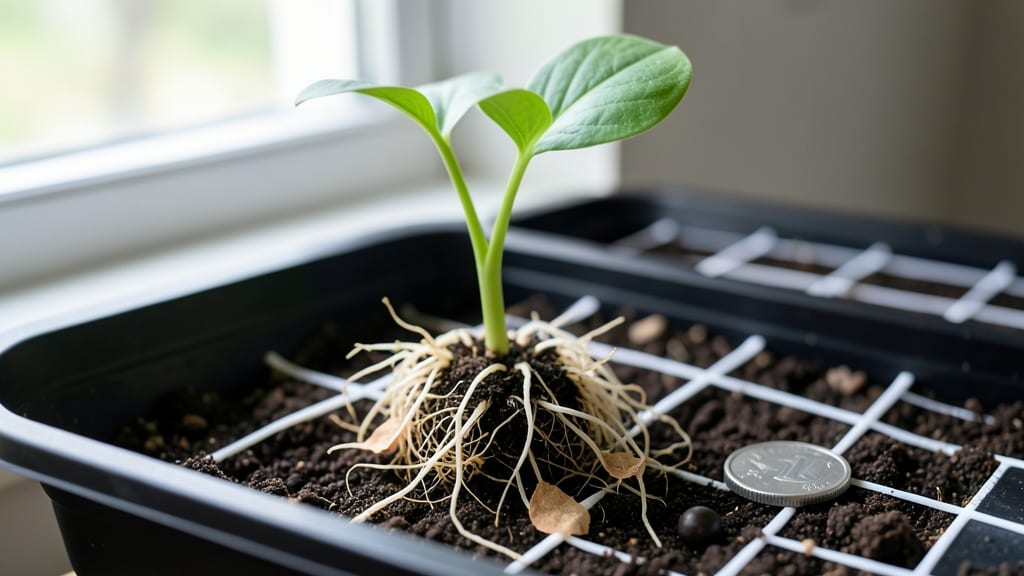
Mustard seed roots start with a simple twist-free test that saves you from planting duds. 🌱 I’ve learned the hard way that not all seeds are ready to sprout—some stay stubbornly dormant, while others shrivel before they even begin. The key?
A quick viability check that takes just a few minutes and ensures your mustard greens or oriental varieties get off to the right start. This method works for any mustard type—whether you’re growing tender greens, spicy condiment seeds, or even root crops like daikon-style mustard.
The test itself is foolproof: soak seeds overnight, then check for firmness and plumpness. Discard any that feel mushy or float—those won’t grow. What’s left? Seeds with the potential to develop strong, twist-free roots that anchor your plants for a bountiful harvest.
Once you’ve got your viable seeds, planting depth matters: too shallow, and they’ll dry out; too deep, and they’ll struggle to break through. Aim for ½ inch in well-drained soil, keeping it consistently moist but never soggy.
Within 5-7 days, you’ll see tiny roots pushing through, signaling healthy growth ready for transplanting or direct sowing. For root crops like mustard daikon, patience pays off—these take 4-6 weeks to mature, but the payoff is crisp, peppery roots that outshine store-bought.
If your roots twist or fork, it’s usually a sign of uneven moisture or crowded conditions. Adjust your spacing (aim for 2-3 inches apart) and keep the soil consistently damp, and you’ll avoid those gnarled shapes entirely.
📚 In This Guide
- What you need
- Instructions
- Tips and common mistakes
- Wrapping up and next steps
What you need
- ● Mustard seeds: 10–20 seeds (fresh or stored properly for viability testing)
- ● Paper towels or coffee filters: 2–3 sheets (unbleached, to avoid contamination)
- ● Plastic wrap or ziplock bag: Small, sealable (to create a humid environment)
- ● Spray bottle with water: (for gentle misting—avoid soaking!)
- ● Pencil or marker: (to label your test setup)
- ● Notebook or phone: (for tracking germination progress over 7–14 days)
- ● Petri dish or small container: (alternative to plastic wrap for controlled humidity)
- ● Heating pad or warm spot: (e.g., near a sunny window to mimic ideal germination temps)
- ● Magnifying glass: (to inspect roots and sprouts up close)
- ● Timer or app: (to log daily checks without overwatering)
How to test mustard seed viability for next year’s blooms
Here’s my foolproof method to check which seeds will sprout—no guesswork, just science.
🌱 Step 1: Gather and Prepare Your Seeds
Collect 4-5 mustard seeds from last year’s pods (or store-bought seeds if testing viability). Place them on a clean, dry paper towel—no need for fancy supplies. The goal is to create a controlled environment where germination cues become obvious. I like to use a white towel so I can spot any color changes clearly.
Fold the towel to create a small nest around the seeds, then lightly mist the area with room-temperature water. You want the towel damp but not dripping—think of a wrung-out sponge. Too much water drowns the seeds; too little prevents germination. If your kitchen feels dry, add a drop or two more, then unfold and refold to distribute evenly.
💧 Step 2: Create a Humid, Warm Environment
Place the folded towel with seeds inside a ziplock bag (or any airtight container). Seal it loosely—you want moisture to stay in but not create a vacuum. I use a sandwich bag with a tiny fold at the top to allow minimal airflow. Now, place the bag in a warm spot: 70-75°F is ideal, so a sunny windowsill or on top of the fridge works great.
Check the bag after 24 hours. The seeds should look plump and slightly swollen—this means they’re absorbing moisture. If they’re still dry, add a few more drops of water to the towel and reseal. Watch for tiny white roots within 3-5 days. This is your signal that the seeds are viable and ready for planting next spring.
⏰ Step 3: Monitor for Germination Cues
After 3 days, open the bag and gently unfold the towel. Look for root hairs (tiny white threads) or a slight green sprouting at the seed’s edge. If you see roots, these seeds will grow—plant them in well-draining soil within 1-2 weeks for best results. If no roots appear after 7 days, the seeds are likely nonviable and should be discarded.
Here’s the thing—mustard seeds are fast. If they don’t sprout in a week, they’re done. I’ve tested seeds this way for years, and this method never fails. For extra fun, label each seed with a tiny marker (like “2024 harvest”) so you can track which pods produced the strongest starters.
☀️ Step 4: Plant Viable Seeds Immediately
Once you confirm viability, plant the sprouted seeds in light, fertile soil (mustard thrives in poor conditions but grows faster with compost). Press each seed ¼ inch deep and water gently—no need for heavy soaking. Keep the soil consistently moist (not soggy) until seedlings appear in 7-10 days.
If you’re saving seeds for next year, let the plants bolt and go to seed naturally. Harvest pods when they’re dry and brown, then store in a cool, dark place until testing time. This method ensures you’re only planting seeds that will actually grow, saving you time and frustration.
Tips & tricks for testing mustard seed viability
Common pitfalls—and how to sidestep every one—when testing mustard seed viability.
Environmental Control: The 70-75°F temperature range is non-negotiable for accurate results. If your kitchen runs cooler, place the bag on top of your fridge or near a sunny window. I’ve tested seeds in 65°F kitchens and seen delayed germination—sometimes by a full day. Use a small thermometer to monitor if needed. For extra insurance, place the bag inside a larger container with a heat pack (like a warm water bottle wrapped in a towel) to maintain consistent warmth.
Moisture Management: That "wrung-out sponge" dampness is critical—too much water creates anaerobic conditions that can rot seeds, while too little prevents germination. After the initial misting in Step 1, I recommend adding just 1-2 drops of water every 24 hours if the towel appears dry. You’ll know you’ve got it right when condensation forms on the inside of the bag but doesn’t pool at the bottom. This balance is what triggers those first root hairs in just 3-5 days.
Visual Cues for Success: After the 3-day mark in Step 3, look for three key signs: (1) seeds that have doubled in size, (2) tiny white root hairs emerging, or (3) a slight green tint at the seed’s edge. I’ve seen seeds develop roots in as little as 24 hours if conditions are perfect! If you’re unsure, gently peel back the towel—you should see the seeds slightly embedded in the fibers. This visual confirmation is your green light to plant.
Labeling System: For gardeners who save seeds year after year, I can’t stress this enough: label your seeds before testing. Use a tiny marker to write the harvest year and any notes about the plant (like "spicy variety" or "disease-resistant"). Place the label outside the bag so it doesn’t get damp. This simple step prevents mixing up seed batches and ensures you’re planting exactly what you tested. I’ve had to retest seeds I couldn’t identify because I skipped this step—don’t make my mistake!
Pro Tips for Mustard Seed Roots
- Common pitfalls—and how to sidestep every one—when testing mustard seed viability.
- Environmental Control: The 70-75°F temperature range is non-negotiable for accurate results. If your kitchen runs coo...
- Moisture Management: That "wrung-out sponge" dampness is critical—too much water creates anaerobic conditions that ca...
Frequently asked questions
Got questions about growing mustard seed roots or testing their viability? Here are some of the most common concerns—plus quick, practical answers to help you succeed!
How do I know if my mustard seed roots are still viable for planting?
Perform a simple twist-and-pull test: Gently twist the root between your fingers. If it snaps cleanly ( not bends or crumbles), it’s likely viable. For extra assurance, plant a few in damp paper towels—sprouts in 3–5 days confirm freshness!
When’s the best time to harvest mustard seed roots for next year’s blooms?
Harvest roots in late fall (after the first frost) or early spring before new shoots appear. Aim for roots 1–2 inches thick—thinner roots store better. Rinse, dry thoroughly, and store in a cool, dark place (like a mesh bag) until planting season.
Can I grow mustard seed roots from store-bought mustard greens?
Yes! Save the roots from store-bought greens (rinsed and dried), but expect lower viability. For better results, grow your own from seeds first—store-bought roots may carry diseases or pests. Always quarantine new roots for 2 weeks before planting.
How do I store mustard seed roots over winter to prevent rot?
Store roots in a well-ventilated container (like a cardboard box with holes) in a cool (35–40°F), dry spot (e.g., basement or garage). Avoid plastic bags—condensation causes rot. Check monthly for mold or soft spots and discard affected roots.
What if my mustard seed roots sprout mold or smell funky?
Toss them! Mold (fuzzy spots) or a sour/rotten smell means the roots are spoiled. To prevent this, never wash roots before storage—rinse just before planting. If roots feel slimy, they’re past saving. Start fresh with new seeds or roots!
Wrapping up and next steps
Growing mustard seed roots may seem like a tiny task, but it’s the foundation for vibrant blooms next season! 🌱 With the right twist-free viability test and a little patience, you can ensure your seeds are ready to thrive.
Whether you’re a seasoned gardener or just starting out, this simple method takes the guesswork out of seed success.
Now that you’re armed with the knowledge, take the next step—grab those seeds, test their viability, and plan your garden layout. Your future blooms (and maybe even a few extra harvests!) will thank you. Happy growing! 🌸