
Lawn
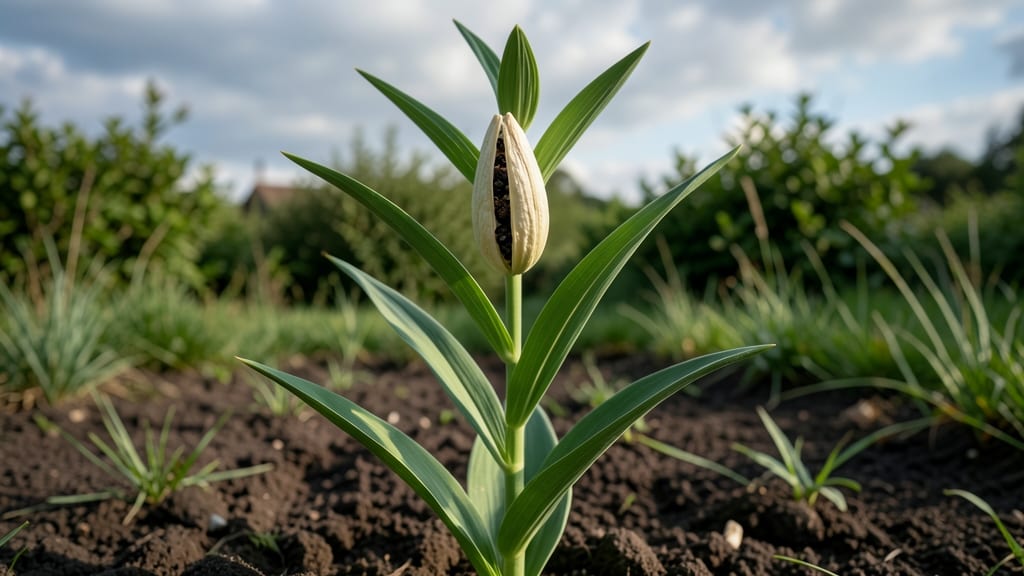
Harvesting lily seed pods turns last year’s blooms into next season’s plants—no fancy tools needed. 🌱 I’ve collected hundreds of these pods over the years, and the ones that dry just right on the stem yield the most reliable seedlings.
The secret lies in timing: harvest them when they’re brown and papery but still intact, then crack them open to find plump, dark seeds. You’ll need just a few supplies: sharp scissors, a bowl for collecting pods, and a warm, sunny spot for drying.
The process takes less than 30 minutes from garden to seed tray, and the payoff is free, homegrown lilies that match your existing plants perfectly. Just avoid the temptation to rush—green pods won’t store well, and overripe ones crumble into dust.
Once you’ve extracted the seeds, plant them ½ inch deep in a mix of potting soil and perlite. Keep the soil lightly moist and place the tray in bright, indirect light. Germination can take 2-4 weeks, but patience pays off with sturdy seedlings that’ll bloom in 2-3 years.
The key is consistency—don’t let them dry out, but don’t drown them either. This method works for hardy lilies like daylilies, tiger lilies, and even rare heirlooms. Start small with a few pods, and soon you’ll have a propagation system that keeps your garden thriving with minimal effort.
Ready to turn those spent blooms into next year’s stars?
📚 In This Guide
- What you need
- Instructions
- Tips and common mistakes
- Wrapping up and next steps
What you need
- ● Mature lily seed pods: 5–10 fully ripened pods (brown, papery, and dry to the touch). Harvest from Lilium species like Lilium asiaticum or Lilium longiflorum.
- ● Pruning shears or sharp scissors: 1 pair (sterilized with rubbing alcohol to prevent disease).
- ● Paper towels or newspaper: 2–3 sheets (for drying seeds).
- ● Small paper bags or envelopes: 5–10 (for seed storage).
- ● Potting soil: 1 bag (well-draining, sterile mix like cactus/succulent blend or add perlite for aeration).
- ● Seed-starting trays or small pots: 6–12 (2–3 inch diameter, with drainage holes).
- ● Spray bottle: 1 (for gentle watering).
- ○ Grow lights or sunny windowsill: 1 (optional but helpful for indoor starts).
- ● Seedling heat mat: 1 (speeds up germination in cooler climates).
- ● Humidity dome or plastic wrap: 1 (keeps moisture high for seeds).
- ● Label markers: 5–10 (to track varieties and planting dates).
- ● Fertilizer (balanced 10-10-10 or compost): 1 small bag (for transplanting).
- ● Gloves: 1 pair (lily pollen can irritate skin—better safe than sorry!).
Step-by-Step guide to harvesting and growing lily seed pods
Here’s how I turn spent lily blooms into next season’s plants—no fancy tools, just patience and timing.
🌱 Step 1: Identify and Wait for Mature Seed Pods
After your lily blooms fade, watch for the seed pod to form. It’ll start as a small, green bulb at the base of the spent flower, swelling over 4-6 weeks until it turns brown and papery. Don’t rush—harvesting too early means immature seeds that won’t sprout. The pod should feel dry and slightly brittle when gently squeezed.
I always check pods in late summer or early fall, right after the first frost warning. If you live in a warm climate, pods may mature faster—just wait until they’re fully brown and crispy to the touch. This ensures maximum seed viability for your future lilies.
✂️ Step 2: Harvest and Extract Seeds
Use clean, sharp scissors to snip the pod from the stem, leaving a ½-inch stem attached for easier handling. Place the pod in a paper bag and let it dry indoors for 3-5 days in a warm, dry spot. This prevents mold and makes seeds easier to remove.
Once fully dry, open the pod carefully—it’ll split naturally along its seams. Inside, you’ll find flat, dark seeds about the size of a pencil eraser. Shake them into a bowl and discard any empty husks or debris. Store the seeds in an envelope labeled with the lily variety and harvest date.
🌿 Step 3: Stratify Seeds for Germination
Lily seeds need cold stratification to break dormancy. Mix the seeds with slightly damp peat moss or coconut coir in a sealed plastic bag. Place the bag in your refrigerator’s crisper drawer (or a similar 35-40°F spot) for 8-12 weeks. Check monthly to ensure the mix stays moist but not soggy.
This chilling mimics winter conditions and tricks seeds into thinking spring has arrived. I set a reminder on my phone—skipping stratification means seeds may take years to germinate, if ever. Patience here pays off with stronger, healthier seedlings.
☀️ Step 4: Plant Stratified Seeds
After stratification, sow seeds ½ inch deep in a pot filled with well-draining potting mix. Space them 1 inch apart to avoid overcrowding. Keep the soil consistently moist (not waterlogged) and place the pot in a bright, indirect light spot. Germination can take 4-12 weeks—longer than most flowers, but worth the wait.
Once seedlings emerge, provide 6-8 hours of sunlight daily and reduce watering slightly. Thin to the strongest seedling per pot if multiple sprouts appear. Real talk: Early growth is slow, but don’t give up—seed-grown lilies often outperform nursery plants in hardiness.
🪴 Step 5: Transplant and Care for Young Lilies
When seedlings develop 2-3 true leaves (about 6-8 inches tall), transplant them into individual 4-inch pots. Use the same well-draining mix and keep them in partial shade for their first week to reduce stress. Gradually introduce them to full sun over 2-3 weeks.
By their second year, seedlings will need 6-inch pots and outdoor planting in a sunny, sheltered spot with rich, well-draining soil. Mulch around the base to retain moisture and protect roots. With proper care, these lilies will bloom in 3-5 years—a rewarding long-term project!
Tips & tricks for perfect lily seed pod harvesting
Between us, growing lilies from seed pods is one of those projects where patience pays off big time. Here’s how I make sure every step goes smoothly—no wasted pods or weak seedlings.
Timing is Everything: In Step 1, those 4-6 weeks until pods mature can feel like forever, but don’t skip the wait! I’ve learned the hard way that harvesting too early means seeds that won’t sprout—you want that pod to feel dry and brittle, like it’s ready to crumble in your fingers. If you’re in a warm climate, check pods weekly starting in late summer, but never before they’ve fully browned. The color change is your green light.
Harvesting Hack: When you’re ready to harvest in Step 2, leave that ½-inch stem attached—it’s like a little handle that makes the whole process cleaner. I use small kitchen scissors (not garden shears) to avoid crushing the pod. After snipping, place each pod in its own paper bag—this prevents cross-contamination between different lily varieties and makes drying more organized. Trust me, you’ll thank yourself later when you’re not sorting through mixed seeds.
Stratification Success: The 8-12 weeks of cold stratification in Step 3 is where most people give up, but it’s the secret to breaking dormancy. I set a phone reminder every 4 weeks to check moisture levels—you want damp, not soggy. Pro tip: If your fridge’s crisper drawer isn’t cold enough (below 35°F), try the back of the freezer section where temps stay steady. This mimics natural winter conditions perfectly, and you’ll see germination rates skyrocket.
Lighting Matters: In Step 4, that bright indirect light is crucial during germination. I place my seed pots on a north-facing windowsill or under LED grow lights set to 6-8 hours daily. Too much direct sun can scorch delicate seedlings, while too little light means leggy, weak plants. If you don’t have good natural light, a simple fluorescent bulb works—just keep it close (2-3 inches above the pots) and consistent.
Pro Tips for Lily Seed Pod
- Between us, growing lilies from seed pods is one of those projects where patience pays off big time. Here’s how I mak...
- Timing is Everything: In Step 1, those 4-6 weeks until pods mature can feel like forever, but don’t skip the wait! I’...
- Harvesting Hack: When you’re ready to harvest in Step 2, leave that ½-inch stem attached—it’s like a little handle th...
Frequently asked questions
Got questions about growing and harvesting lily seed pods?
You’re not alone! Here are some of the most common queries—and their straightforward answers—to help you navigate your lily seed pod journey with confidence.
When do lily seed pods form after flowering?
Lily seed pods typically form 4–8 weeks after the flower blooms, depending on the variety and growing conditions. Watch for the flower to wilt and the pod to swell slightly—this signals the start of seed development. Pro tip: Harvest pods when they’re firm but still greenish-yellow (not brown or shriveled) for the best viability.
How long does it take for lily seeds to mature inside the pod?
Seed maturation varies, but most lily seeds are ready for harvest 8–12 weeks after pollination. The pod will turn brown and papery, and seeds inside will look plump and dark. Warning: If left too long, pods may split open naturally—so keep an eye on them!
Can I grow lilies from seed pods instead of buying bulbs?
Growing lilies from seed pods is rewarding but slower—it can take 2–5 years for seedlings to bloom. Start seeds indoors in spring, and transplant seedlings outdoors once they’re sturdy. Fun fact: Some heirloom varieties produce unique blooms when grown from seed!
What should I do if my lily seed pods won’t form?
Pods may fail to form due to lack of pollination, poor weather, or weak plants. Hand-pollinate flowers with a soft brush, ensure full sun (6+ hours/day), and fertilize lightly with compost. Troubleshoot: If pods appear but drop early, check for pests (like aphids) or fungal issues.
Are lily seed pods toxic like other parts of the plant?
Yes, lily seed pods (and all parts of the plant) are toxic to pets and humans if ingested. Keep them away from children and animals. Always wear gloves when handling pods, and dispose of them safely. Safety tip: Store harvested seeds in a sealed container labeled “Toxic.”
Wrapping up and next steps
Growing lily seed pods may seem like a delicate task, but with the right knowledge and patience, you can enjoy year-round blooms and even share your harvest with fellow gardeners! 🌸 Whether you’re a beginner or seasoned green thumb, the key is consistency—from selecting healthy pods to nurturing them with care.
Your efforts will reward you with stunning flowers and the satisfaction of self-sufficiency.
Ready to take the next step? Start small—plant a few pods in a controlled environment, document your progress, and refine your technique. Before you know it, you’ll be a lily seed pod pro, turning your garden into a thriving sanctuary of color and life! 🌱